Extend Your Blog's Functionality With Hashnode Widgets
Make your blog do more with third-party embeds and iframes—here's how
With Hashnode Widgets, you can insert third-party embeds or iframes anywhere in your articles! This is a powerful way to extend the functionality of your Hashnode blog.
"Can you give us an example?" Sure. Let's say you have a YouTube channel where you create tech videos. With this feature, you can let your blog readers know about your channel by adding a widget inside your articles!
Pretty awesome, right?
Get the embedded code 🧰
The first step is to get the embed code from the third-party website. To speed up the process and avoid confusion, let's take the following code as an example:
<style type="text/css">
  .wm {
    background-color: #383838;
    color: #ffffff !important;
    padding: 30px 25px;
    border-left: 6px solid #2962ff;
    font-family: Arial, Helvetica, sans-serif;
    font-style: italic;
    }

    a {
    text-decoration: none;
    border-bottom: 2px solid #2962ff;
    color: #fffffe;
    }

    a:hover {
    text-decoration: none;
    color: #2962ff;
    border-bottom: 2px solid #ffffff;
    }
</style>
<div class="wm">
    I also have a YouTube channel! Do not forget to subscribe <a href="https://catalins.tech/youtube" target="_blank">here</a>.
</div>
The code above is for a widget that promotes my YouTube channel. I can embed it directly into my articles to drive people to my channel.
Let's see how to use the code!
Create the widget 🛠
The second step is to click on the profile picture and then on the Blog Dashboard option, as shown in figure 1.
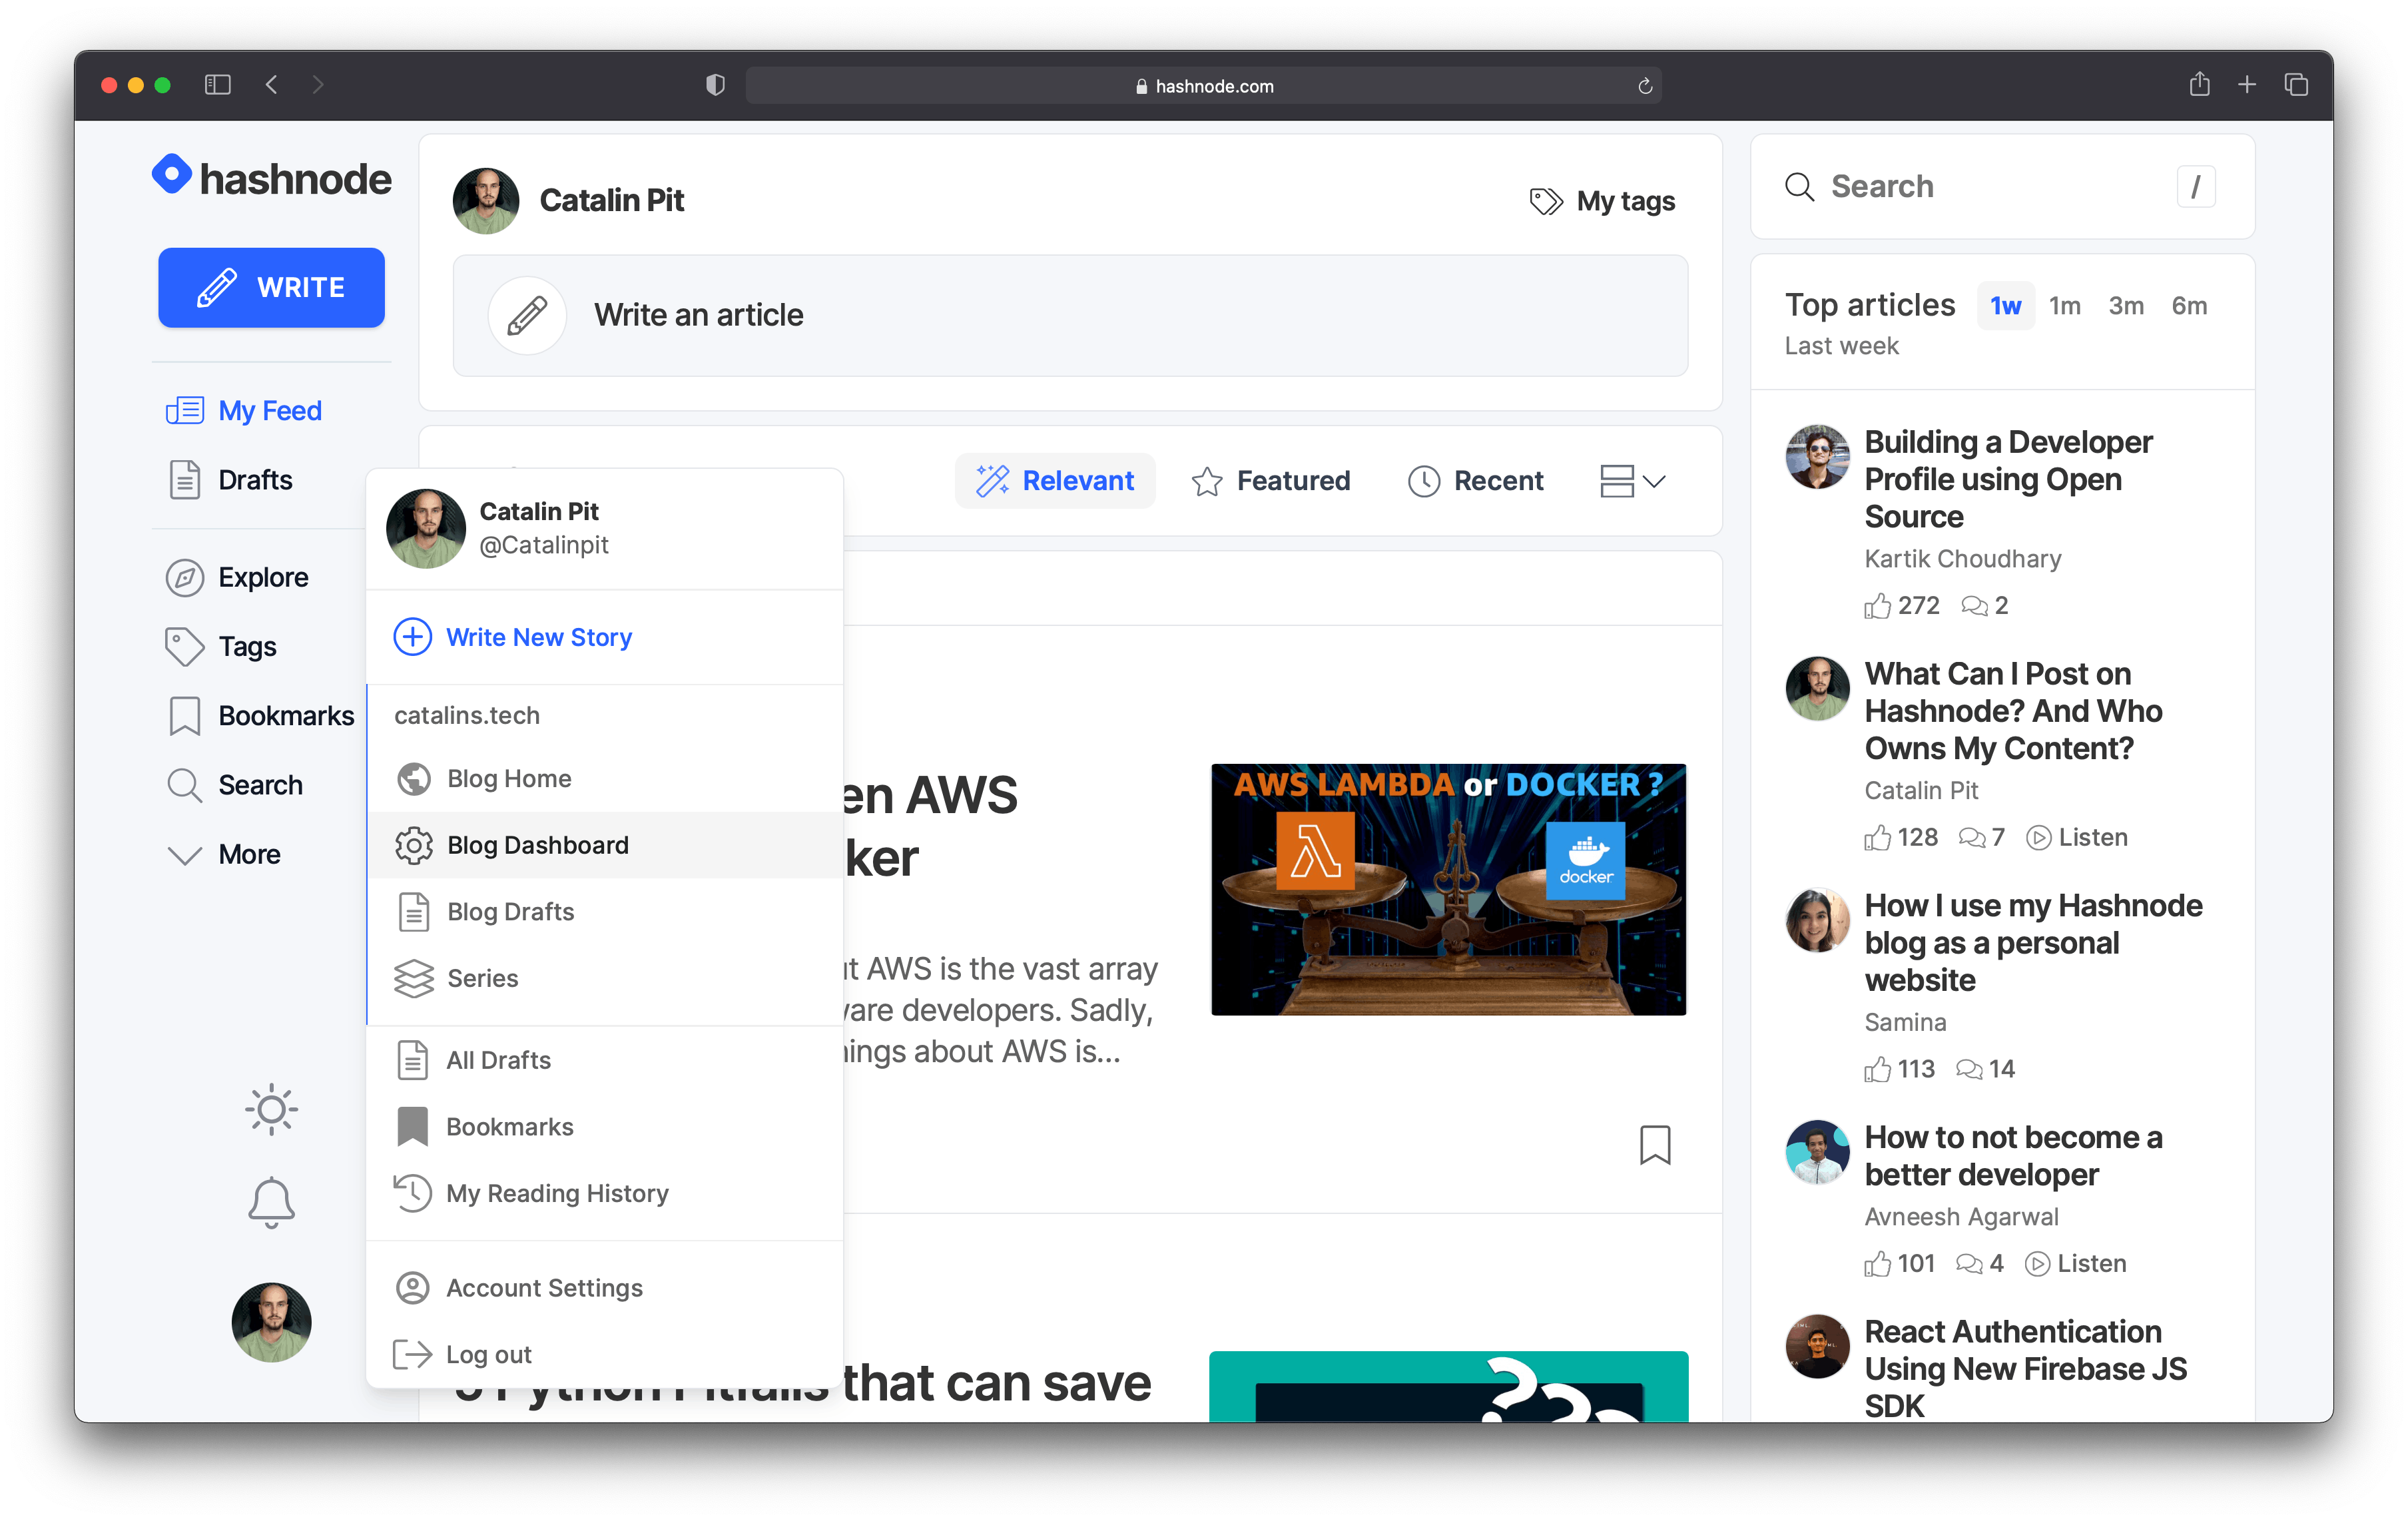 Figure 1
Once you click on the Blog Dashboard option, your blog dashboard will open. On the left-hand side, you should see a couple of options. See figure 2 for reference.
Click on the Widgets option to access your current widgets or add new ones.
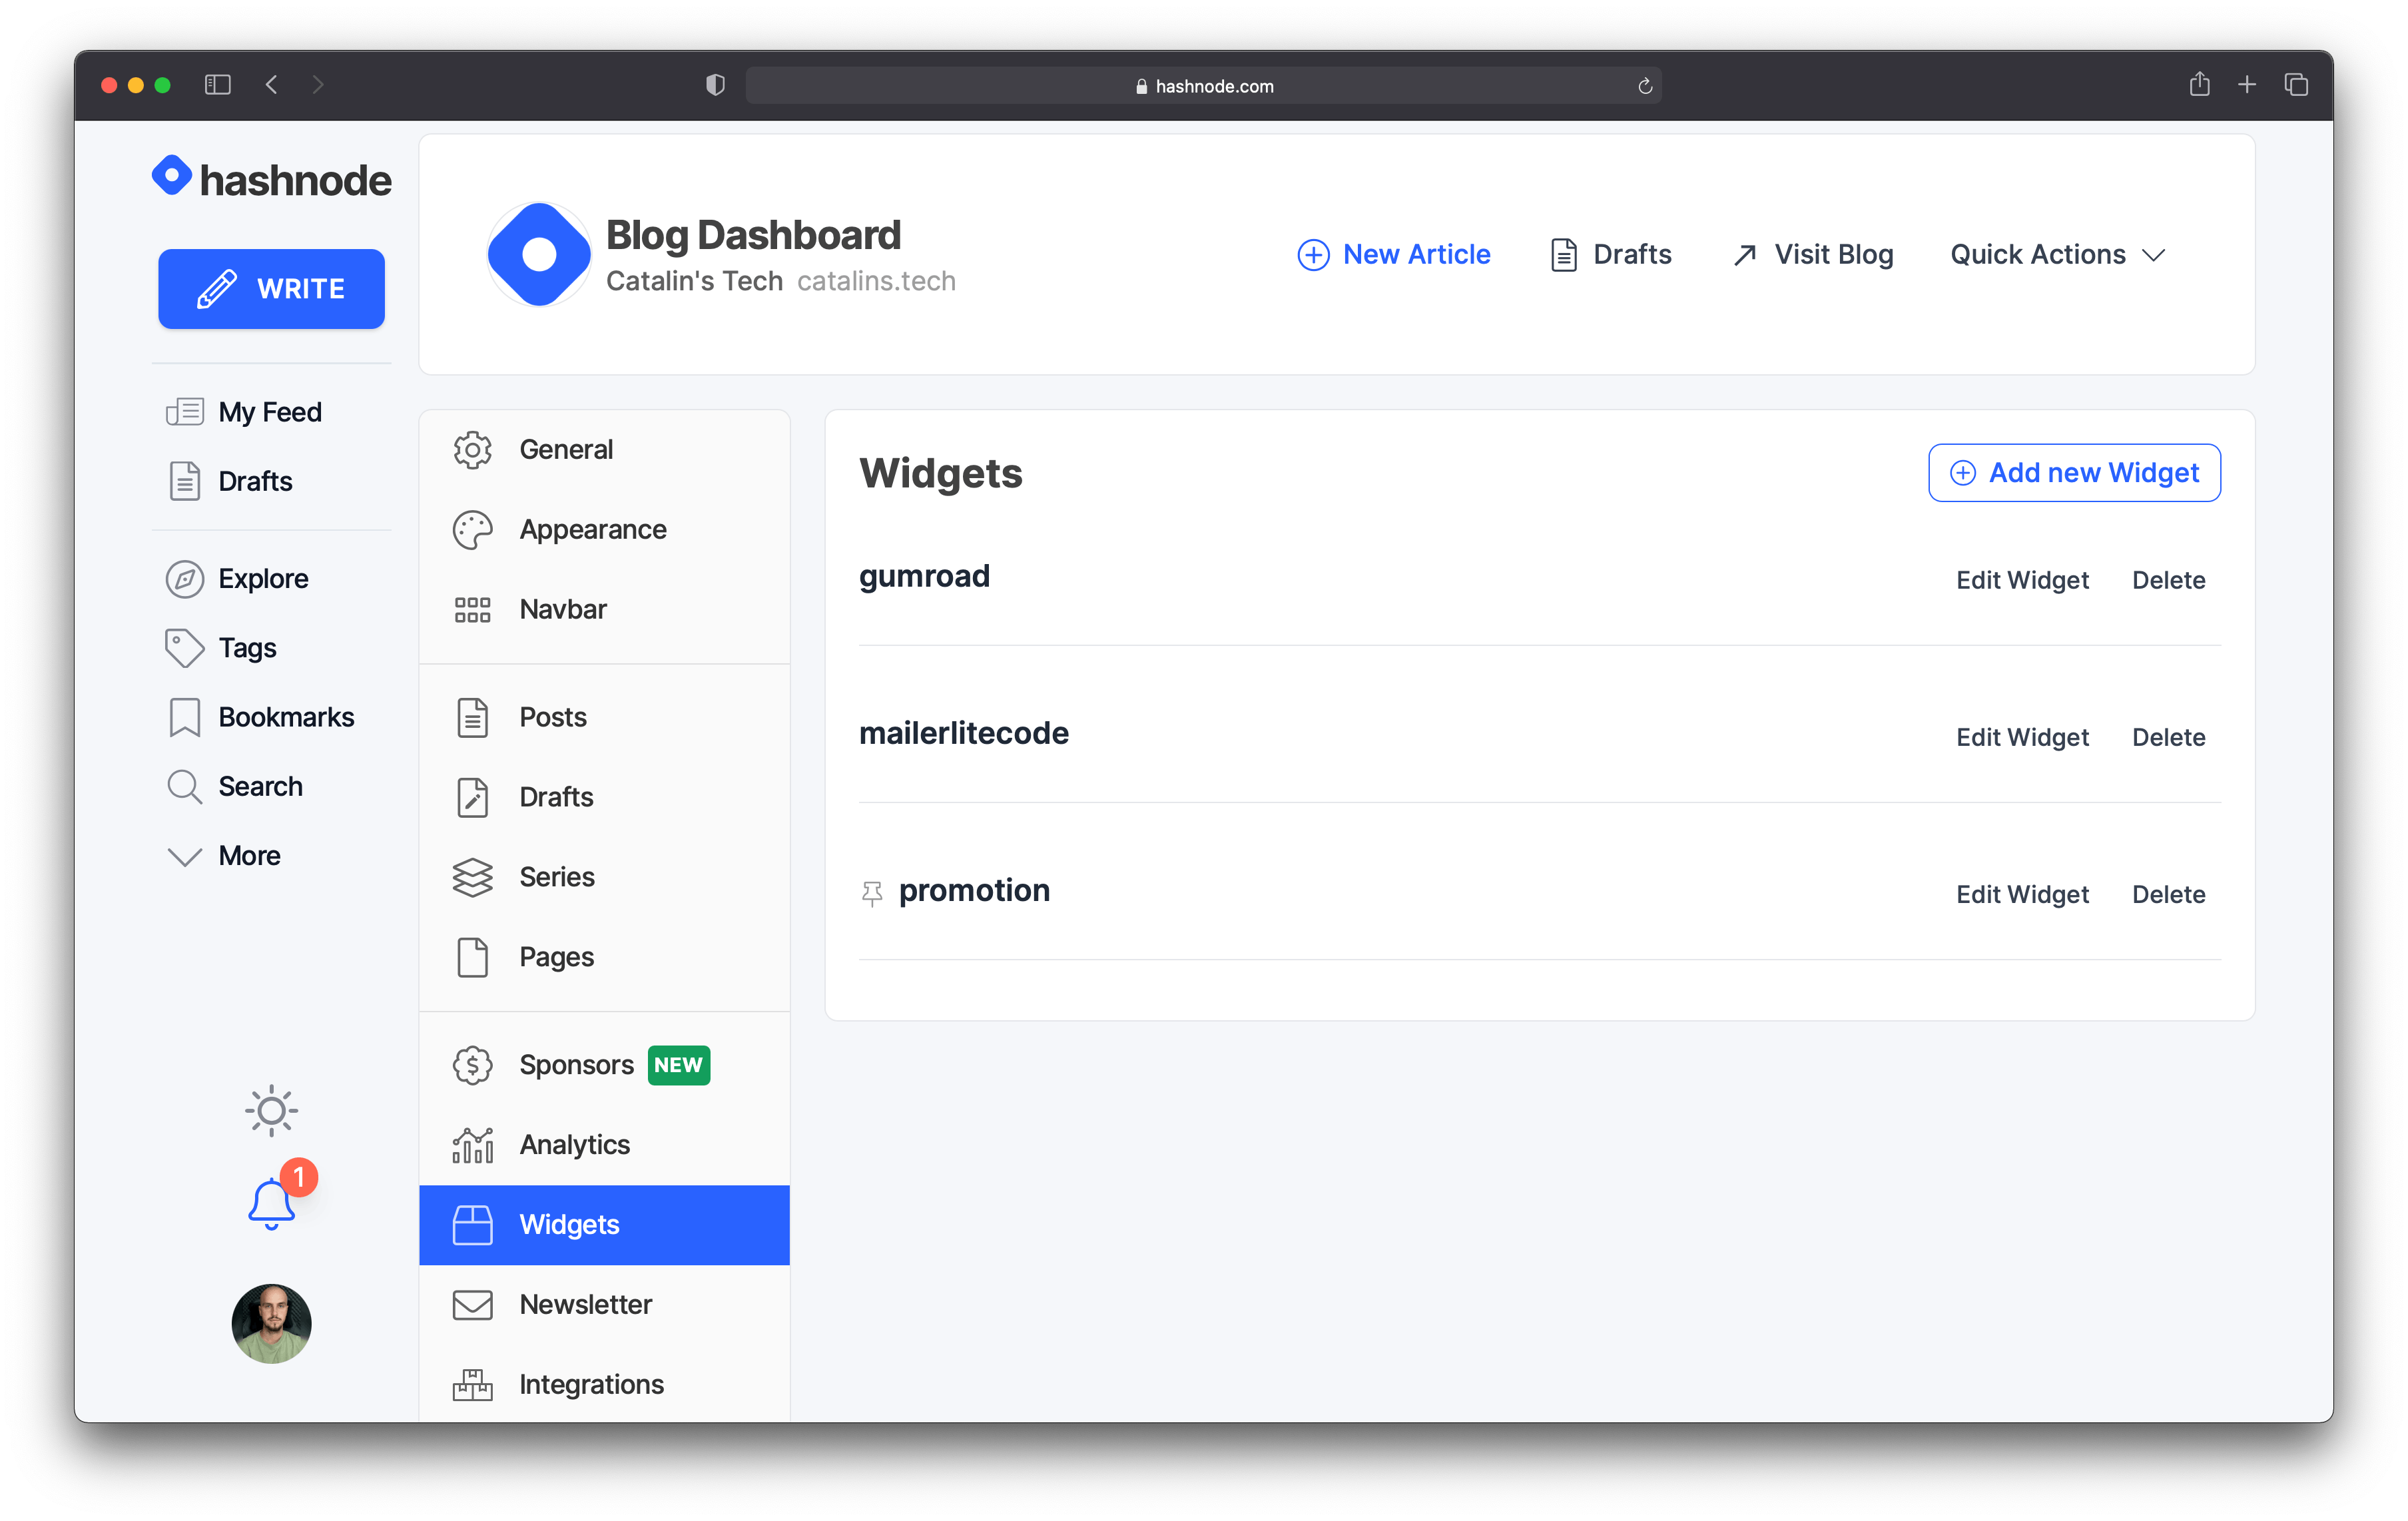 Figure 2
Once you are there, click on the button saying Add new Widget. Clicking on the button opens a new page where you can configure and create your new widget.
To add a new widget, you need to:
- add the embed code
- name the widget
See figure 3 for reference. (Note that the code was shortened here so everything could be captured in one screenshot.)
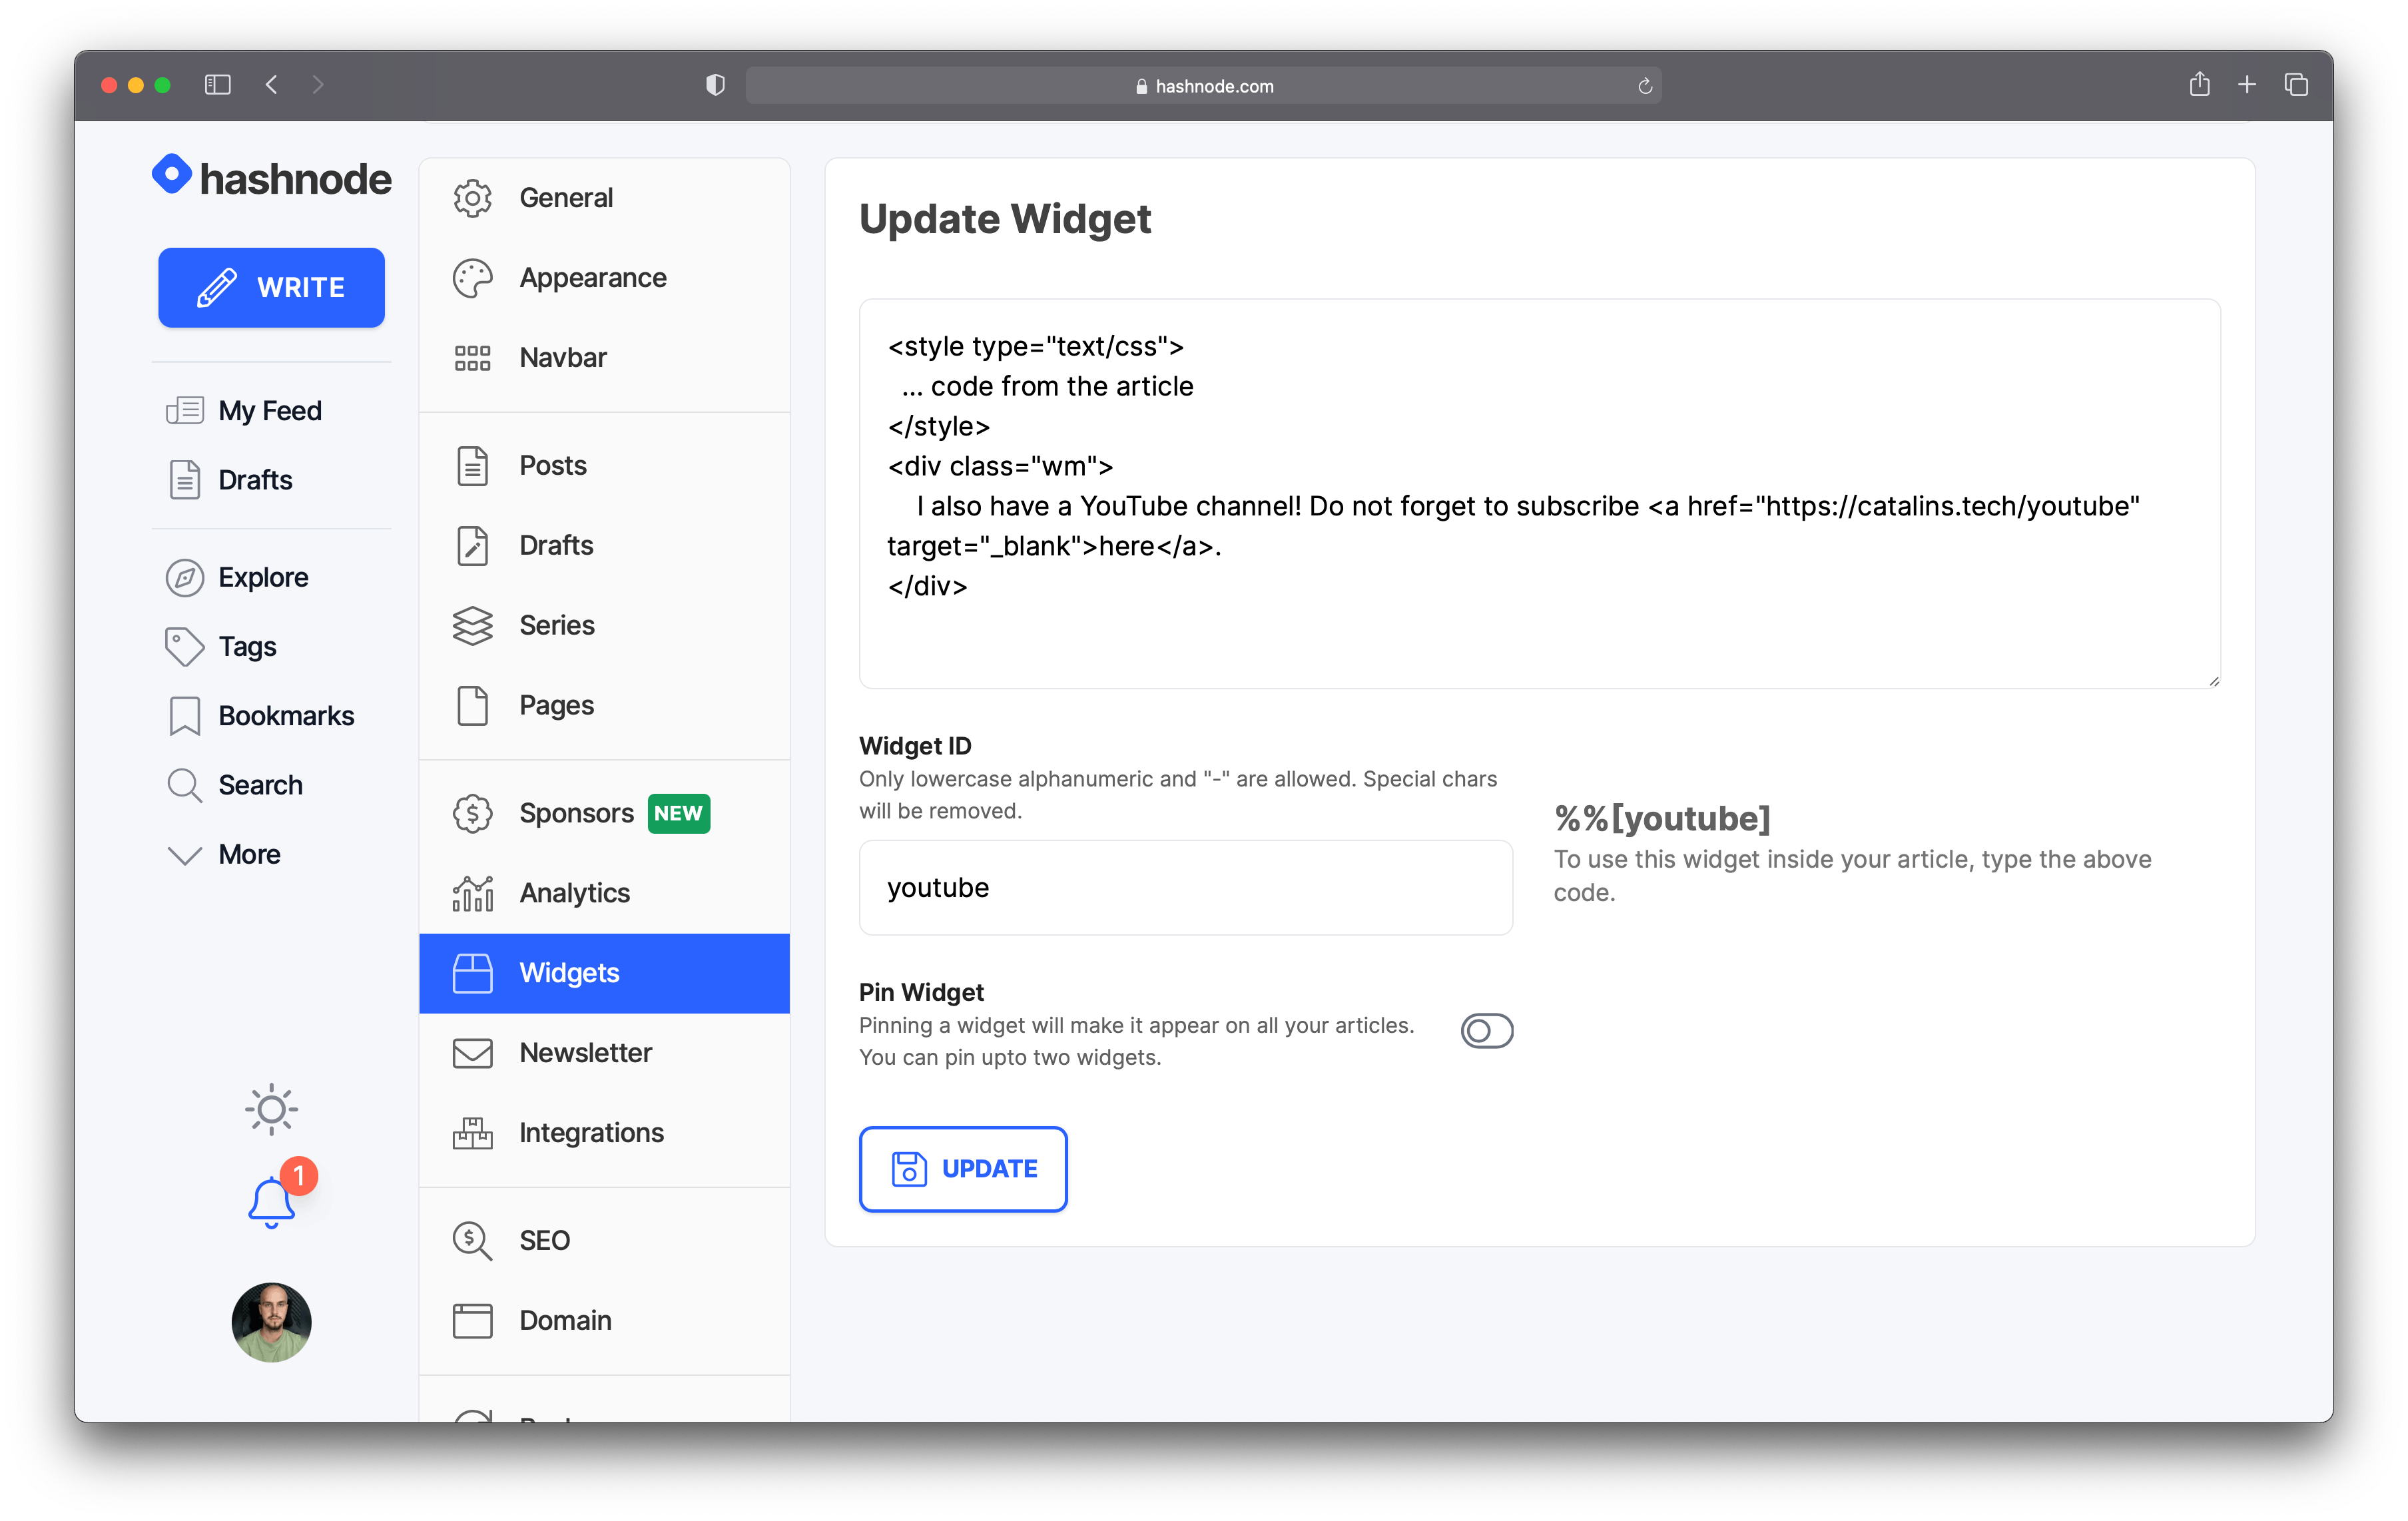 Figure 3
After adding the code and naming the widget, click the CREATE button to create the widget.
Now you are done, and you should see the newly-created widget in your blog dashboard. See figure 4 for reference.
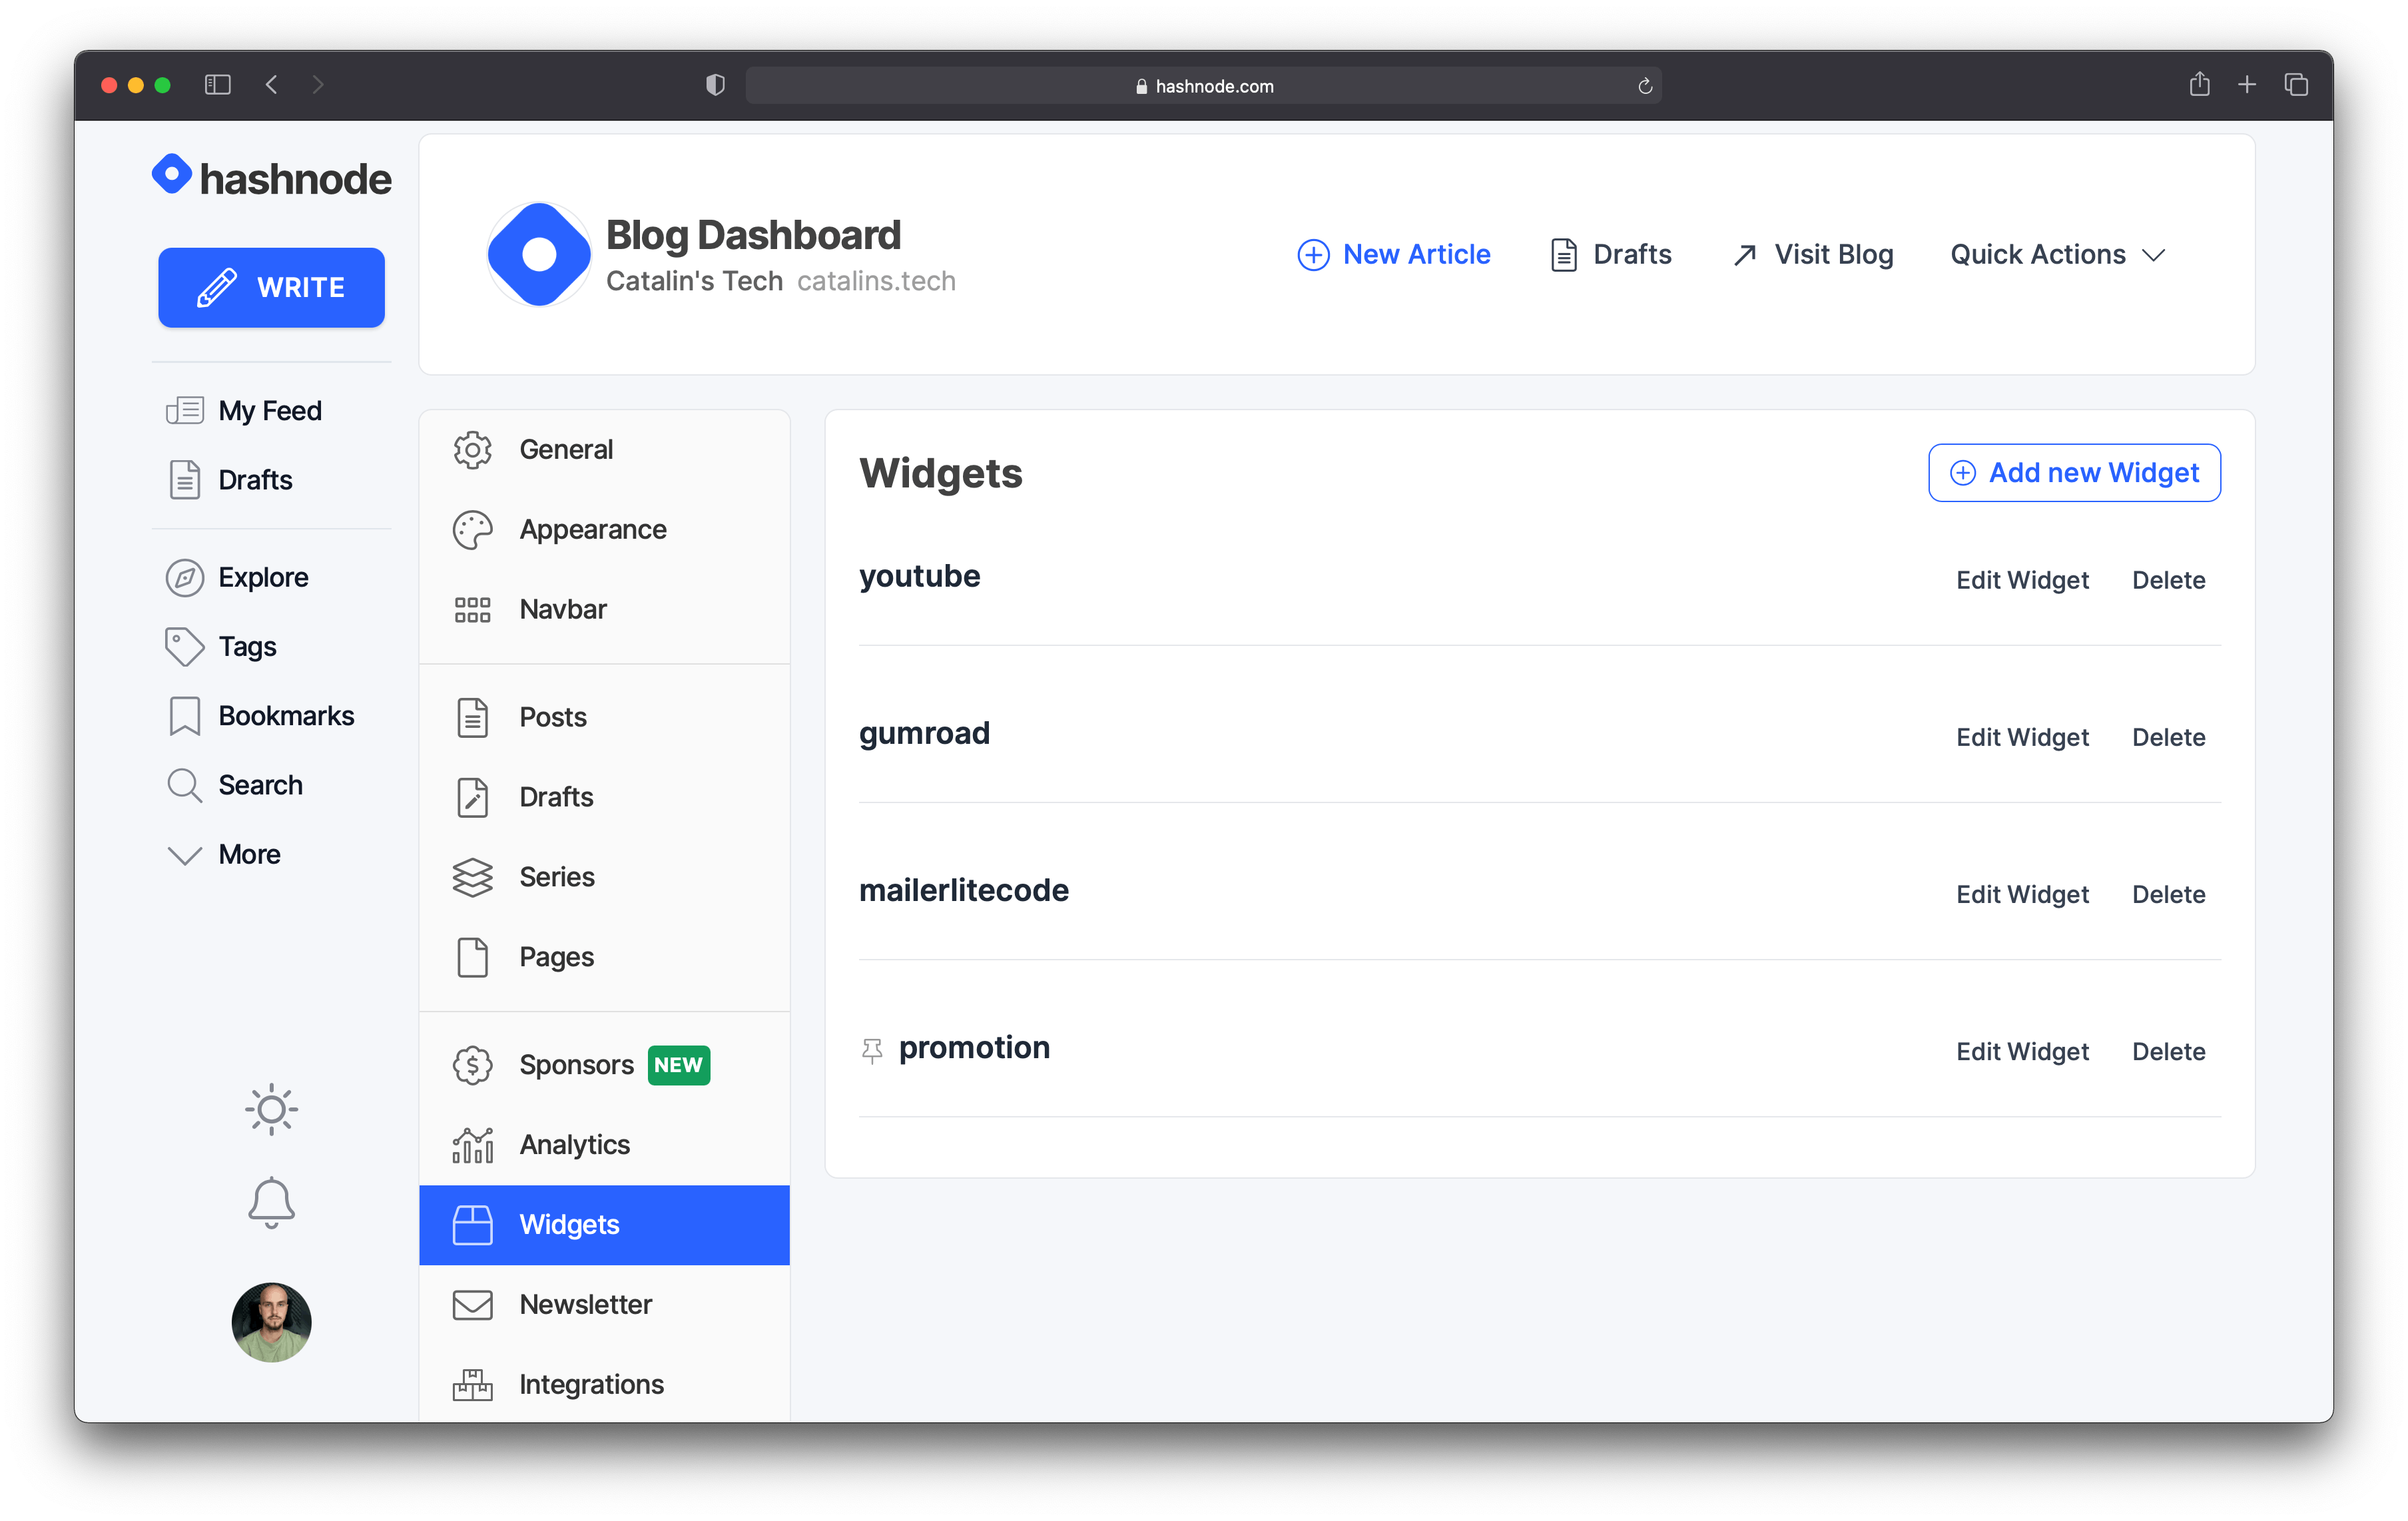 Figure 4
How to use your widget ✍️
There are two ways to use widgets. You can add them manually in your articles, or you can pin them at the top/bottom of your articles.
Add the widget manually
If you only want to use the widget in a certain set of articles, you should add it manually.
The format for using widgets manually is as follows:
%%[widget_name]- for the example from this article, you would use%%[youtube].
If you return to figure 3 above, you'll see that it tells you how to use the widget.
Pin the widget
Alternatively, you can pin widgets at the top or bottom of all your articles. This is a great option because it saves you the trouble of going through all articles and adding the widget manually.
When you create/edit the widget, you have an option saying Pin Widget. Clicking on that option will toggle it on and off.
You can select where to pin the widget when it's on—at the bottom or the top. Once you select that, you can save the widget and you are done.
See figure 5 for reference.
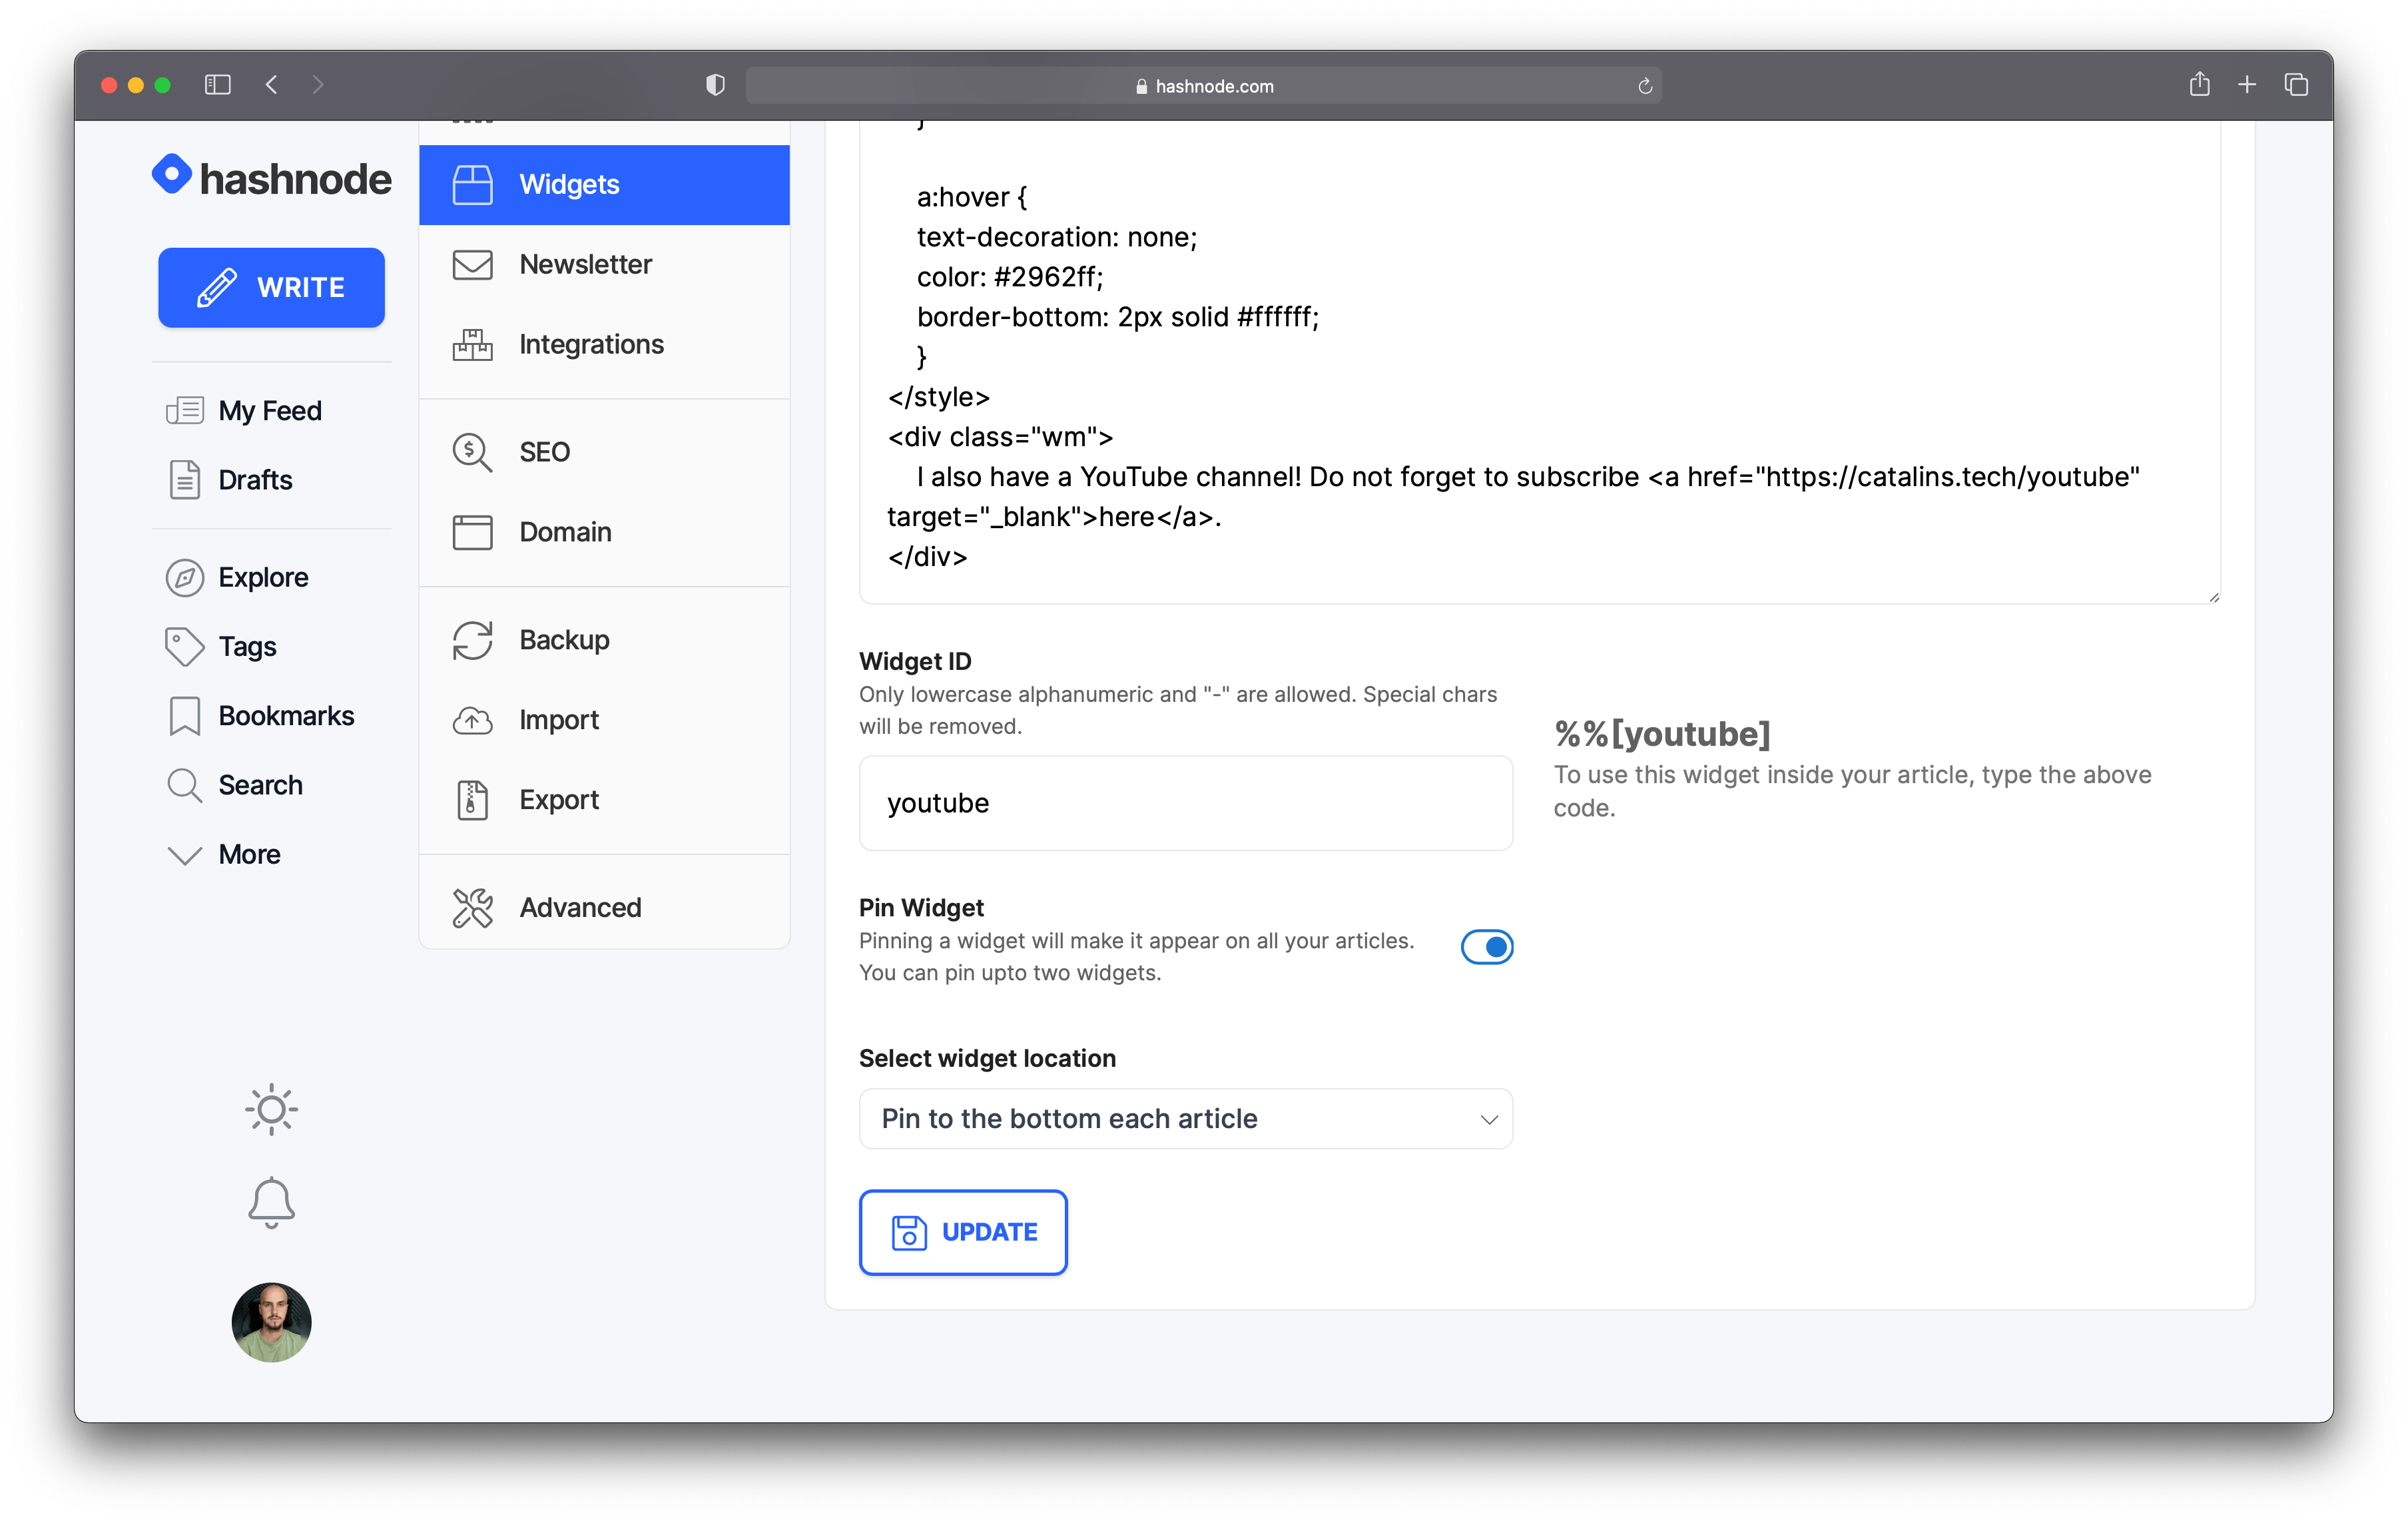 Figure 5
In figure 6, below, you can see the widget in action. I pinned the widget at the bottom of each article.
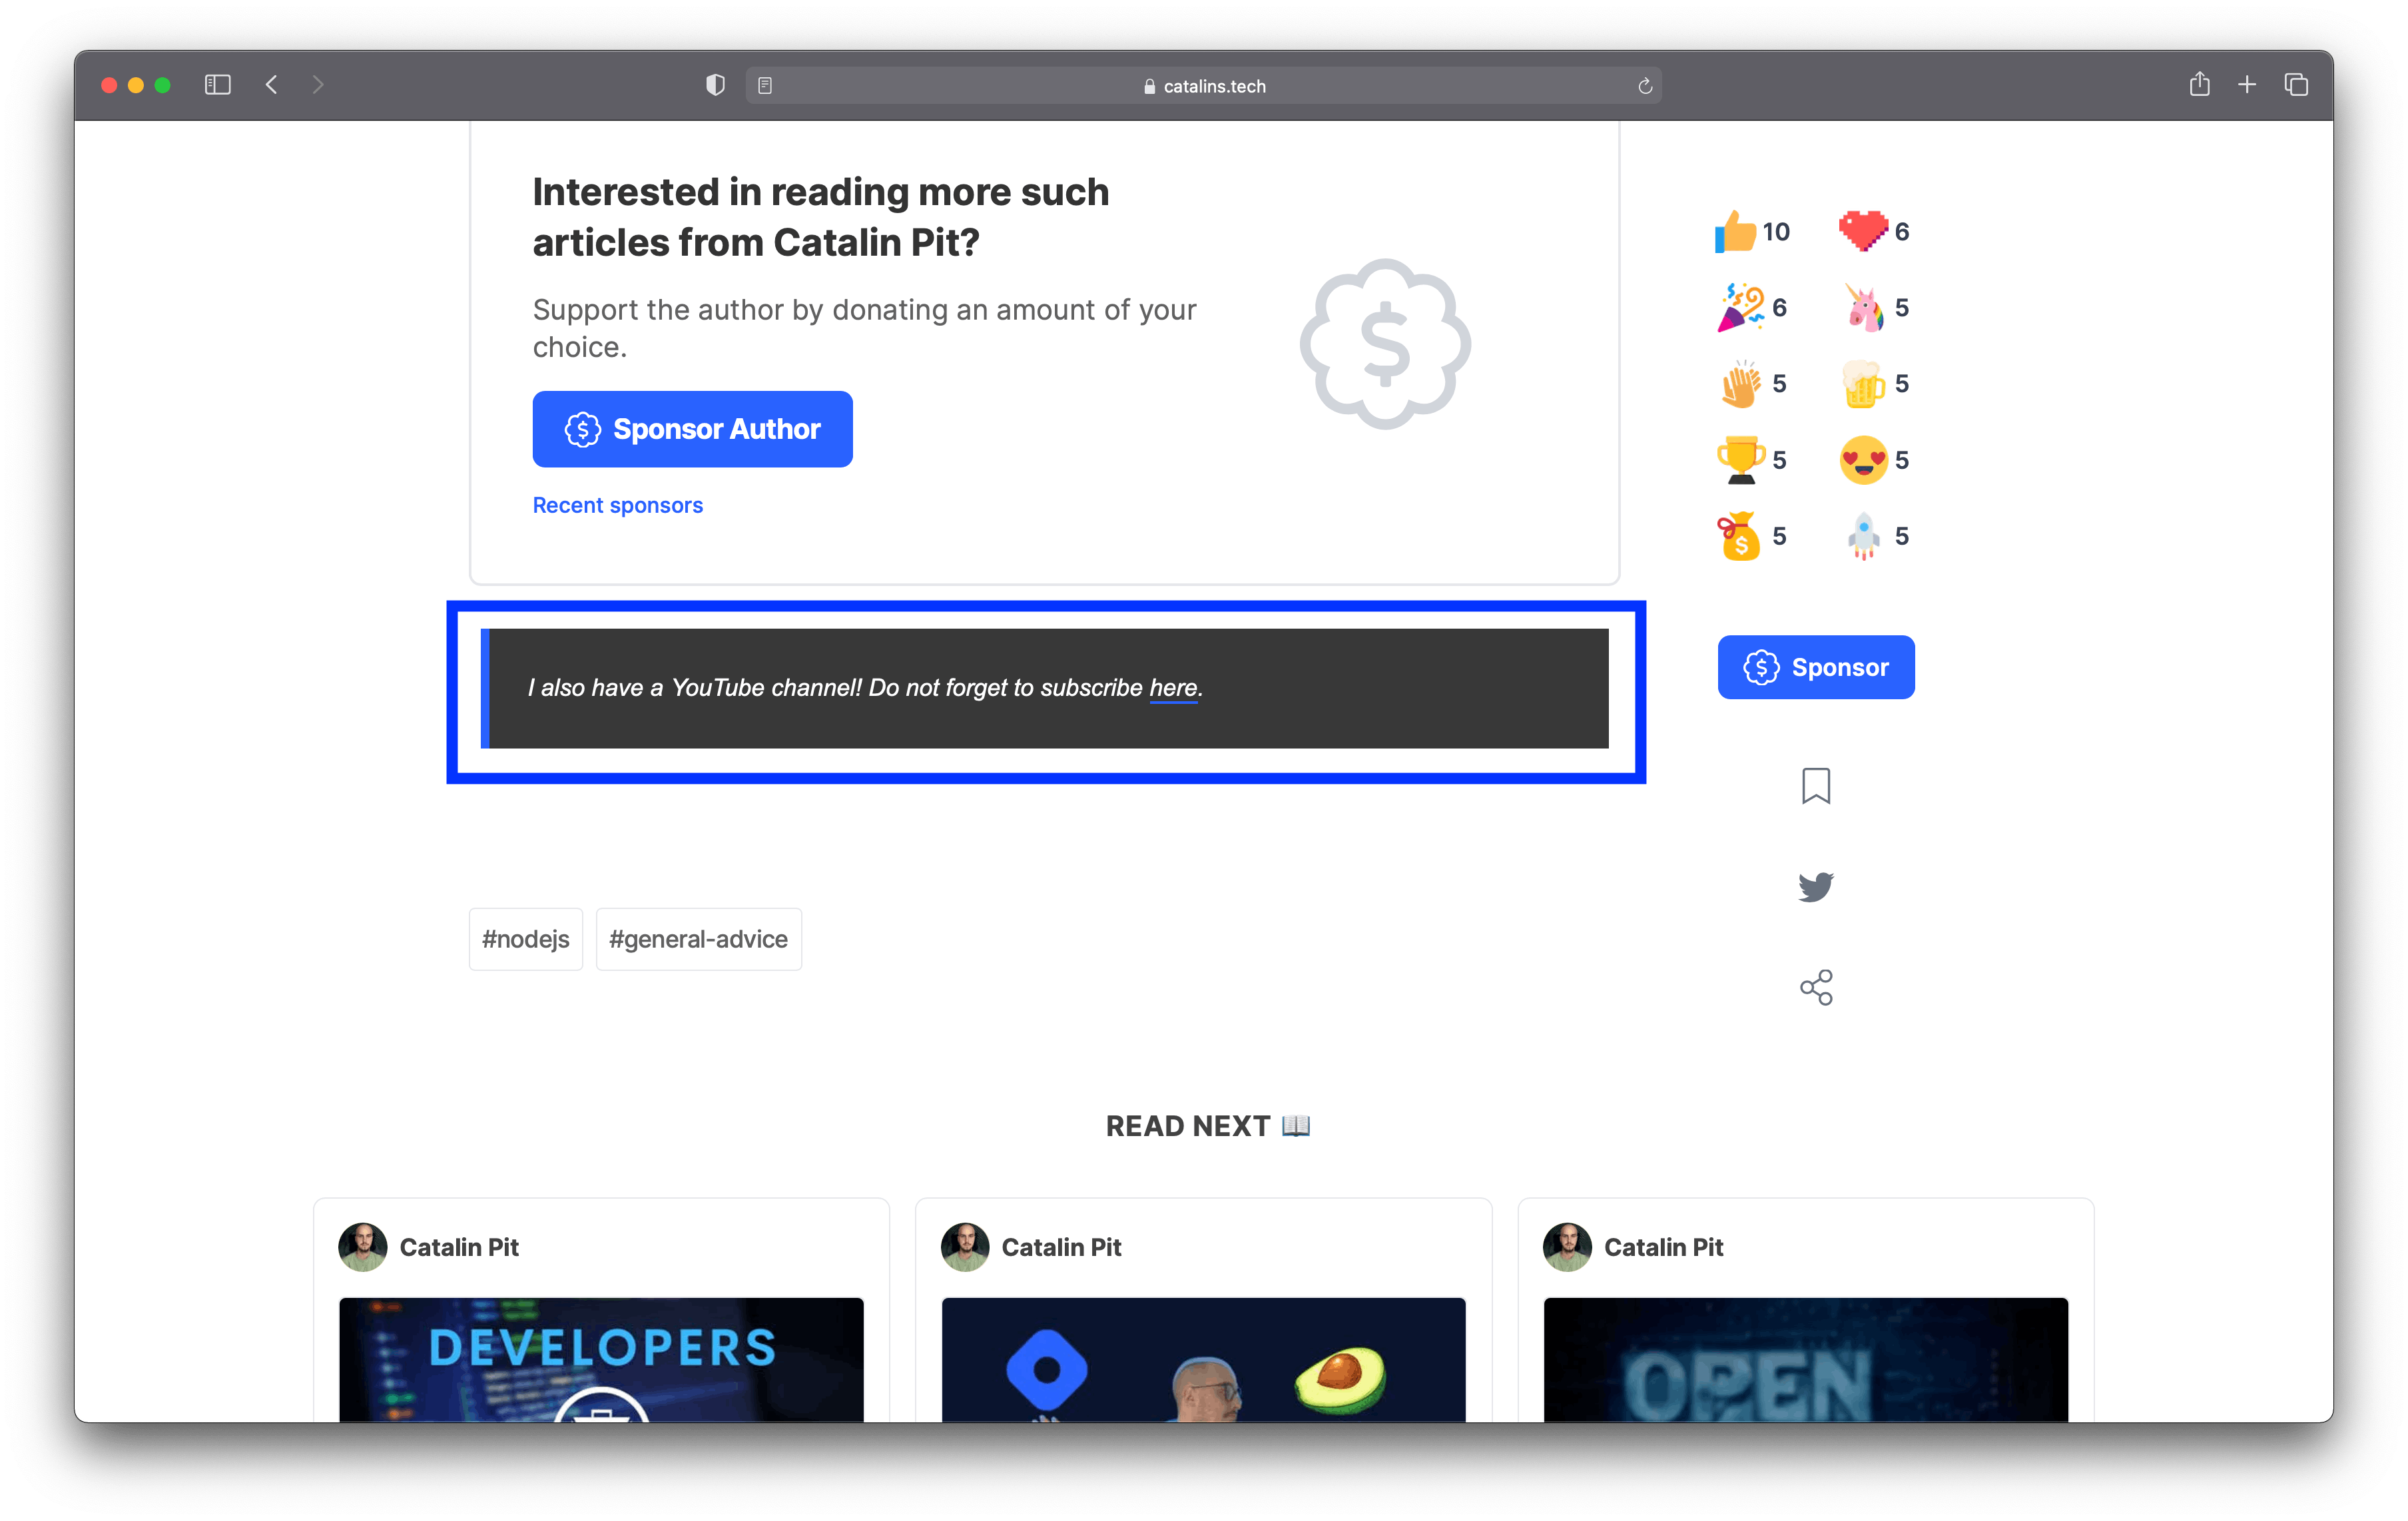 Figure 6
Conclusion
Widgets are powerful, so make the most of them!
Some of the scenarios where you could use them include:
- to collect email addresses
- to drive traffic to your other online accounts
- to embed your projects
Keep in mind that not all embeds require widgets—Hashnode supports embedding YouTube, CodePen, Gists, and many more by default. You can check the list of officially supported embeds here.
Note: Be aware when using widgets—especially those outside of the officially supported embeds—that they can slow your blog considerably, which will affect your SEO and your visitors' reading experience. Use them sensibly.

