

Why And How To Migrate Your Medium Blog To Hashnode
Start your blogging journey on Hashnode


In this article, you will see how you can migrate your blog from Medium to Hashnode in a few simple steps.
But before going further, you might be curious why should you migrate to Hashnode. That's a great question, and you should know what are the benefits of doing so!
Thus, make yourself comfortable & pick up your favourite beverage and let us convince you!
1. No paywall
Have you ever searched for something on Google just to land on Medium and see this pop-up?
Then you can understand how frustrating it is when you want to read an article and you are forbidden if you do not pay.

But why should you pay? How do you know the content it's worth the money you are paying? Why should you pay for the content you can find for free elsewhere?
Hashnode wants to change that. Hashnode makes creating and consuming content free for everyone. Thus, that's the first and most important reason why you should migrate to Hashnode.
Hashnode does not have a paywall, pop-ups and other mechanisms that make content inaccessible to developers.
You can write and read unlimited articles without paying a single penny. An additional benefit of having no paywall is that you can reach a wider audience since everyone can access your content.
Are you already convinced? Then, start your paywall-free blog now!
2. Custom domain
Is it your blog if you do not have your custom domain? Many people overlook the importance of having a domain for their blog.
Two of the most important reasons why you should have your custom domain are as follows:
- Get all the SEO benefits - If you do not use your domain, you give up all the SEO benefits. The blogging platform you use reaps all the benefits. Additionally, if you decide in the future to purchase and use a custom domain, you start from 0, even if you move all the articles to your new blog. You have to build your SEO again.
- Own your content and your brand - If you decide to move to your custom domain in the future, you lose all the SEO benefits, which takes us back to the first point. With a personal domain, you promote your brand, and you are in charge of your content.
Now you might say - but you can have a custom domain on Medium as well. That's true, but it has a catch. Can you guess what the catch is? You need to pay.
If you want to use your custom domain on Medium, you have to buy a plan. On the other hand, on Hashnode, you can do it for free. So you can use your custom domain without paying anything.
Therefore, Hashnode allows bloggers to build their brand and reap all the SEO benefits. Connect your domain and start building your developer empire!
3. Monetize your content
Everybody would like to be rewarded for their work. On Hashnode, you can monetize your content in non-intrusive ways.
You can monetize your content with the Hashnode Sponsors feature and Coil. The great thing is that you can use both features simultaneously, which means 2x the chances of making more money.
With Hashnode sponsors, bloggers can add a Sponsor button on the page. Thus, readers can sponsor the author with a custom amount of money. It's important to mention that Hashnode does not take a cut. All the money goes directly to the author!
For example, let's pretend you found an article that helped you solve a bug that bothered you for a while. As a way of thanking the author, you can donate $10.
Check the video below.
Alongside Hashnode Sponsors, you can use Coil to increase your profits. According to the Coil documentation, "Coil streams micropayments to the site, when you visit a web monetized site. These payments occur in real-time and continue for as long as you actively view the content." You can read more about Coil here.
Thus, you can monetize your content without forcing people to pay. This way, both the creator and the consumer are happy!
Ready to start your blogging journey? Start here.
Start the migration
The first step of the migration is to export the articles from Medium. Medium packages all the articles in a zip file, which you will use to import your articles to Hashnode.
Lastly, you import the zip file to Hashnode and wait for the magic to happen.
Export the articles from Medium
You can export your Medium articles directly from this page or your blog dashboard.
To export the articles, follow these steps:
- Go to Hashnode
- Click on your avatar
- Click on the "Blog Dashboard" option
See figure 1 for reference.
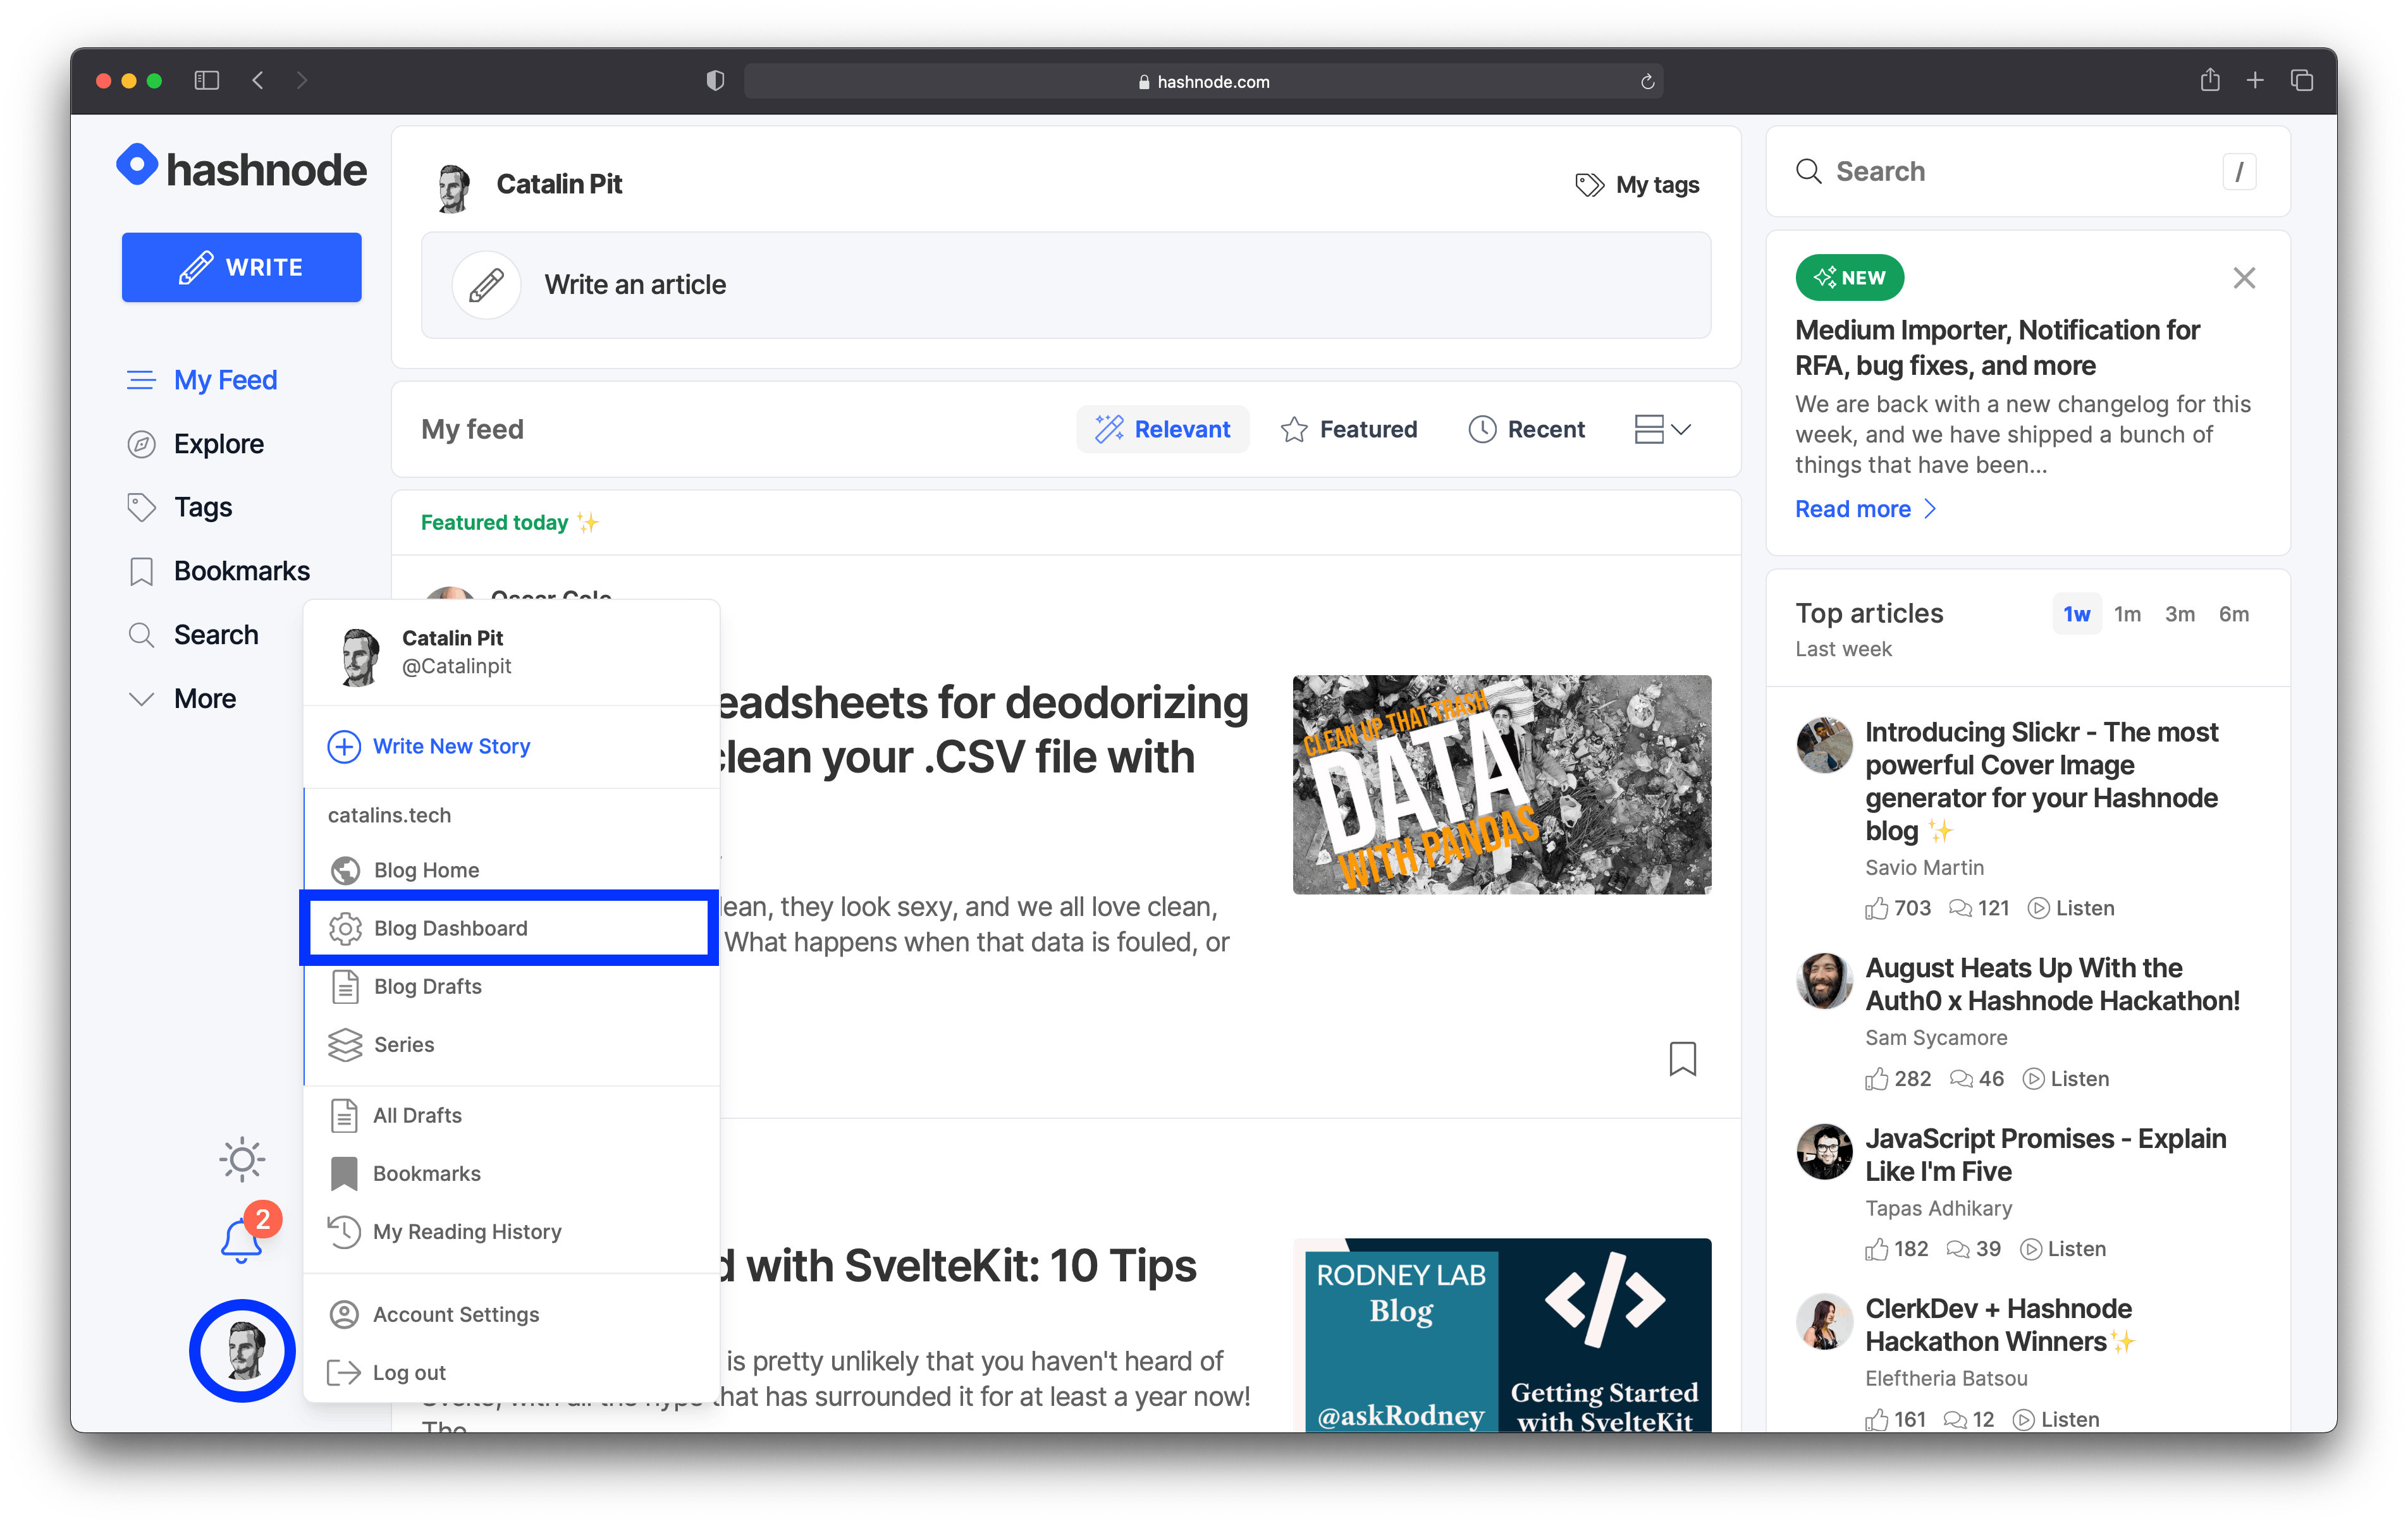 Figure 1
The next step is to click on the "Import" option and select the "Medium Importer". On this page, you should see a link from where you can export the Medium articles. Click on that link.
See figure 2 below for reference.
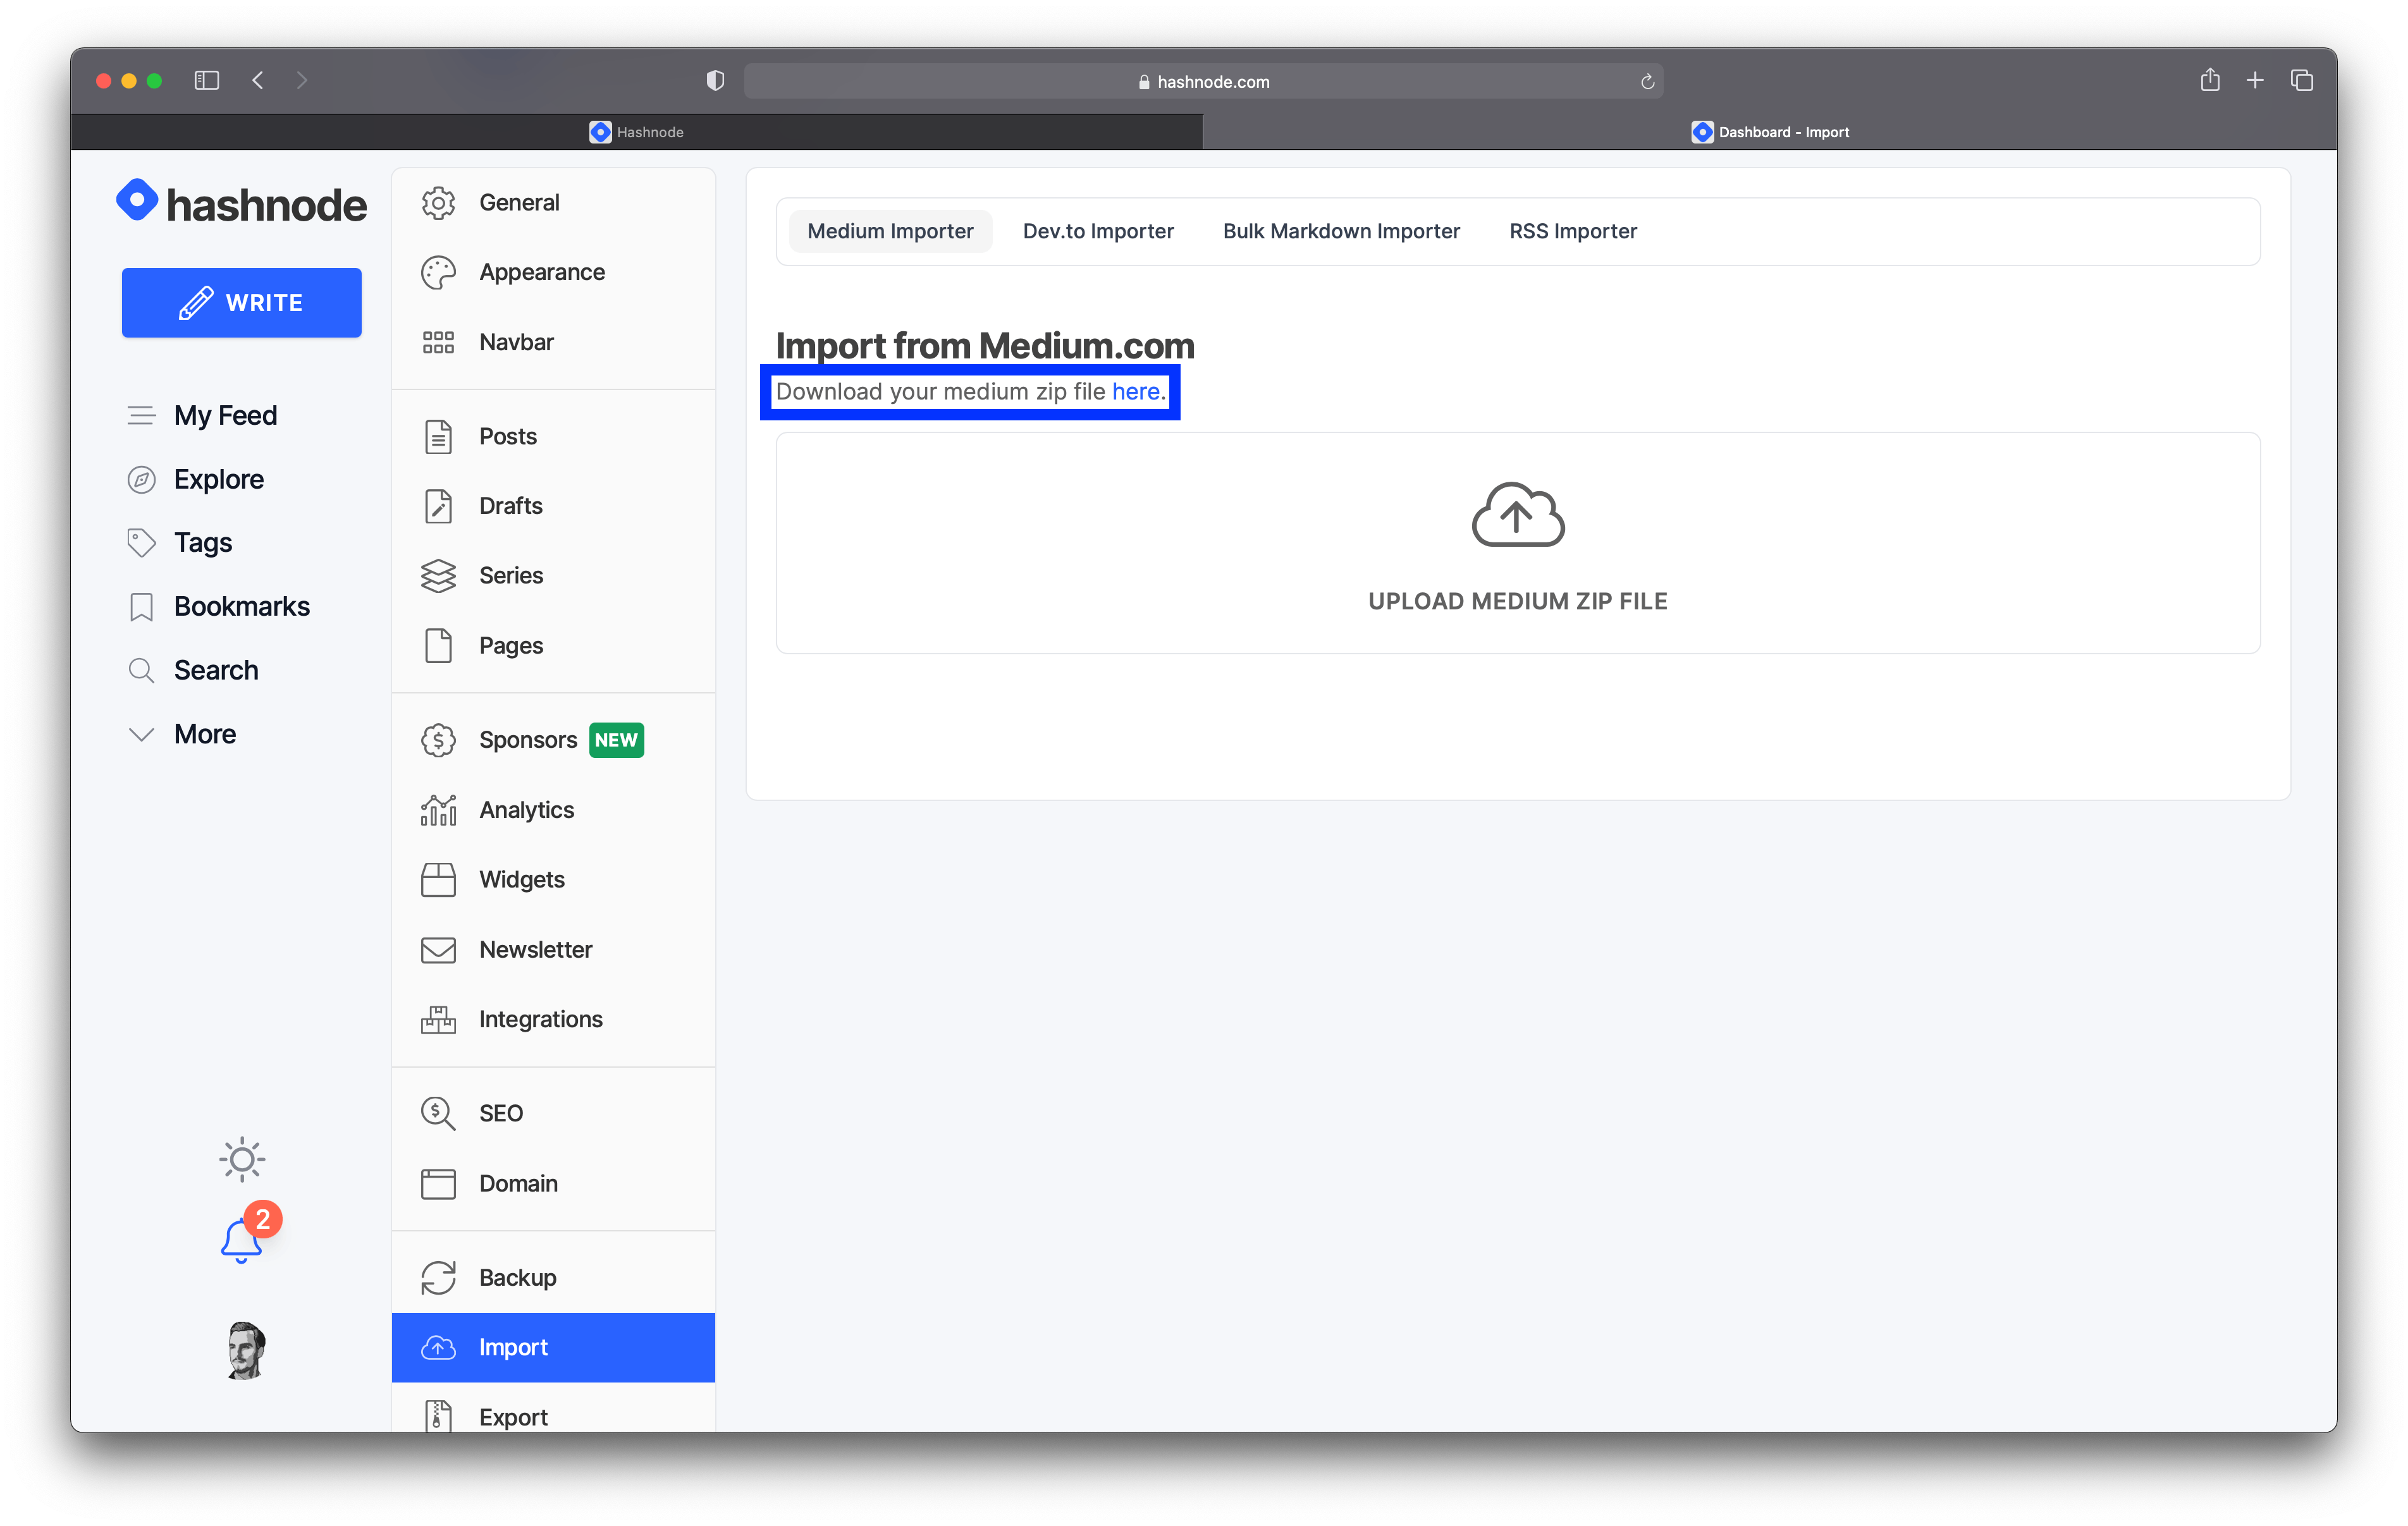 Figure 2
After clicking on the link, you are taken to Medium. If you are not logged in, you need to log into your account before exporting your articles. On the other hand, if you are logged in, you can export your articles straightaway.
After logging in, click on the "Export" button, and you are done!
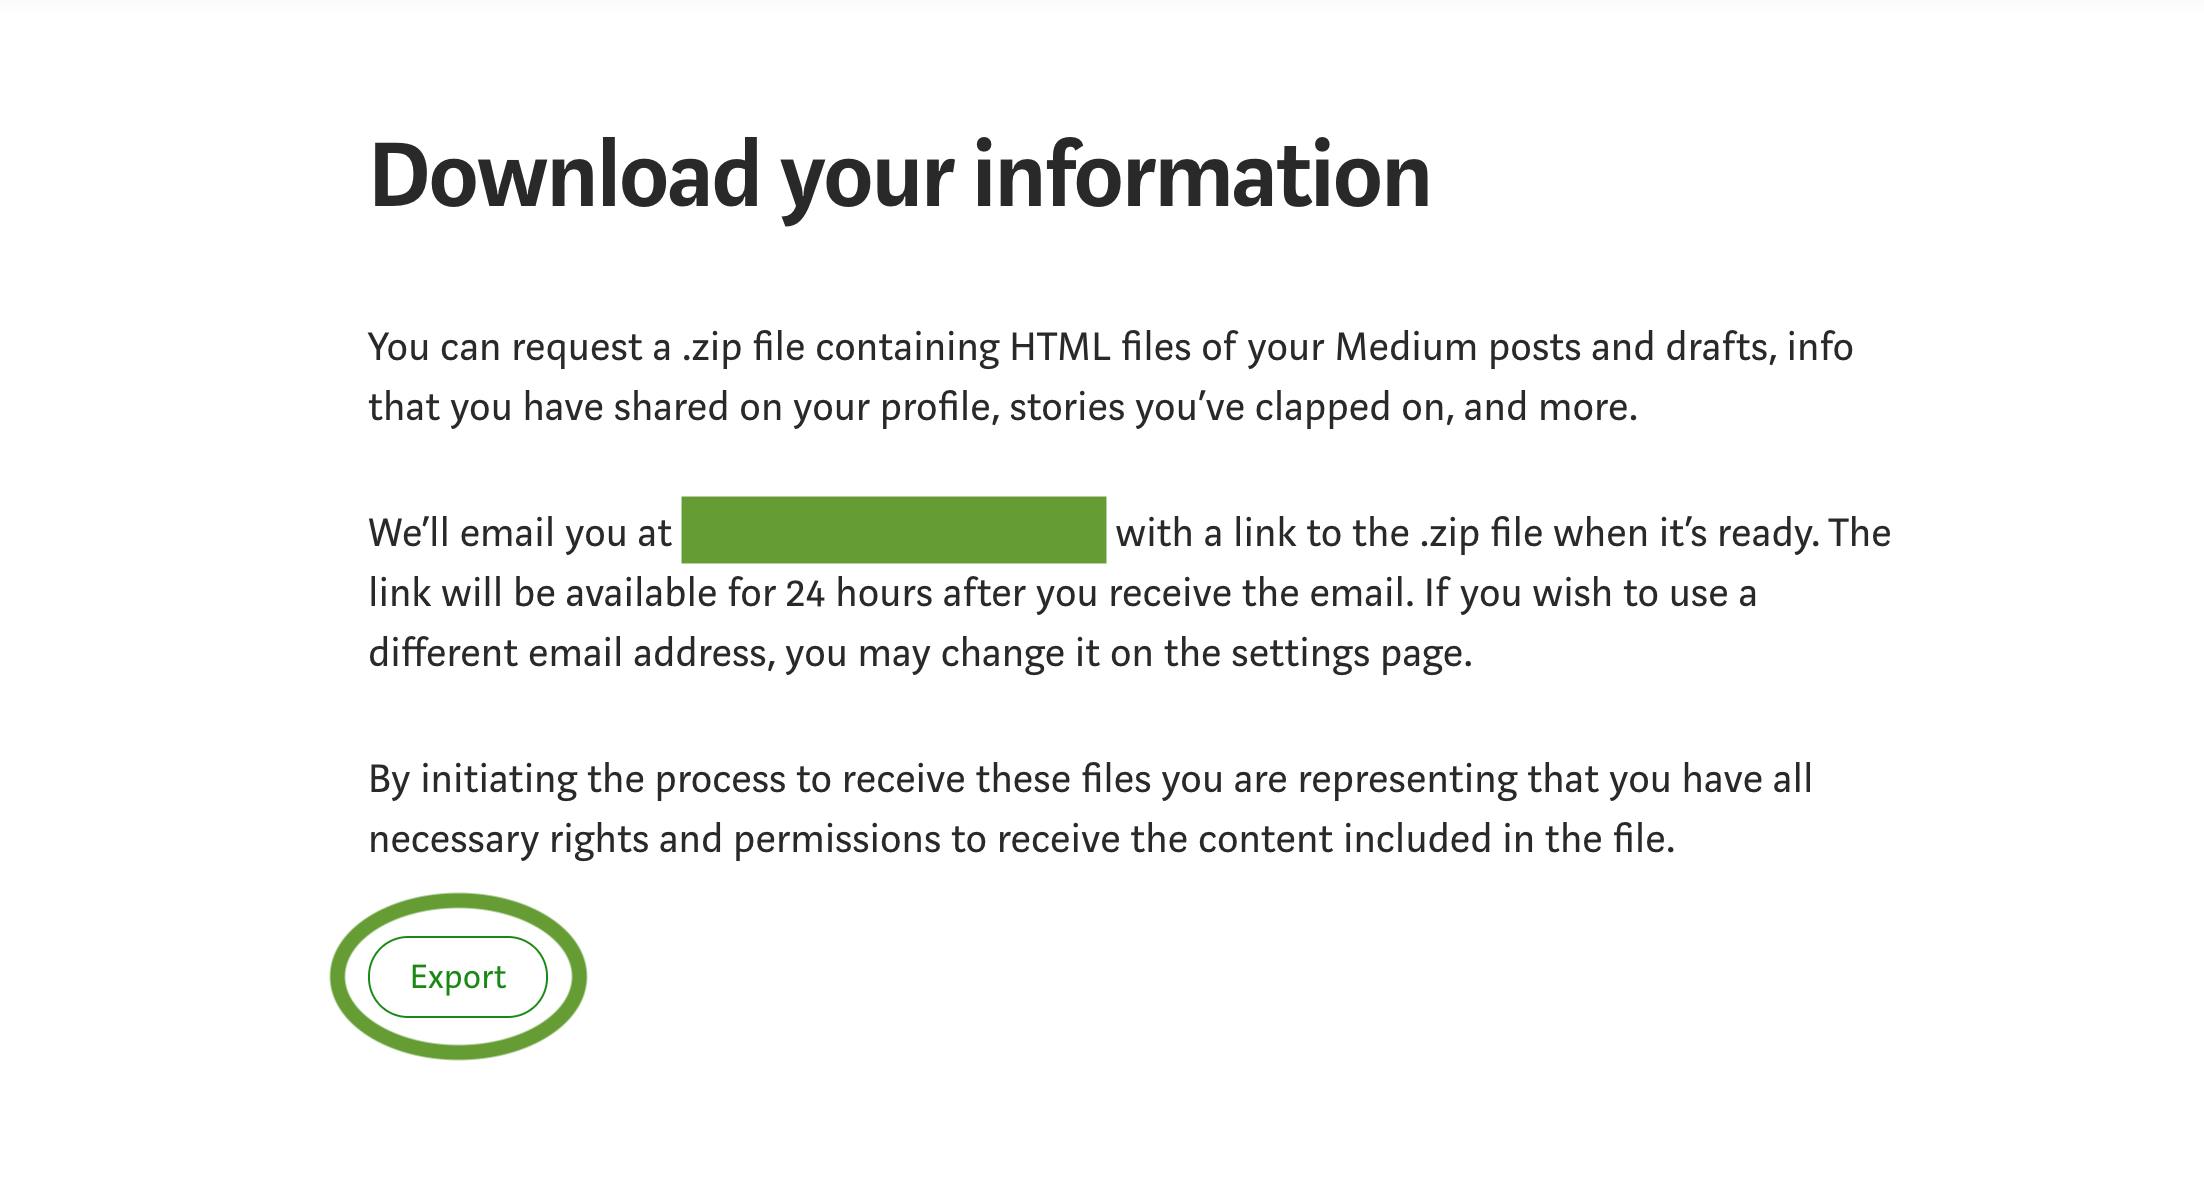 Figure 3
In a few minutes, you should get an email from Medium with all of your articles. Download the zip file on your machine as you will need it!
Now you have all the articles from Medium on your machine! The next step is to import them into your Hashnode blog.
Import Medium articles to Hashnode
Let's start the importing process. Go back to your blog dashboard and go to the "Import" section.
You should be on the same page as in figure 4 below.
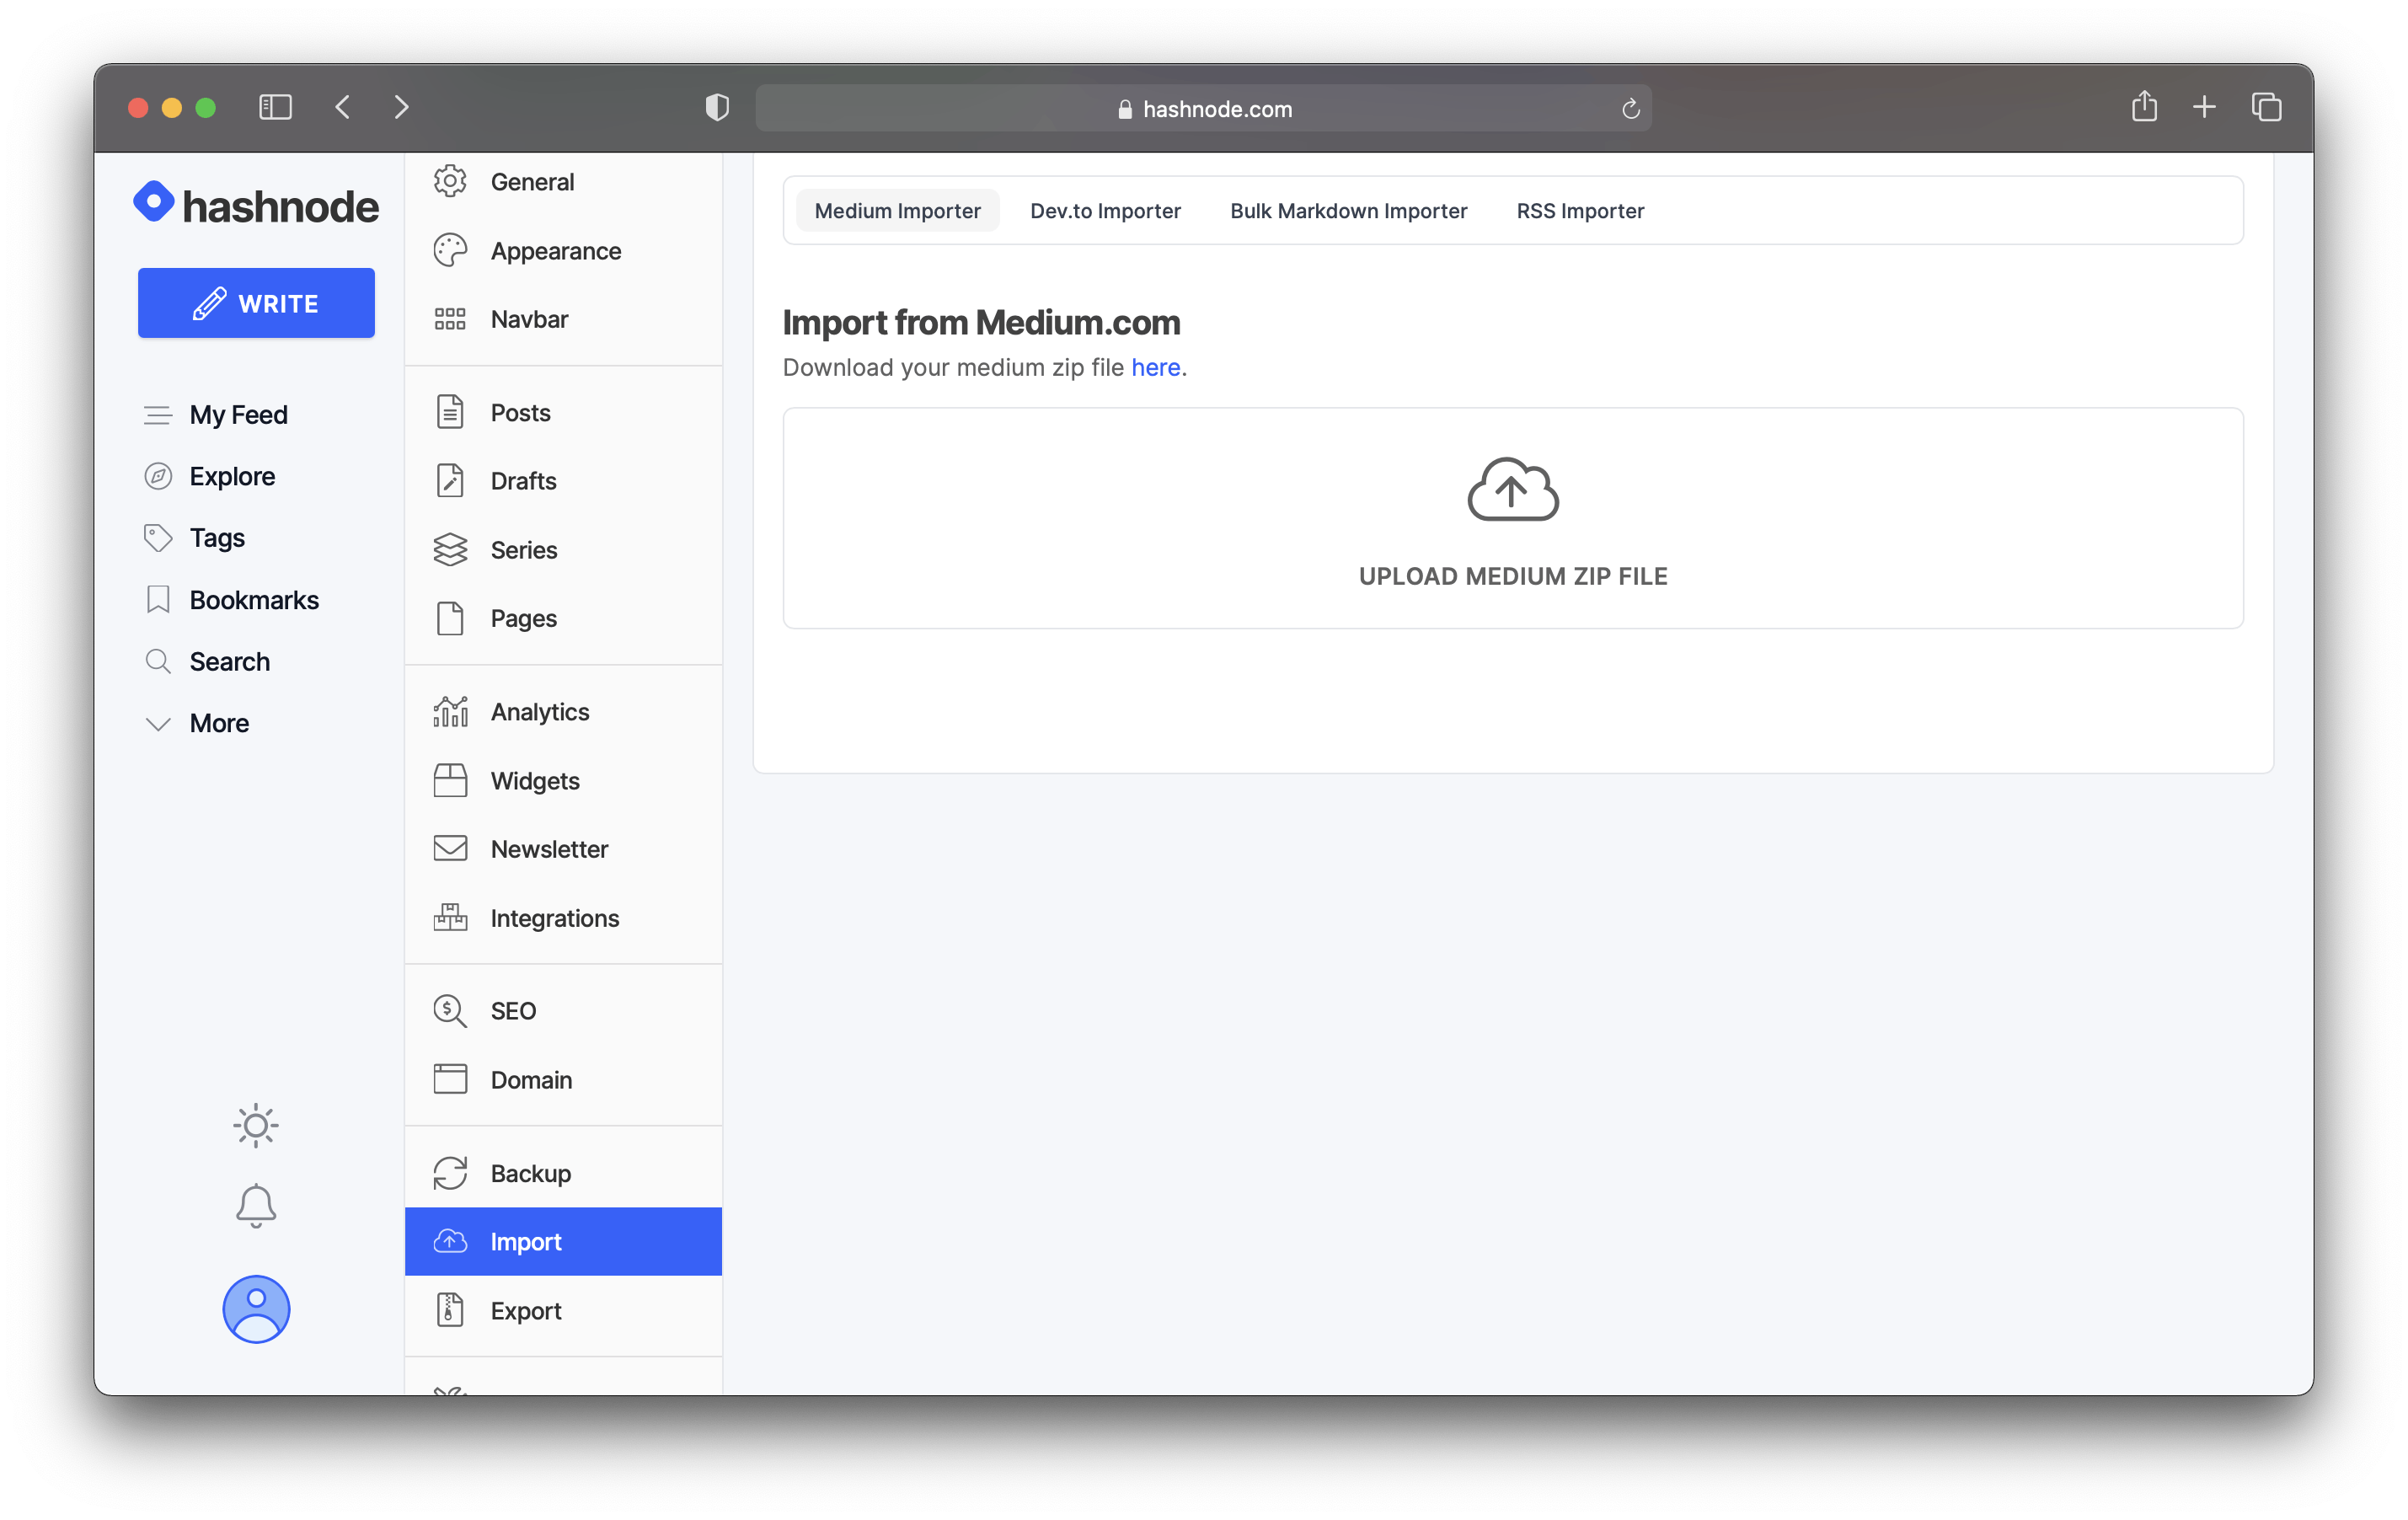 Figure 4
Click on the cloud icon, and you will be prompted to select the .zip file from your machine. Select it and press enter.
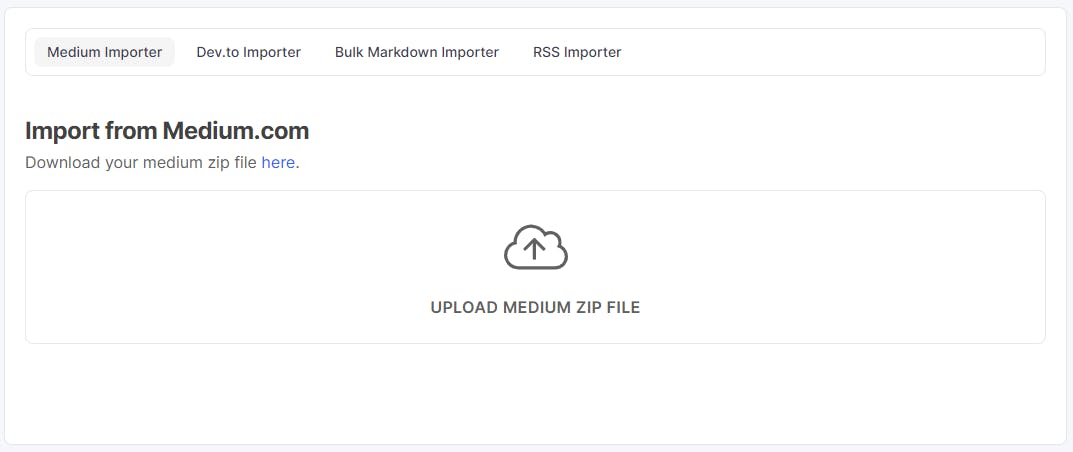 Figure 5
Once you add the .zip file to the importer, Hashnode starts uploading your articles. Figure 6 below illustrates what you should see.
Like the image says, do not reload the page to avoid unwanted issues!
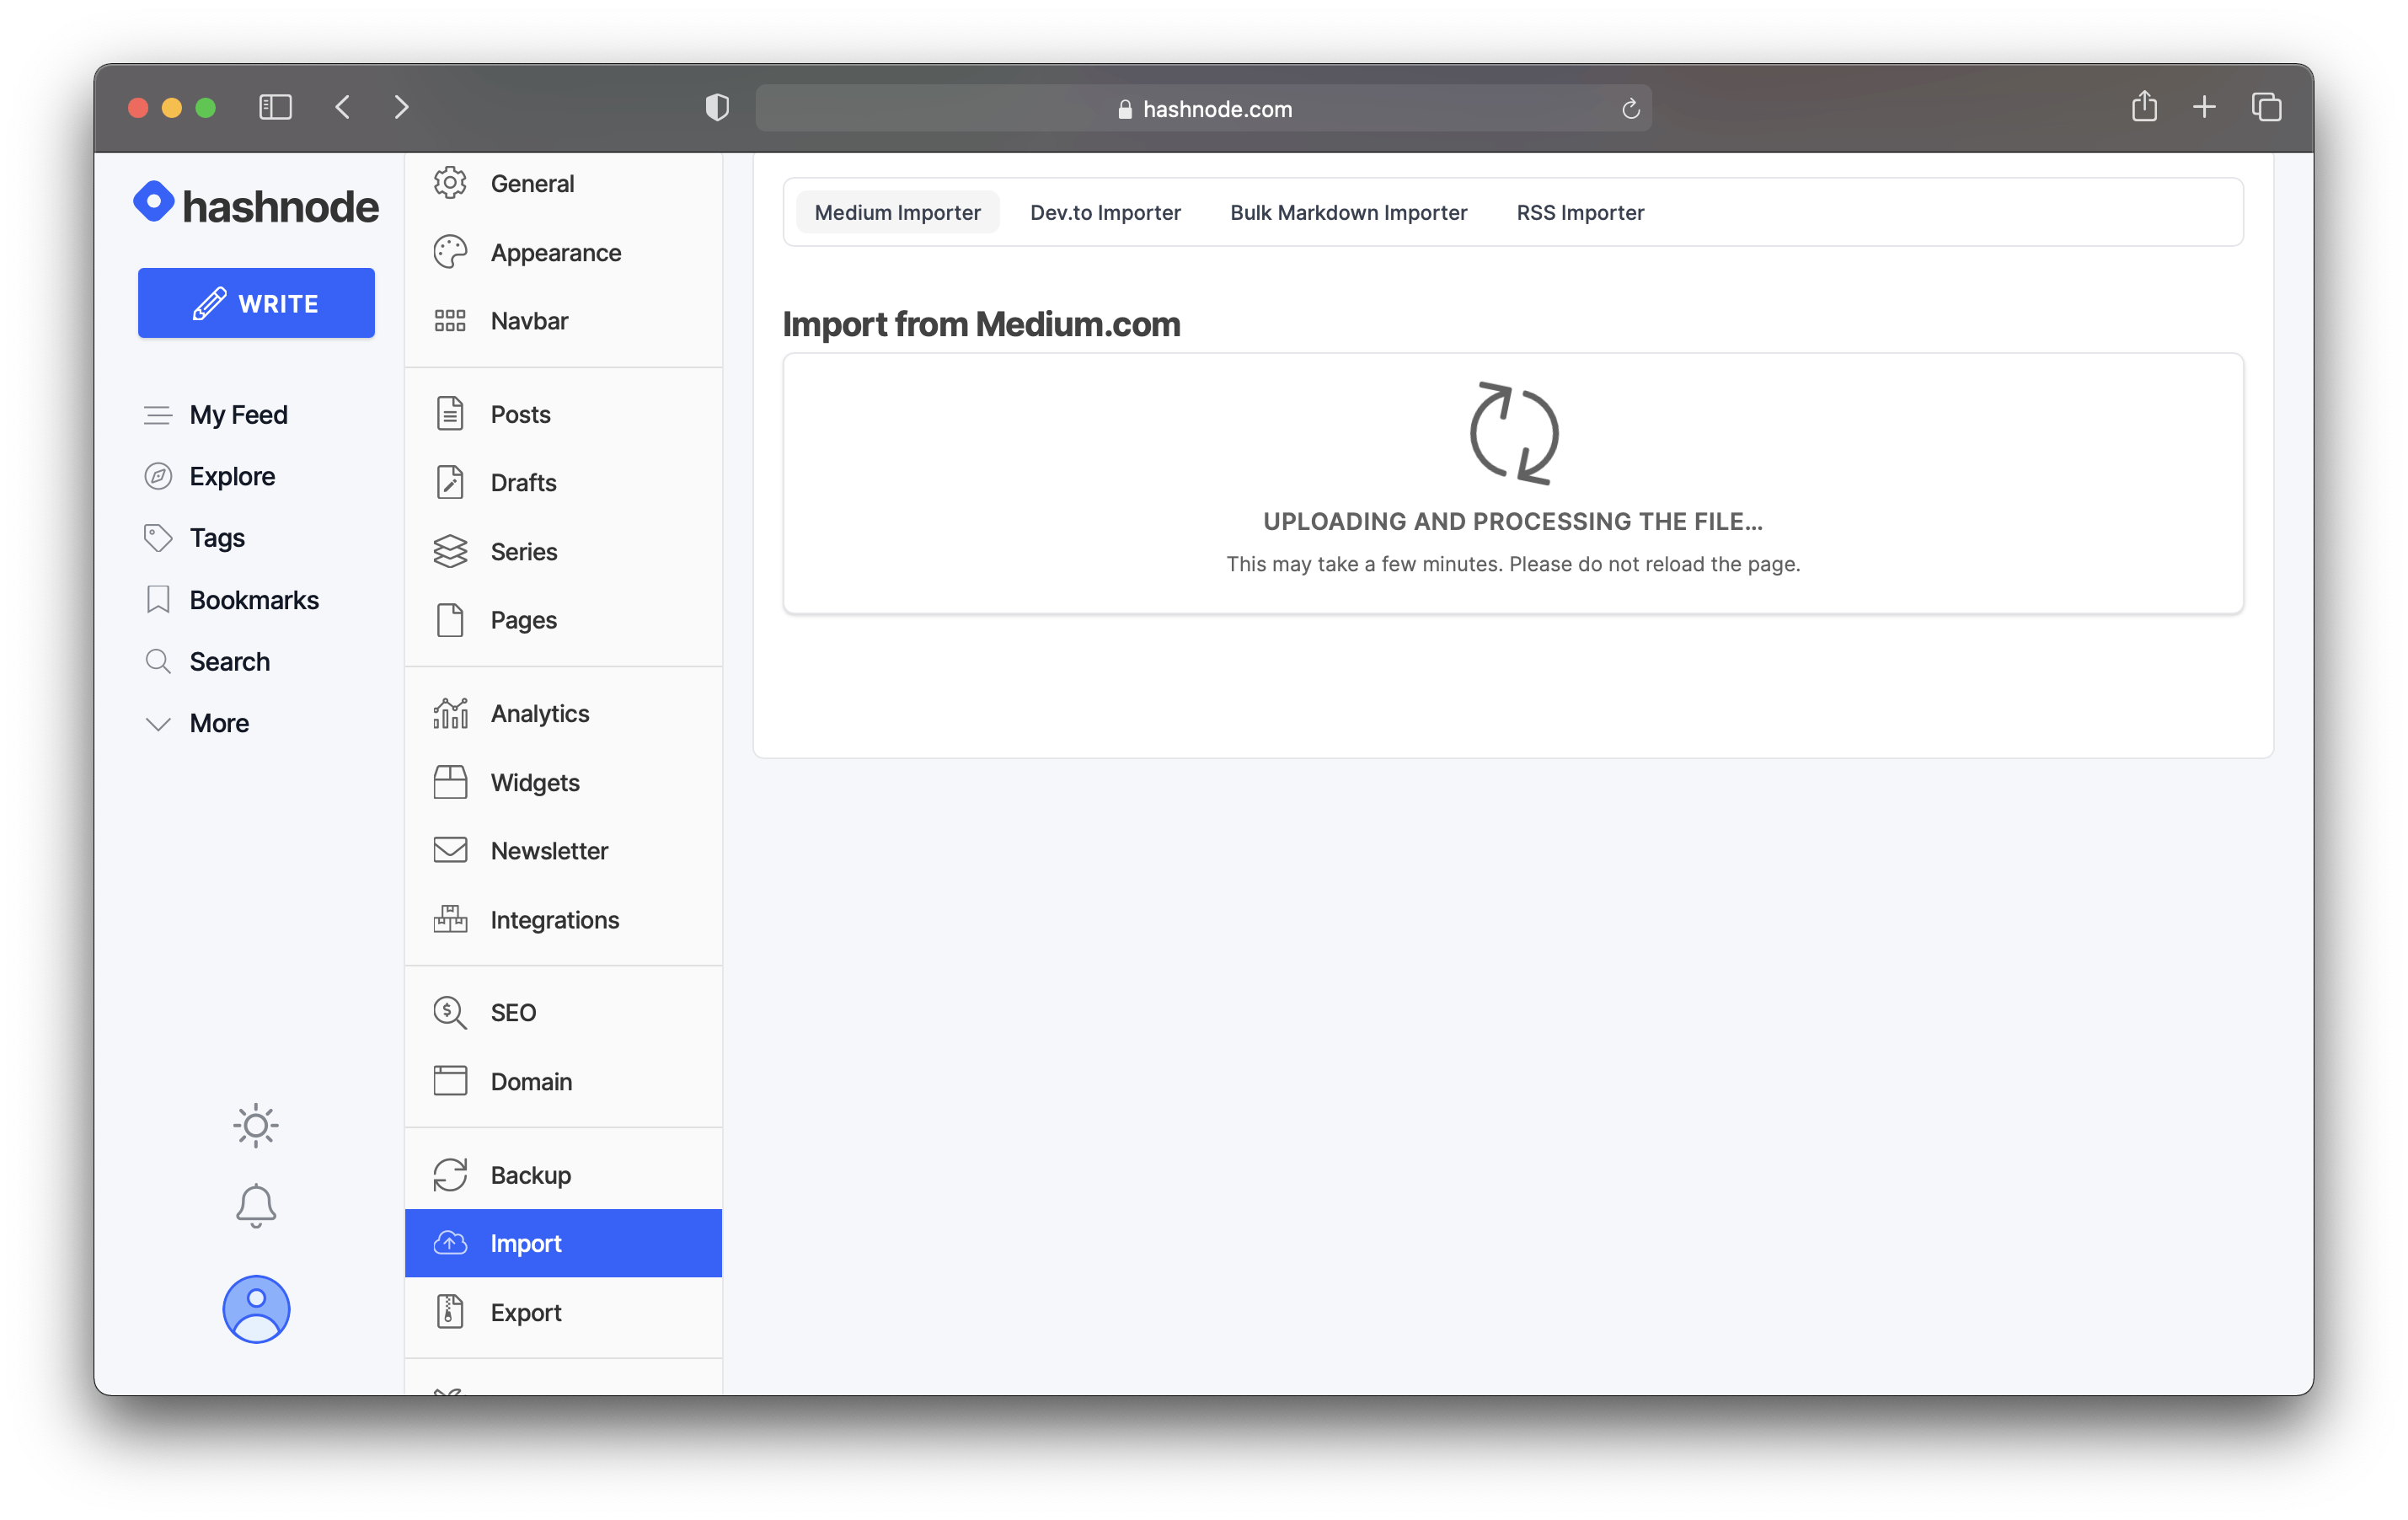 Figure 6
After that, the importer will show you a list of all the articles, as shown in figure 7 below. From here, you have the following options:
- publish all the articles
- publish only specific articles
Additionally, you can also toggle selections if you have too many articles to check/uncheck.
Lastly, you can either directly publish the articles on your blog or import them as drafts. Figure 7 illustrates the importer.
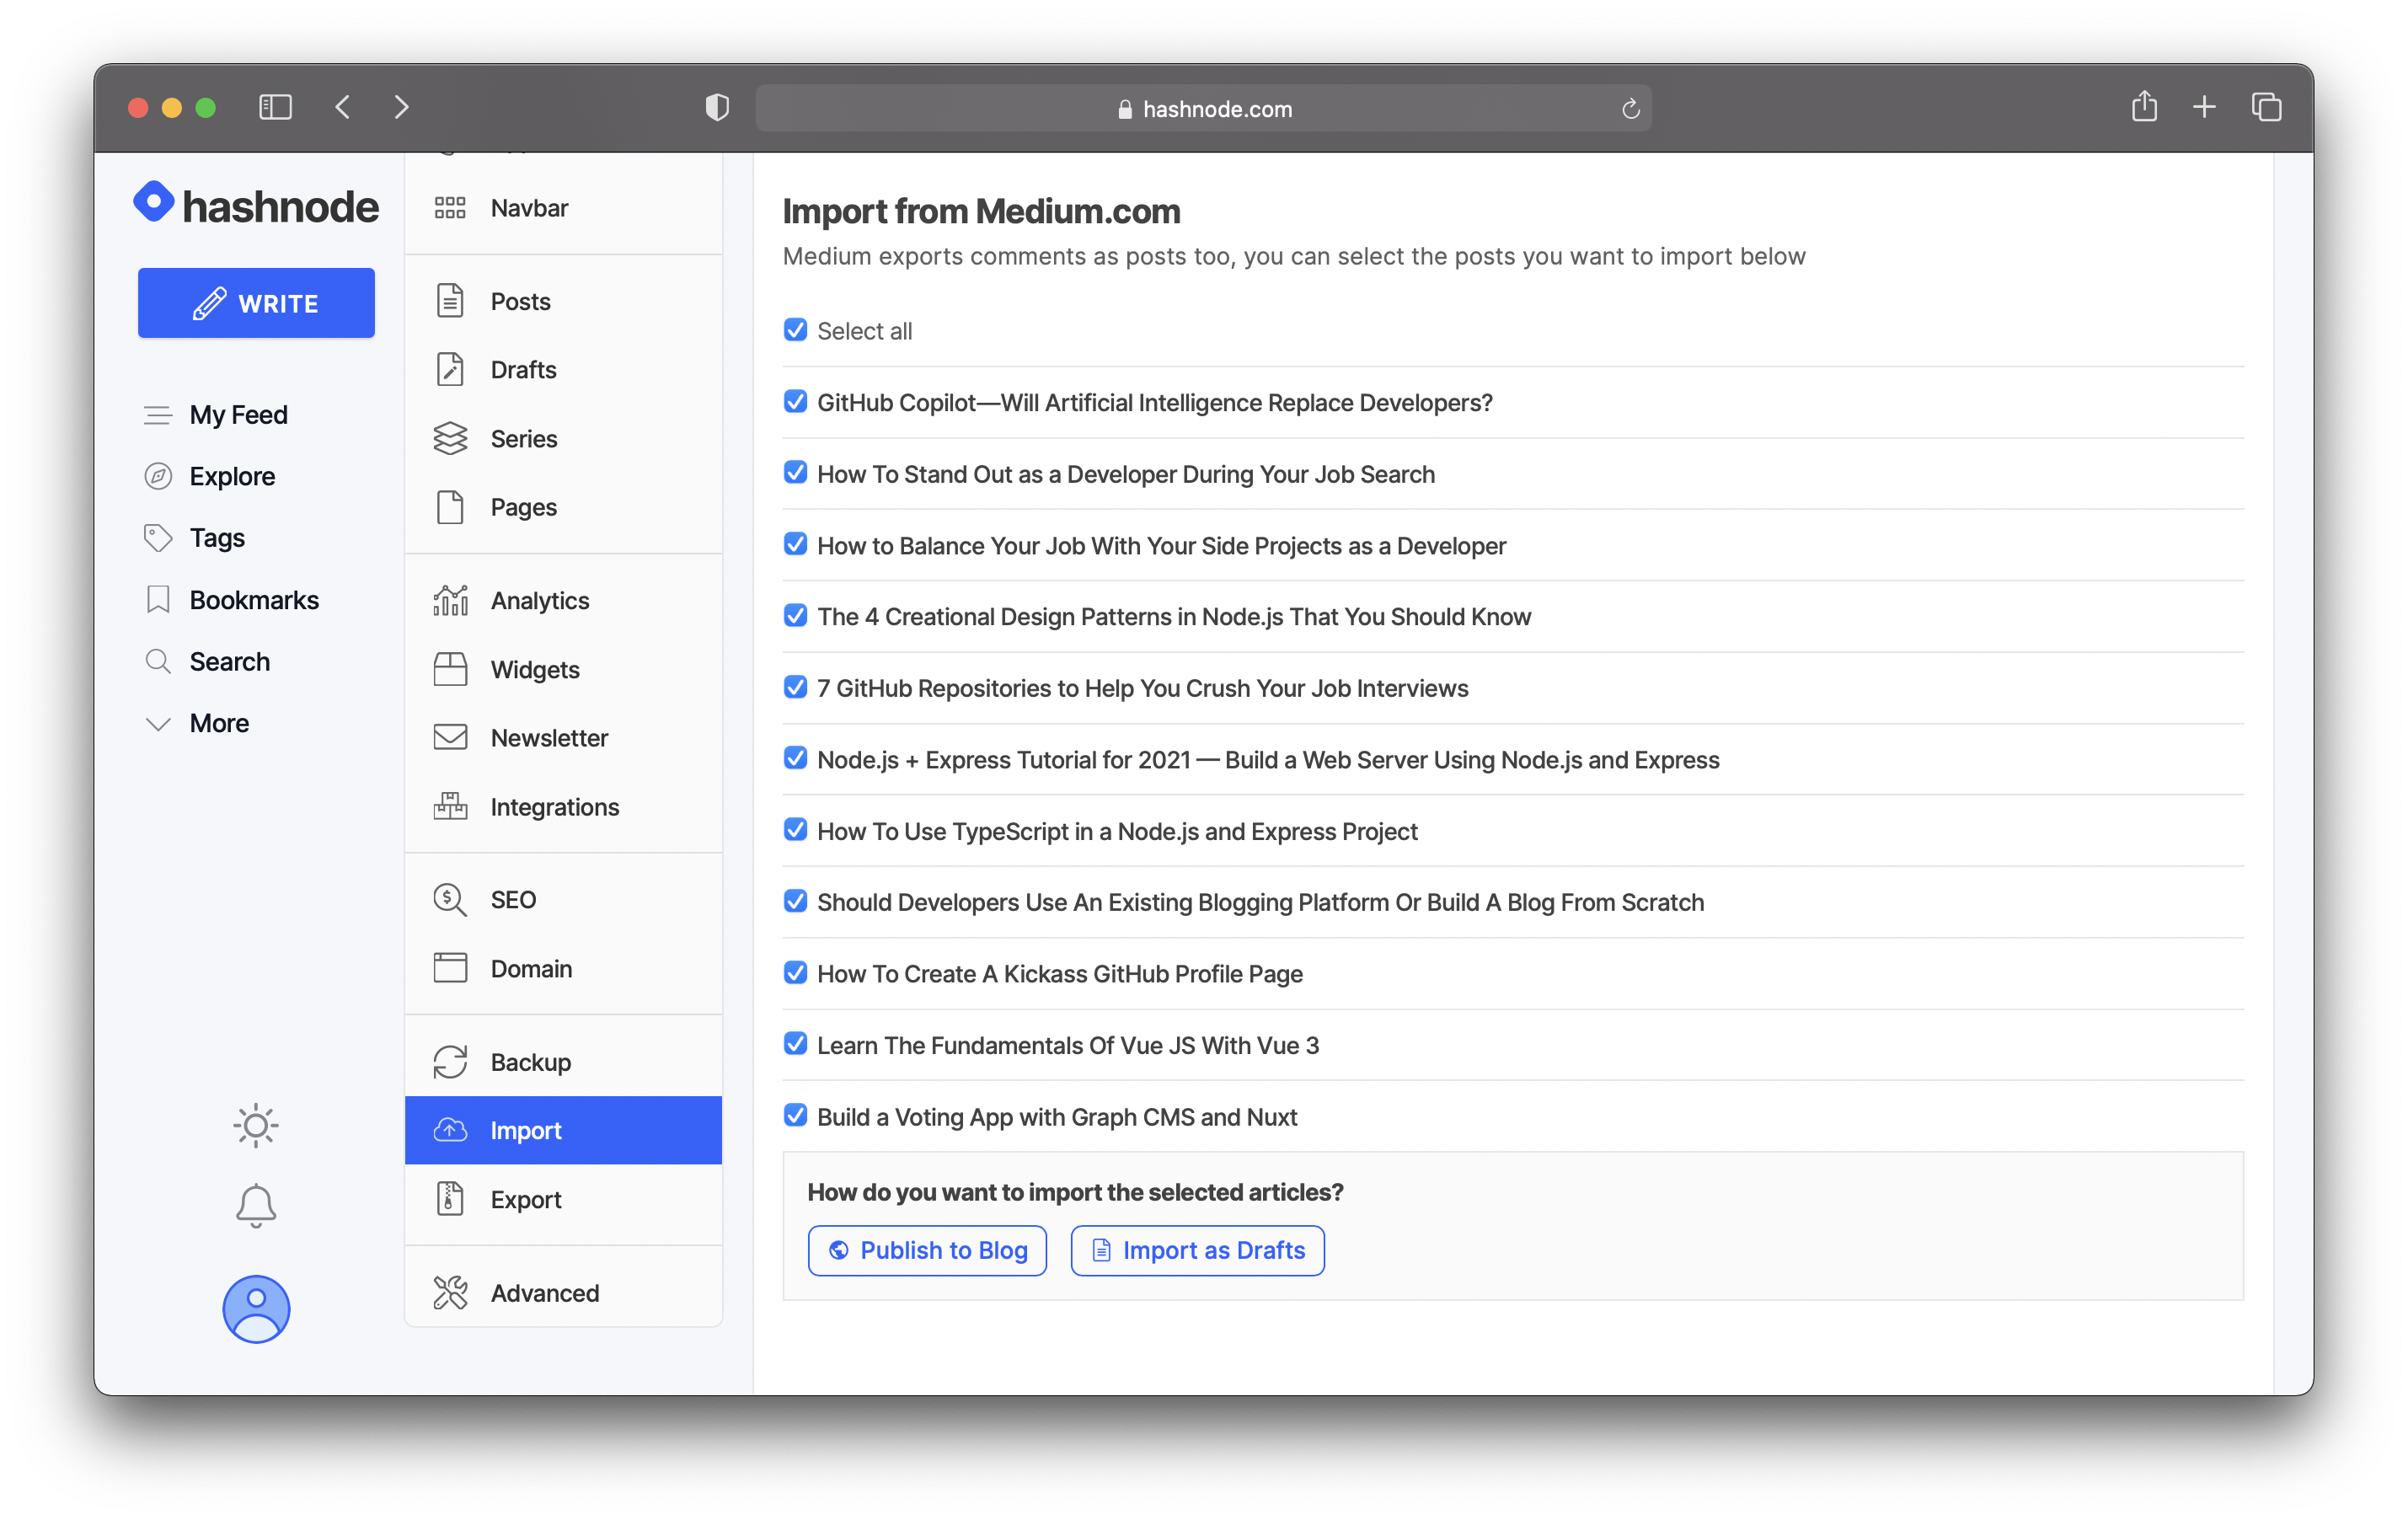 Figure 7
The importer will let you know once the articles are imported successfully. For example, figure 8 shows an example of importing articles as drafts.
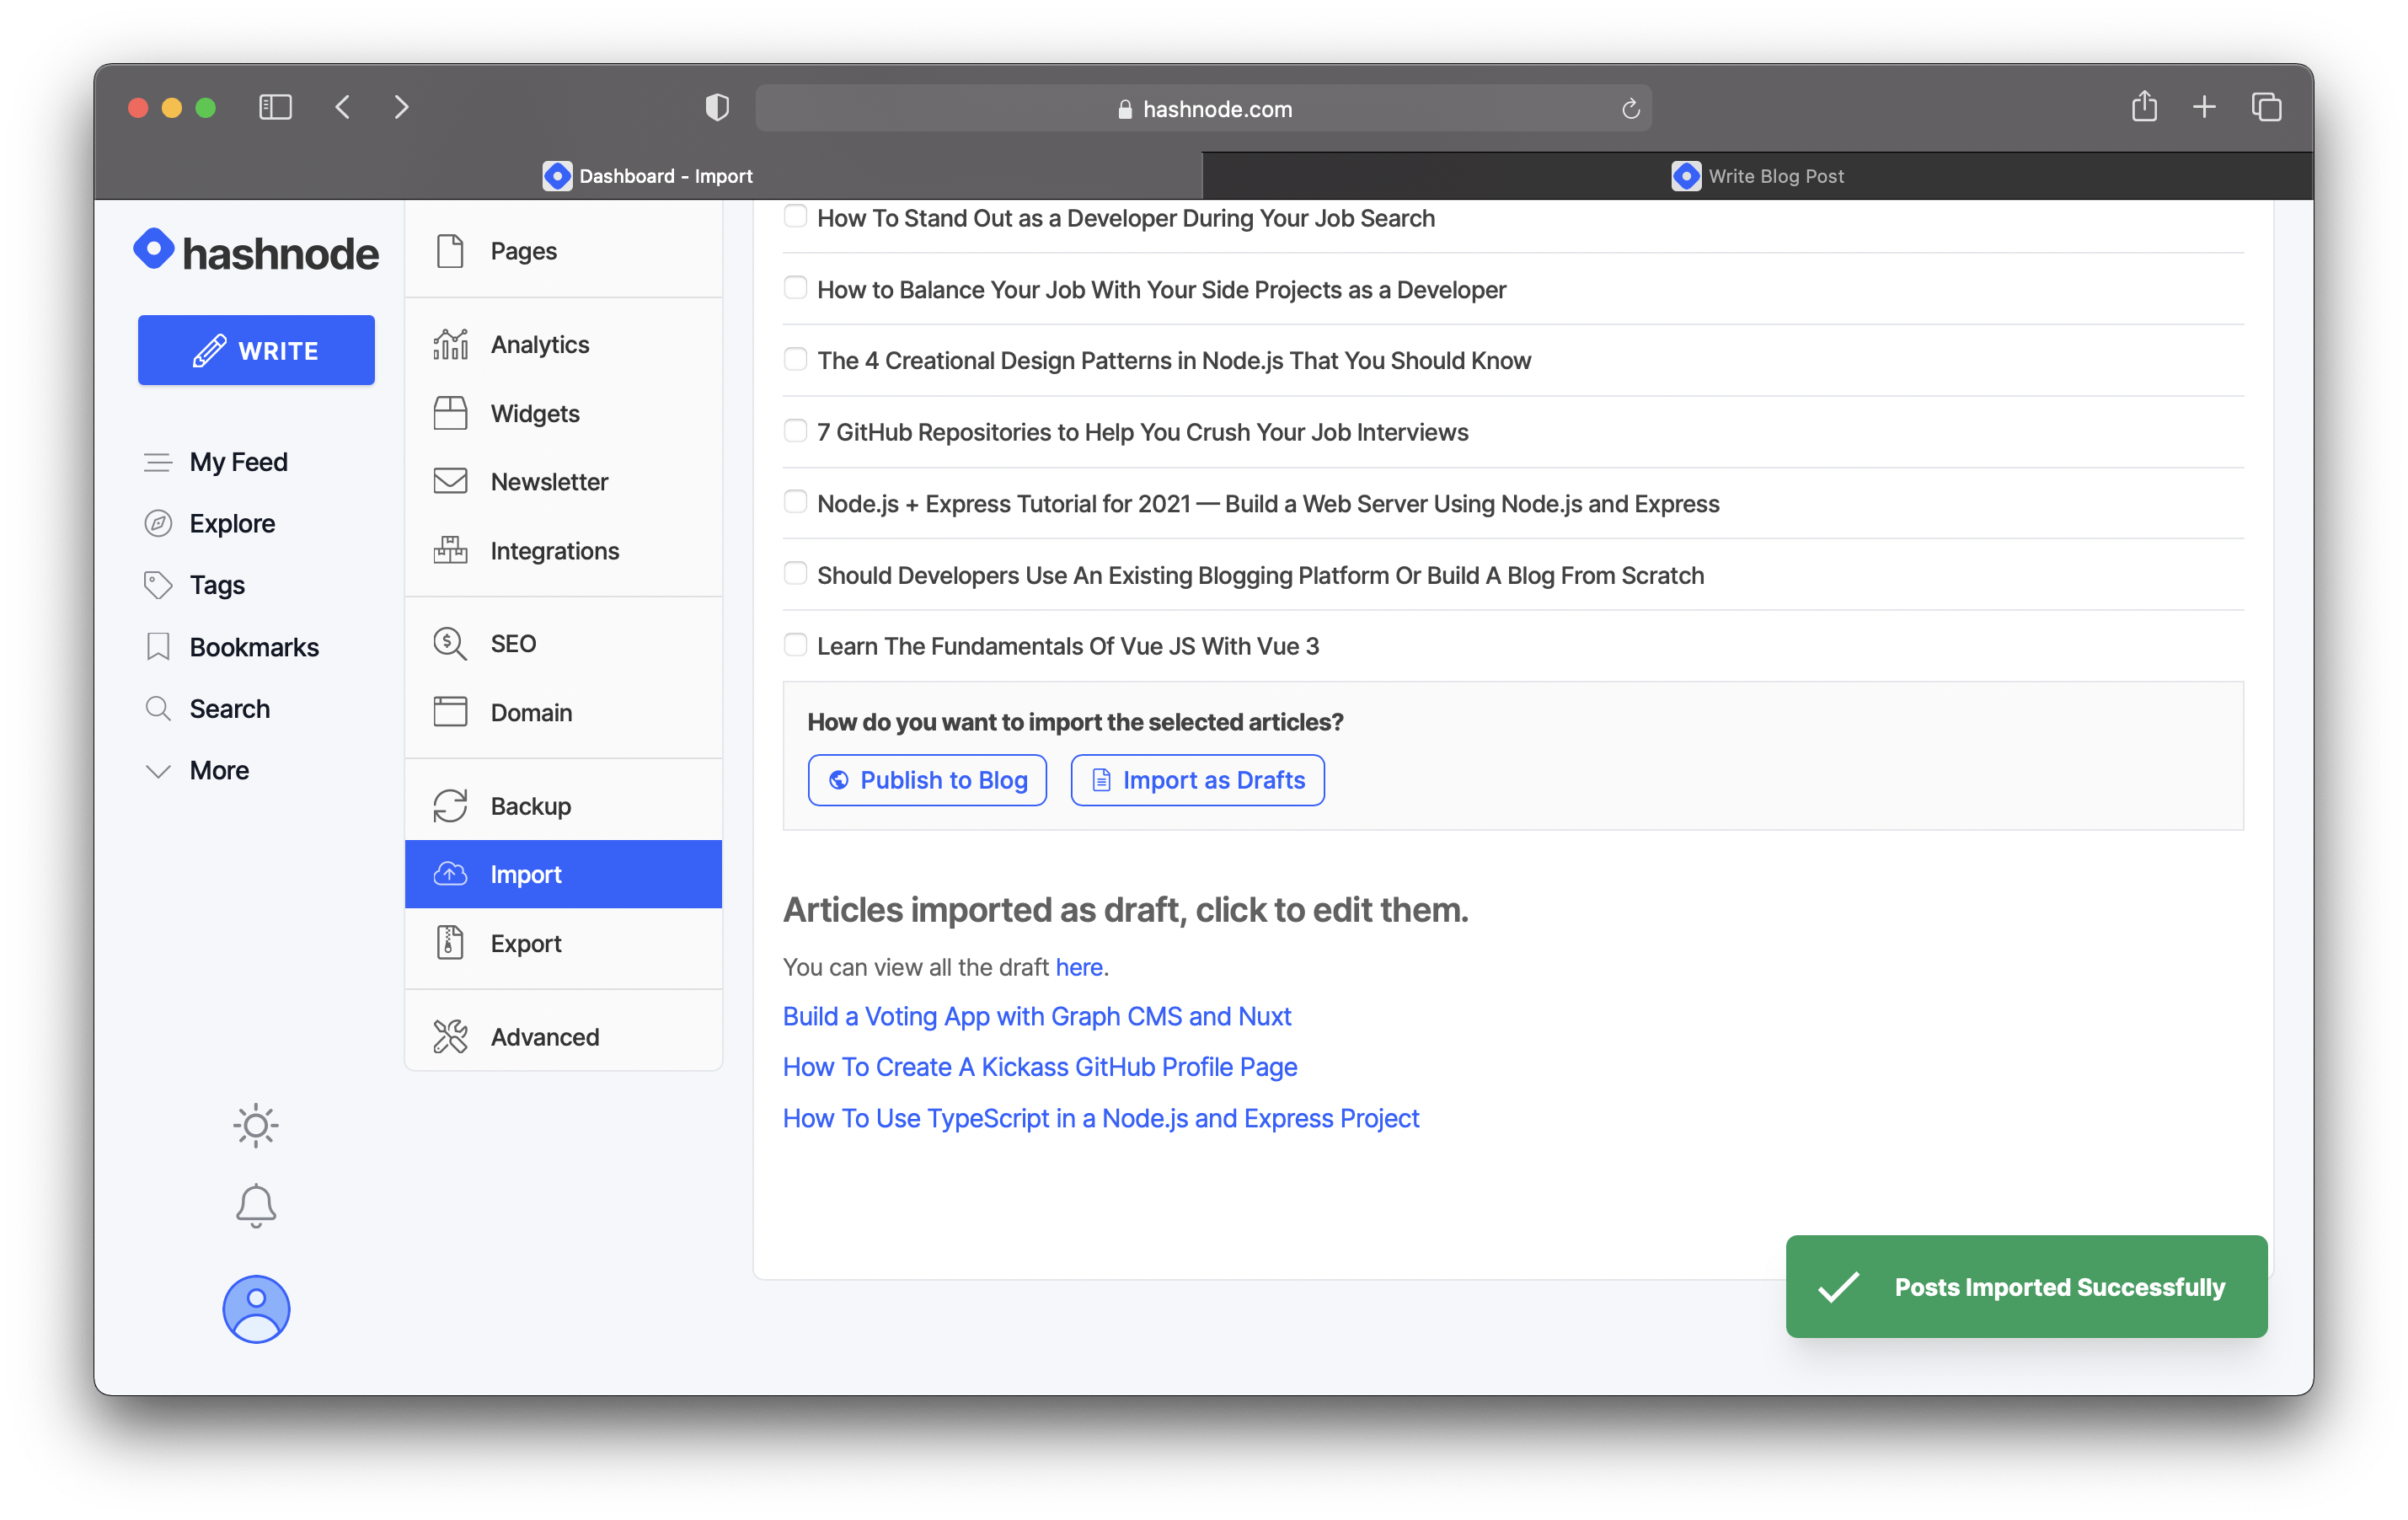 Figure 8
Additionally, you can see the imported articles in your dashboard. For instance, if you go to drafts, you should see the articles imported from Medium.
Figure 9 shows the articles imported from Medium as drafts. From here, you can further edit them or publish them directly.
 Figure 9
Alternatively, you can publish the articles on your blog straight from the importer. If you click on the button saying "Publish to Blog", the importer publishes the article on your blog.
In figure 10, you can see the published article under "Articles published to blog".
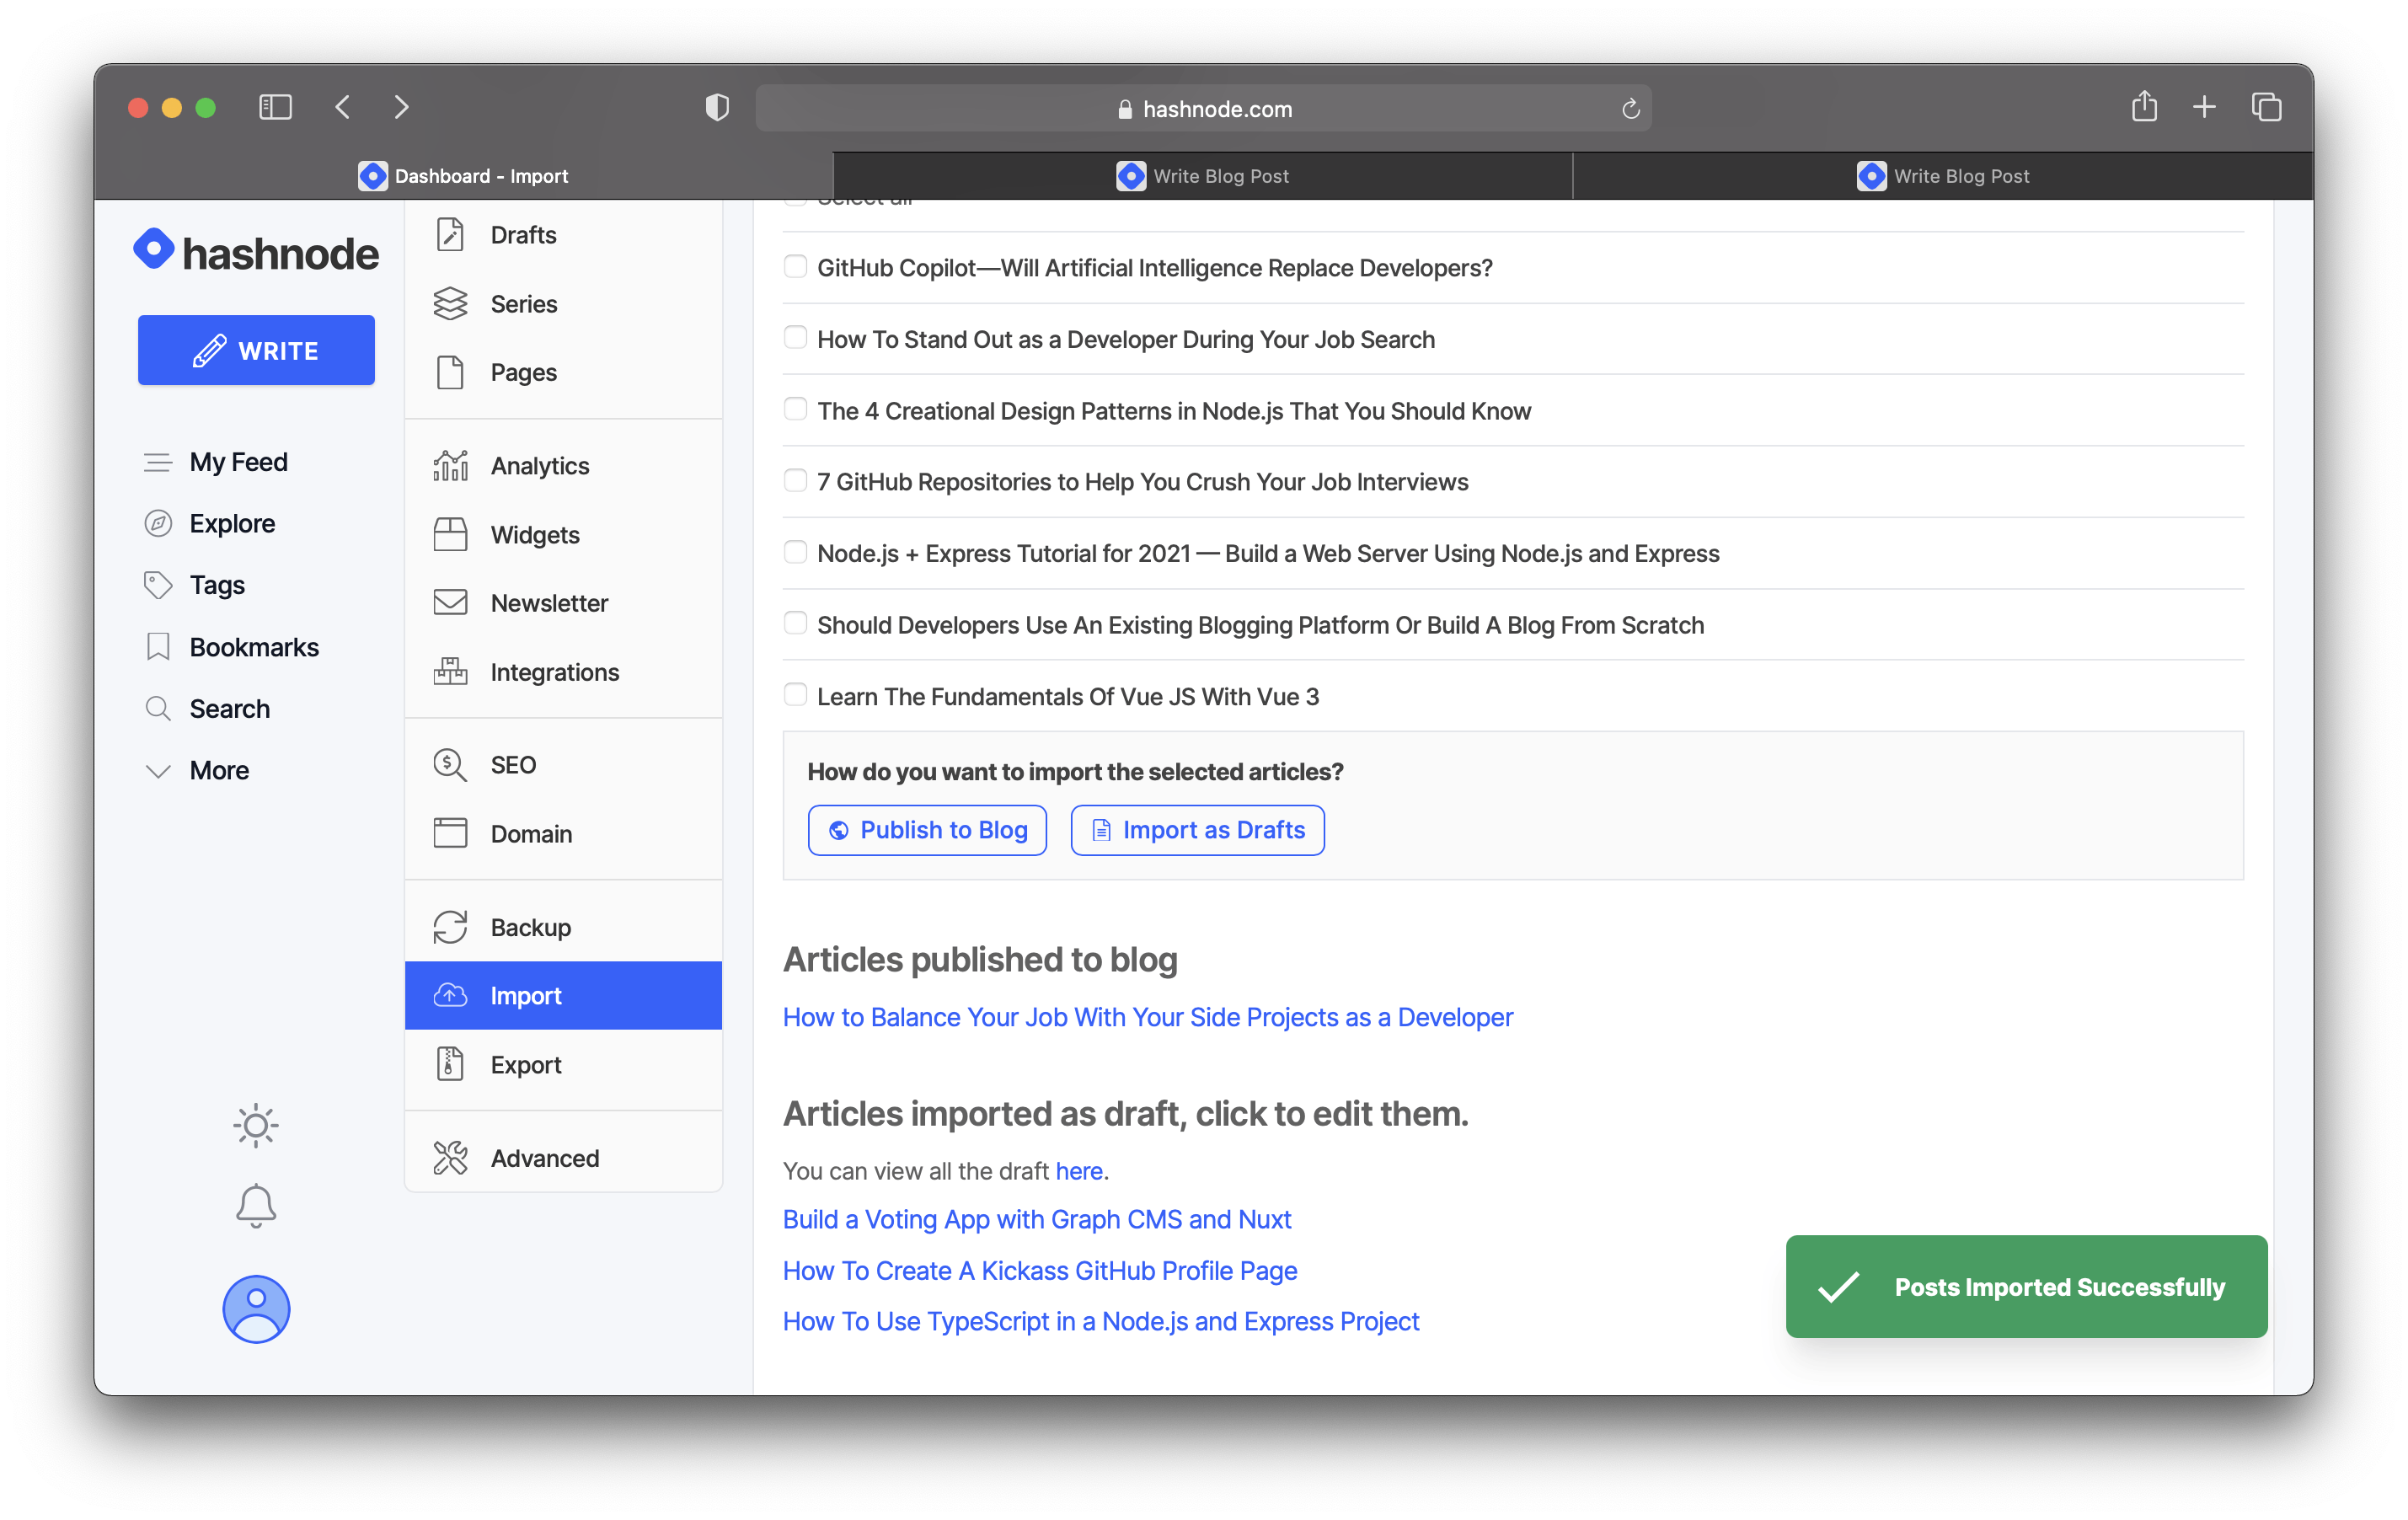 Figure 10
If you go to your blog, you should see the imported article. Figure 11 below shows an example with the imported article.
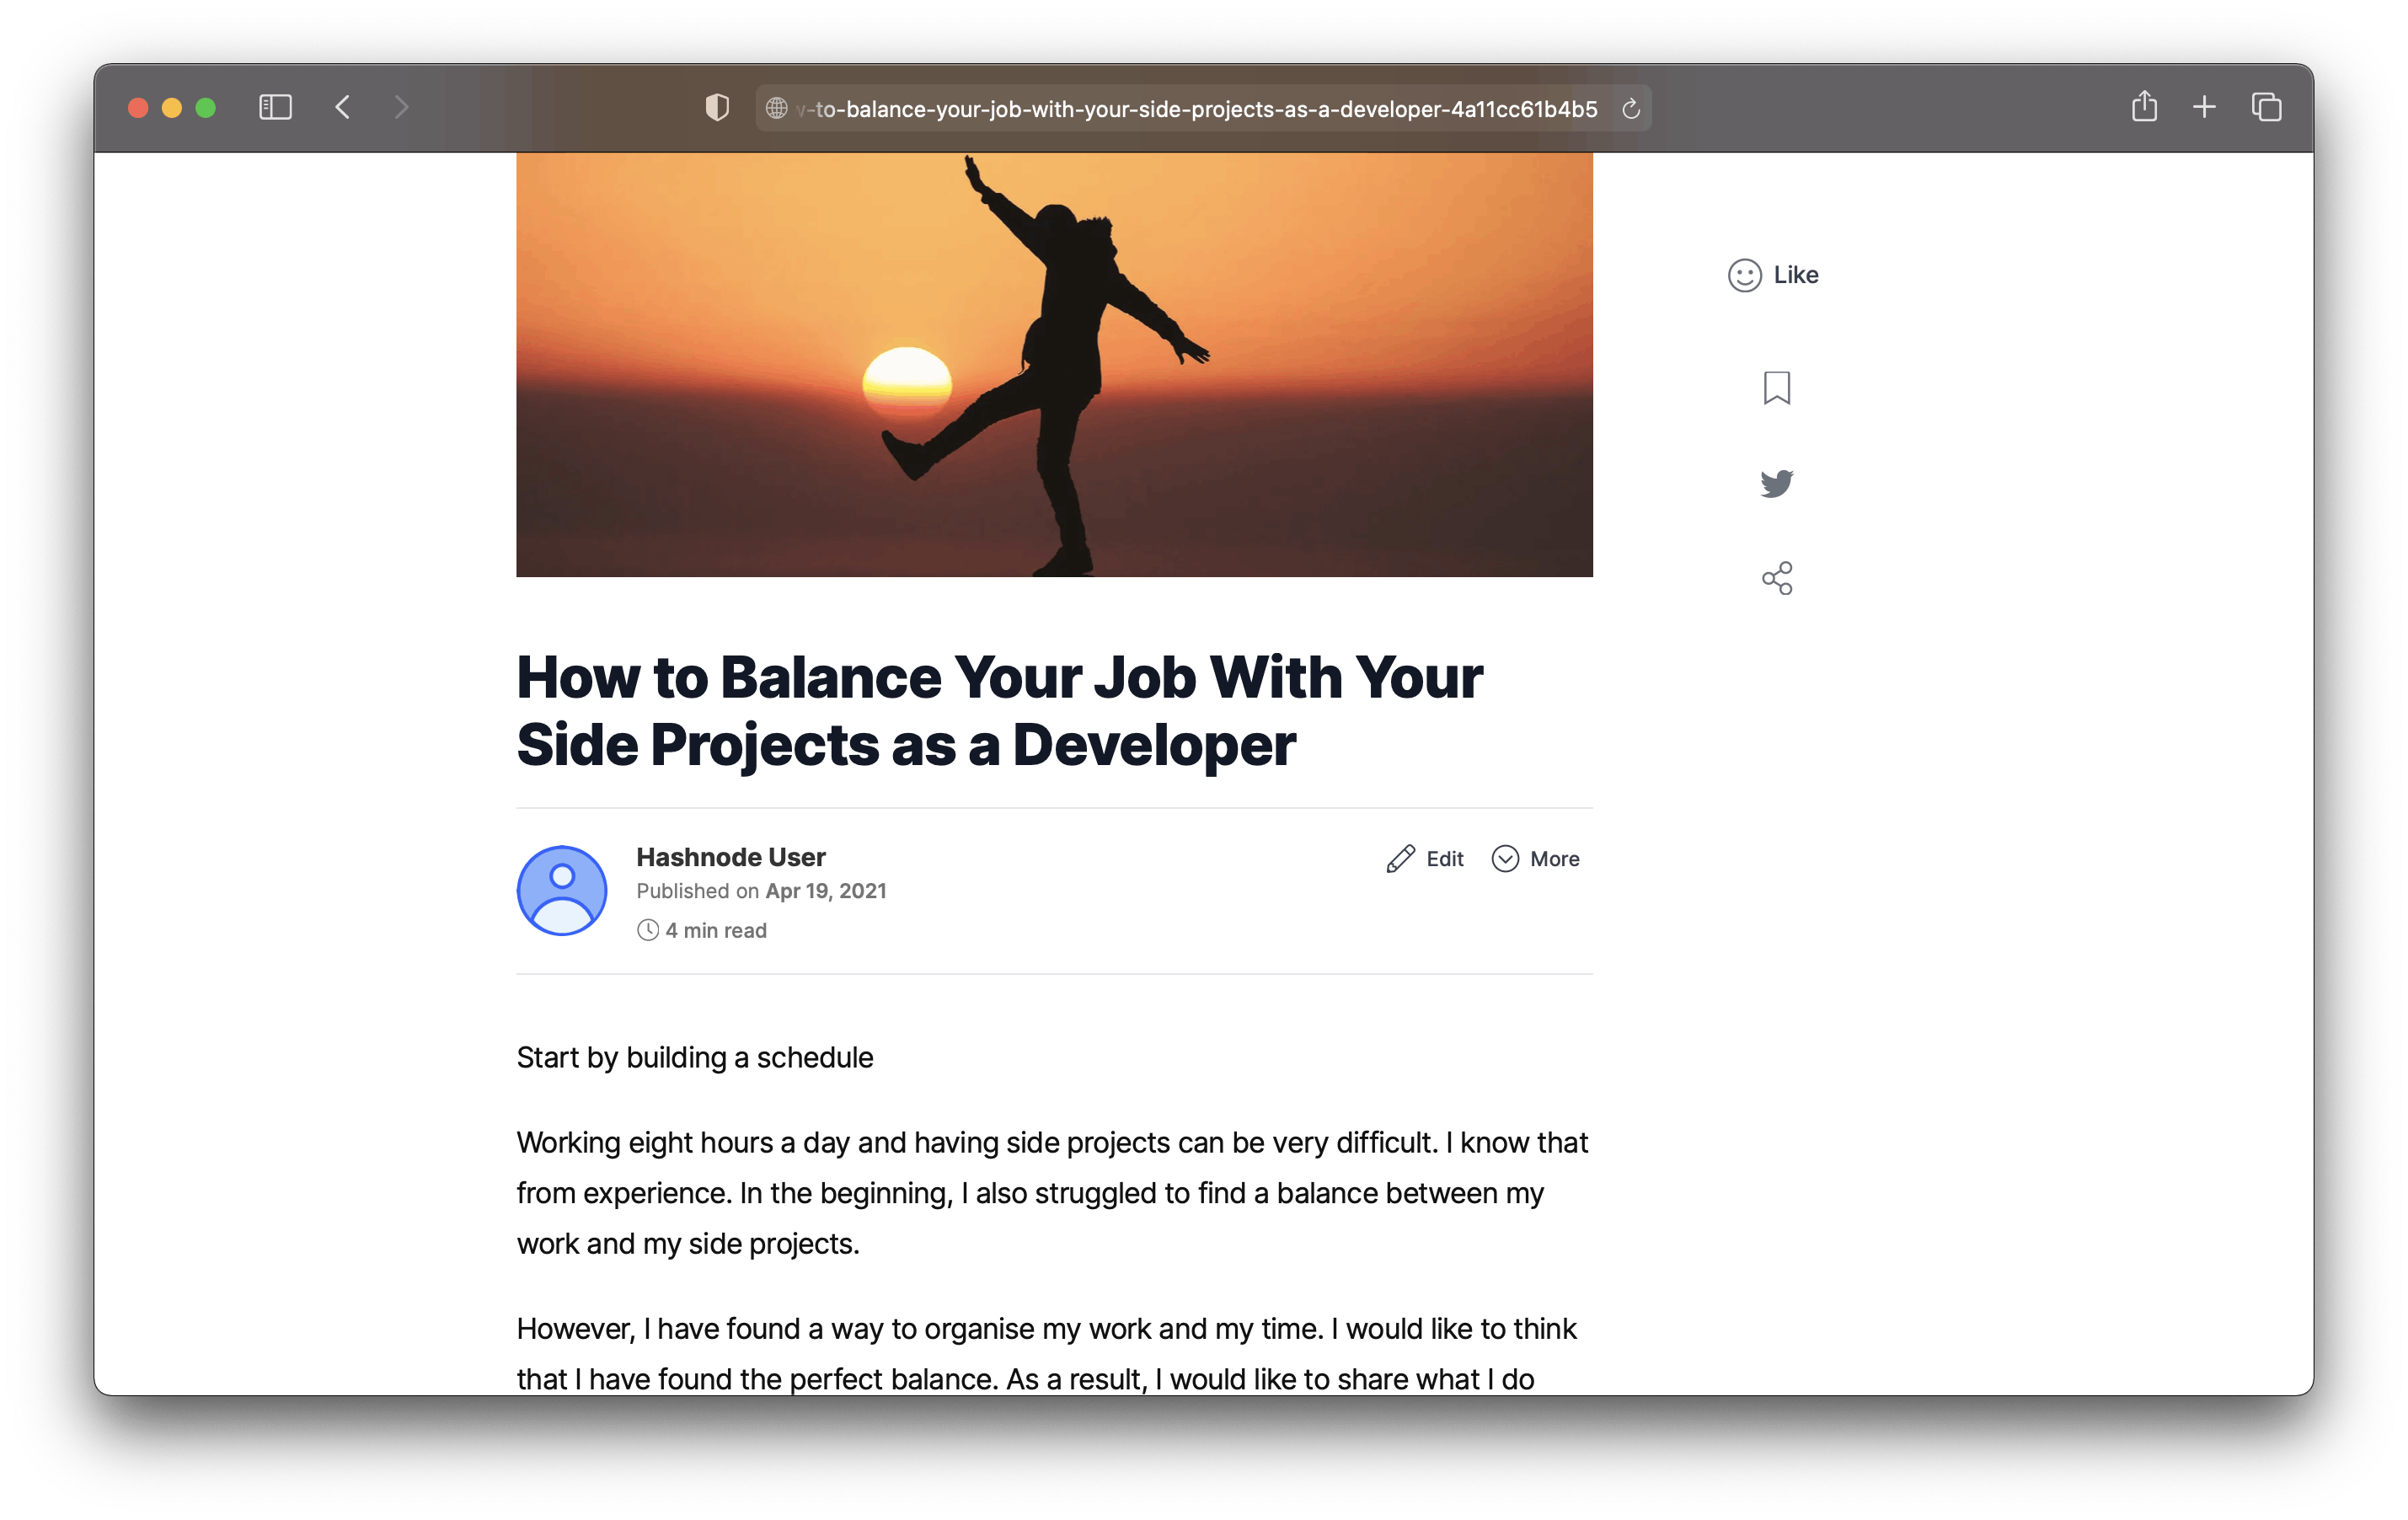 Figure 11
Therefore, all you have to do is to upload the exported articles from Medium, select the articles you want to import and publish them or import them as drafts.
Conclusion
Thus, you can migrate from Medium to Hashnode in a handful of steps and a few minutes.
If you want a blog without paywalls and restrictions, with non-intrusive monetization and custom domain, you came to the right place.
Be an early adopter and join Hashnode! Start creating and consuming content for free!