


Split Complex Ideas into Series and Make Your Readers Happy
Hashnode's Series feature enables you to group together related posts so your readers can find exactly what they need.


Sometimes there are topics that do not fit too well in one article. The article would become too long and difficult to read.
Let's say you want to write about JavaScript fundamentals, which consists of several topics. One way of doing that would be to cram multiple topics into one article.
But that would be a really long article, which is off-putting for readers!
The Solution
Instead of cramming multiple topics into one article, you can create a Series. This way, each article covers a single topic.
With Hashnode's Series feature, you can group related articles together in one place. In the aforementioned example, you could have a Series named "JavaScript Fundamentals" and then an article for each topic.
In Figure 1 below, you can see an example of a Series from my blog. The topic is AWS, and each article in the Series talks about different AWS services. This way, people can find all my AWS articles in one place.
All Series come with their own corresponding URLs and landing pages. Figure 1 below show the page for my AWS Series, which you can access through this link.
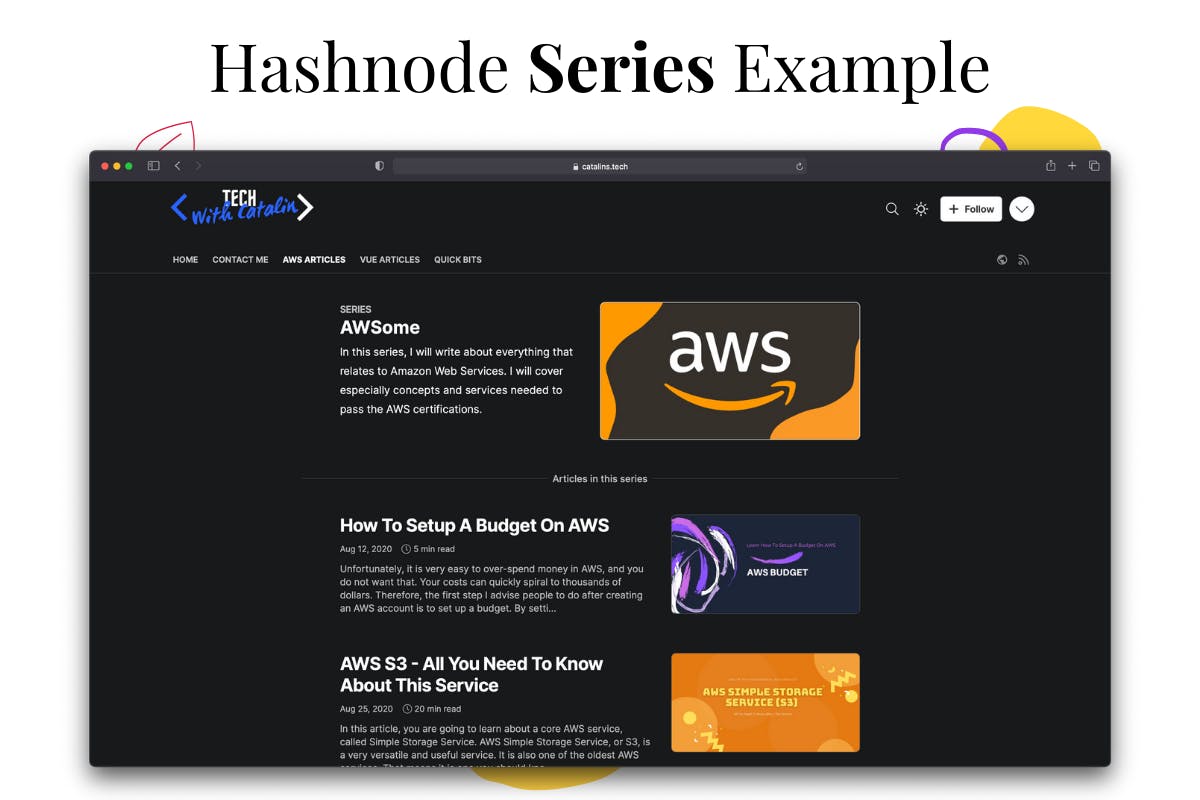 Figure 1
As you can see, Hashnode's Series feature is handy for complex topics, or when you want to group together similar articles. It's more elegant, organized, and it makes it easier for people to consume your content.
How to Create a Series
The first step to create a Series is to go to your blog dashboard. Once you're in, click on the option that says Series (see Figure 2 below).
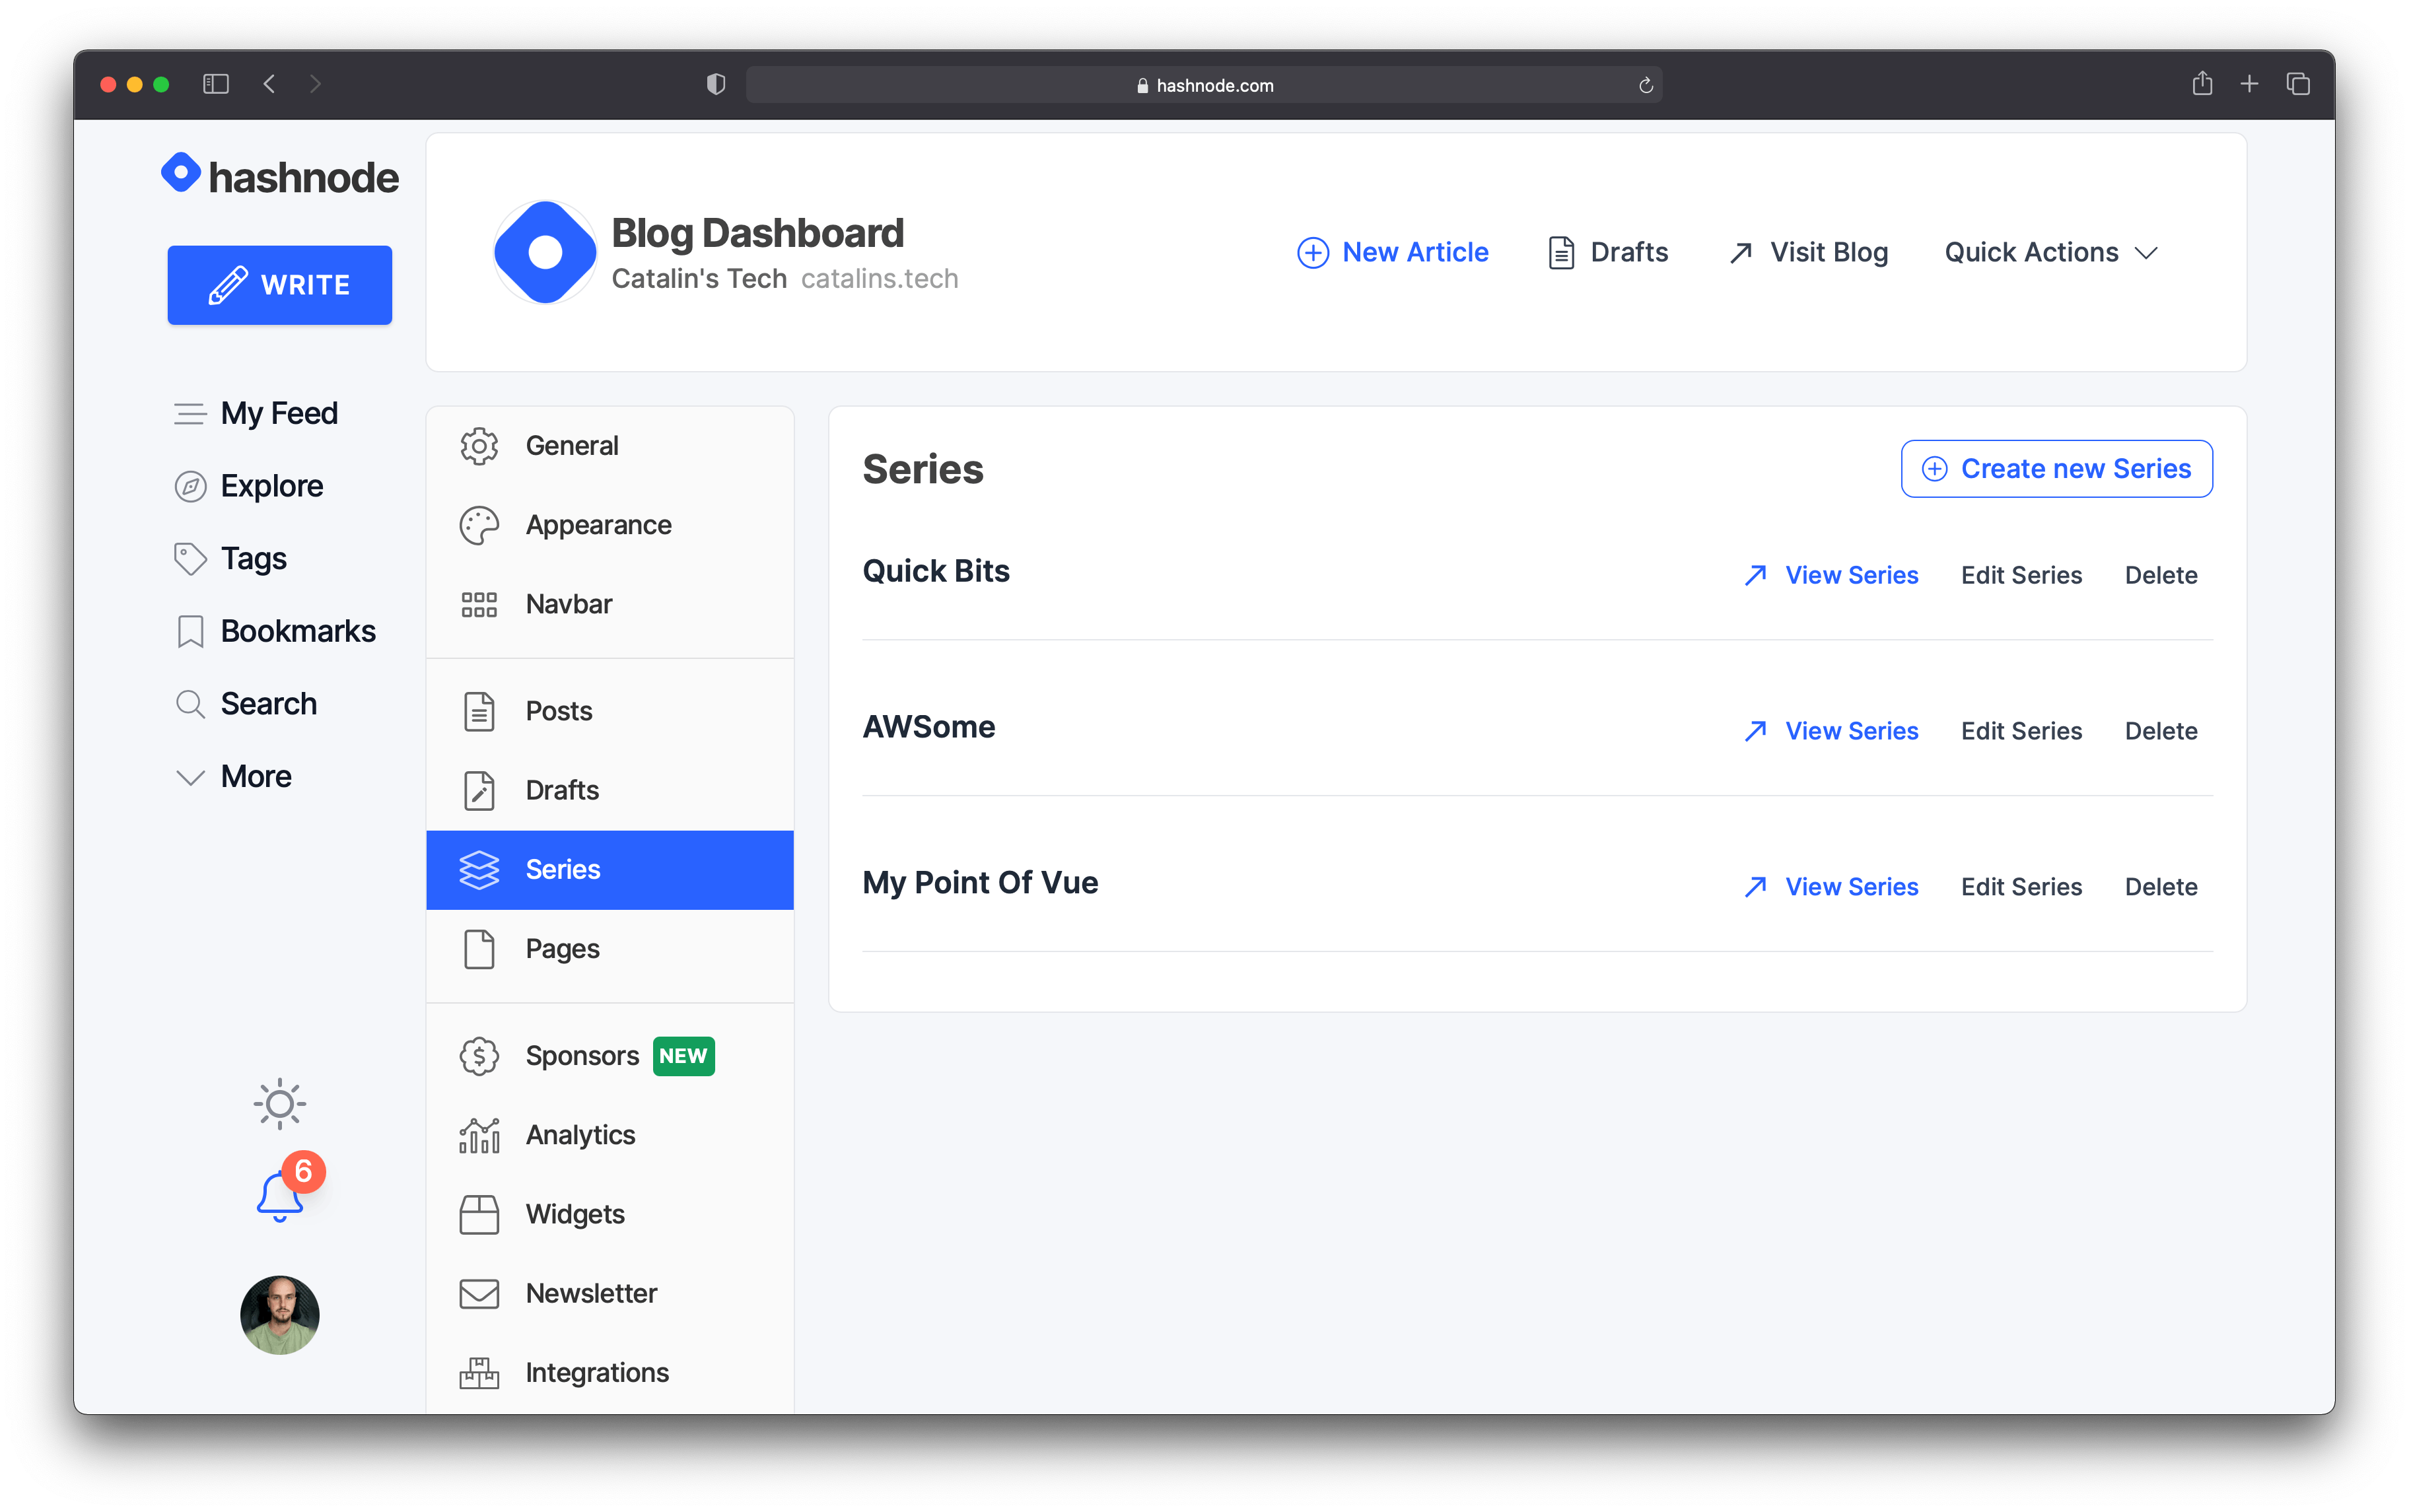 Figure 2
Now that you're on the Series page, you should see all your existing Series, if you have any. Otherwise, you can create a new Series by clicking on the Create new Series button.
The button opens a new page where you can add the details about your Series, including:
- name
- custom slug
- description
- cover image
- post order (oldest or latest post first)
Figure 3 below illustrates a Series called "JavaScript Fundamentals":
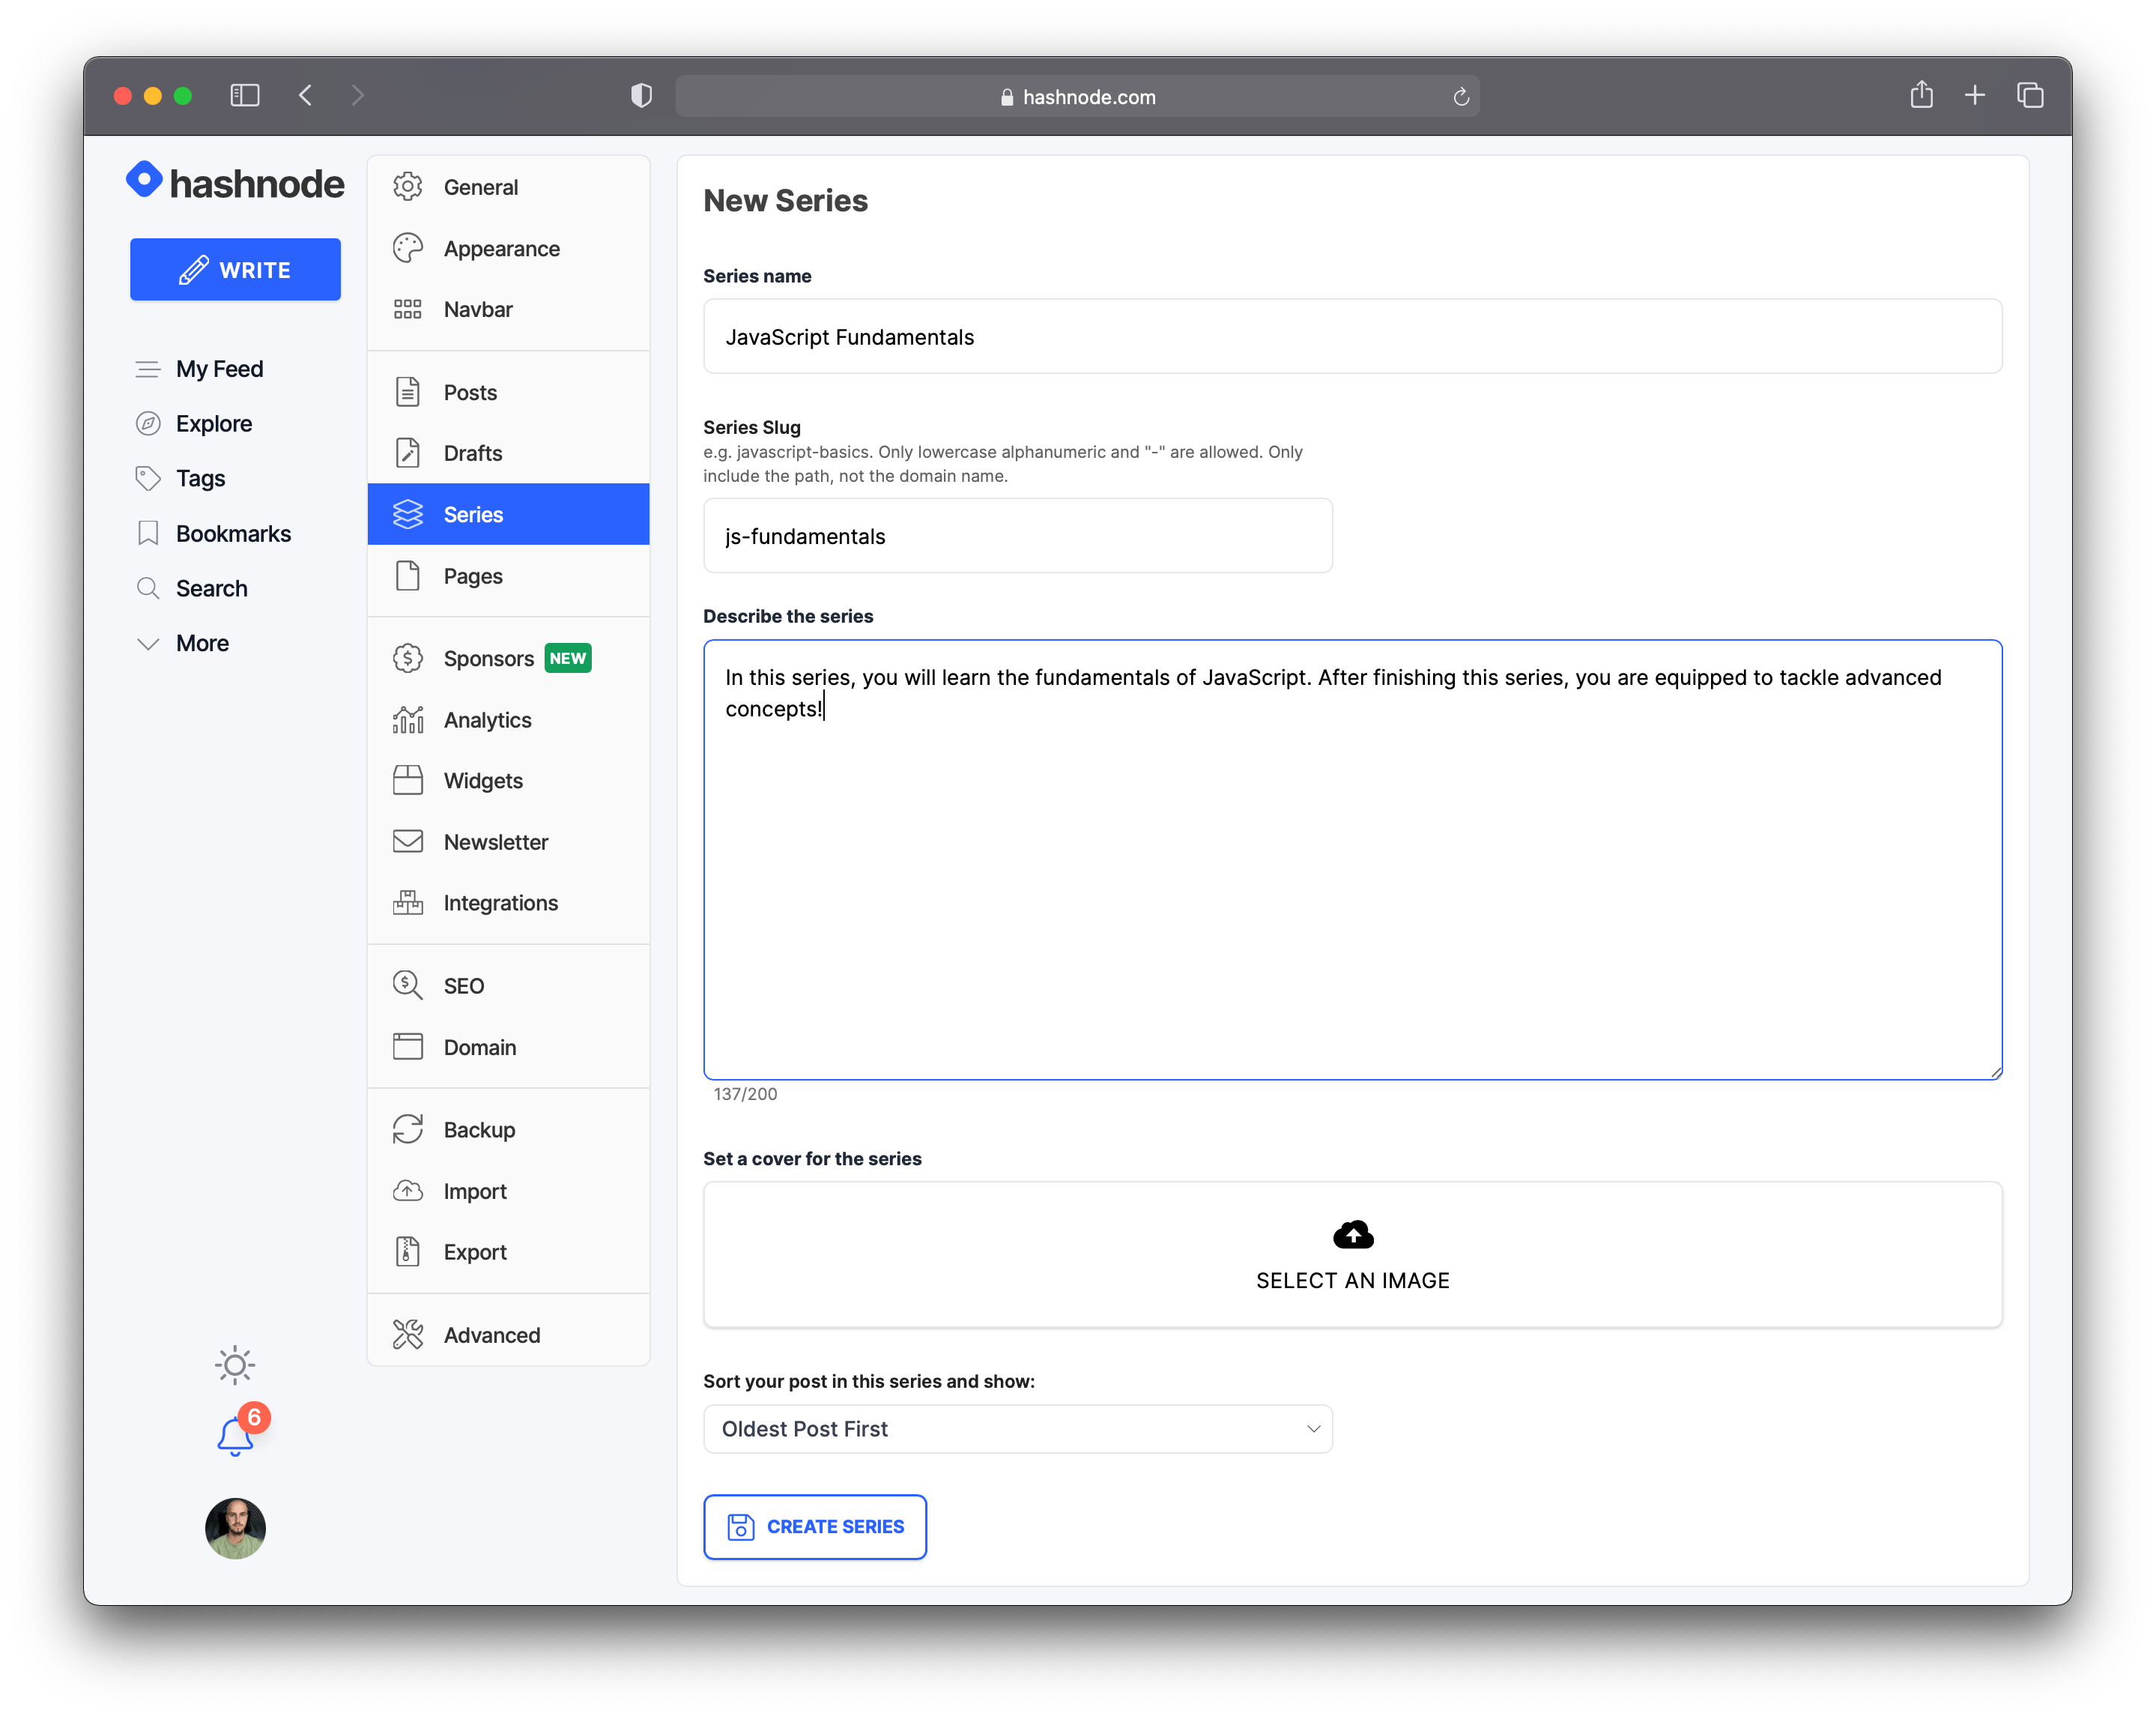 Figure 3
When you are done configuring your new Series, click on the CREATE SERIES button.
After you create the Series, it will appear in your dashboard. Figure 4 below shows the newly created Series:
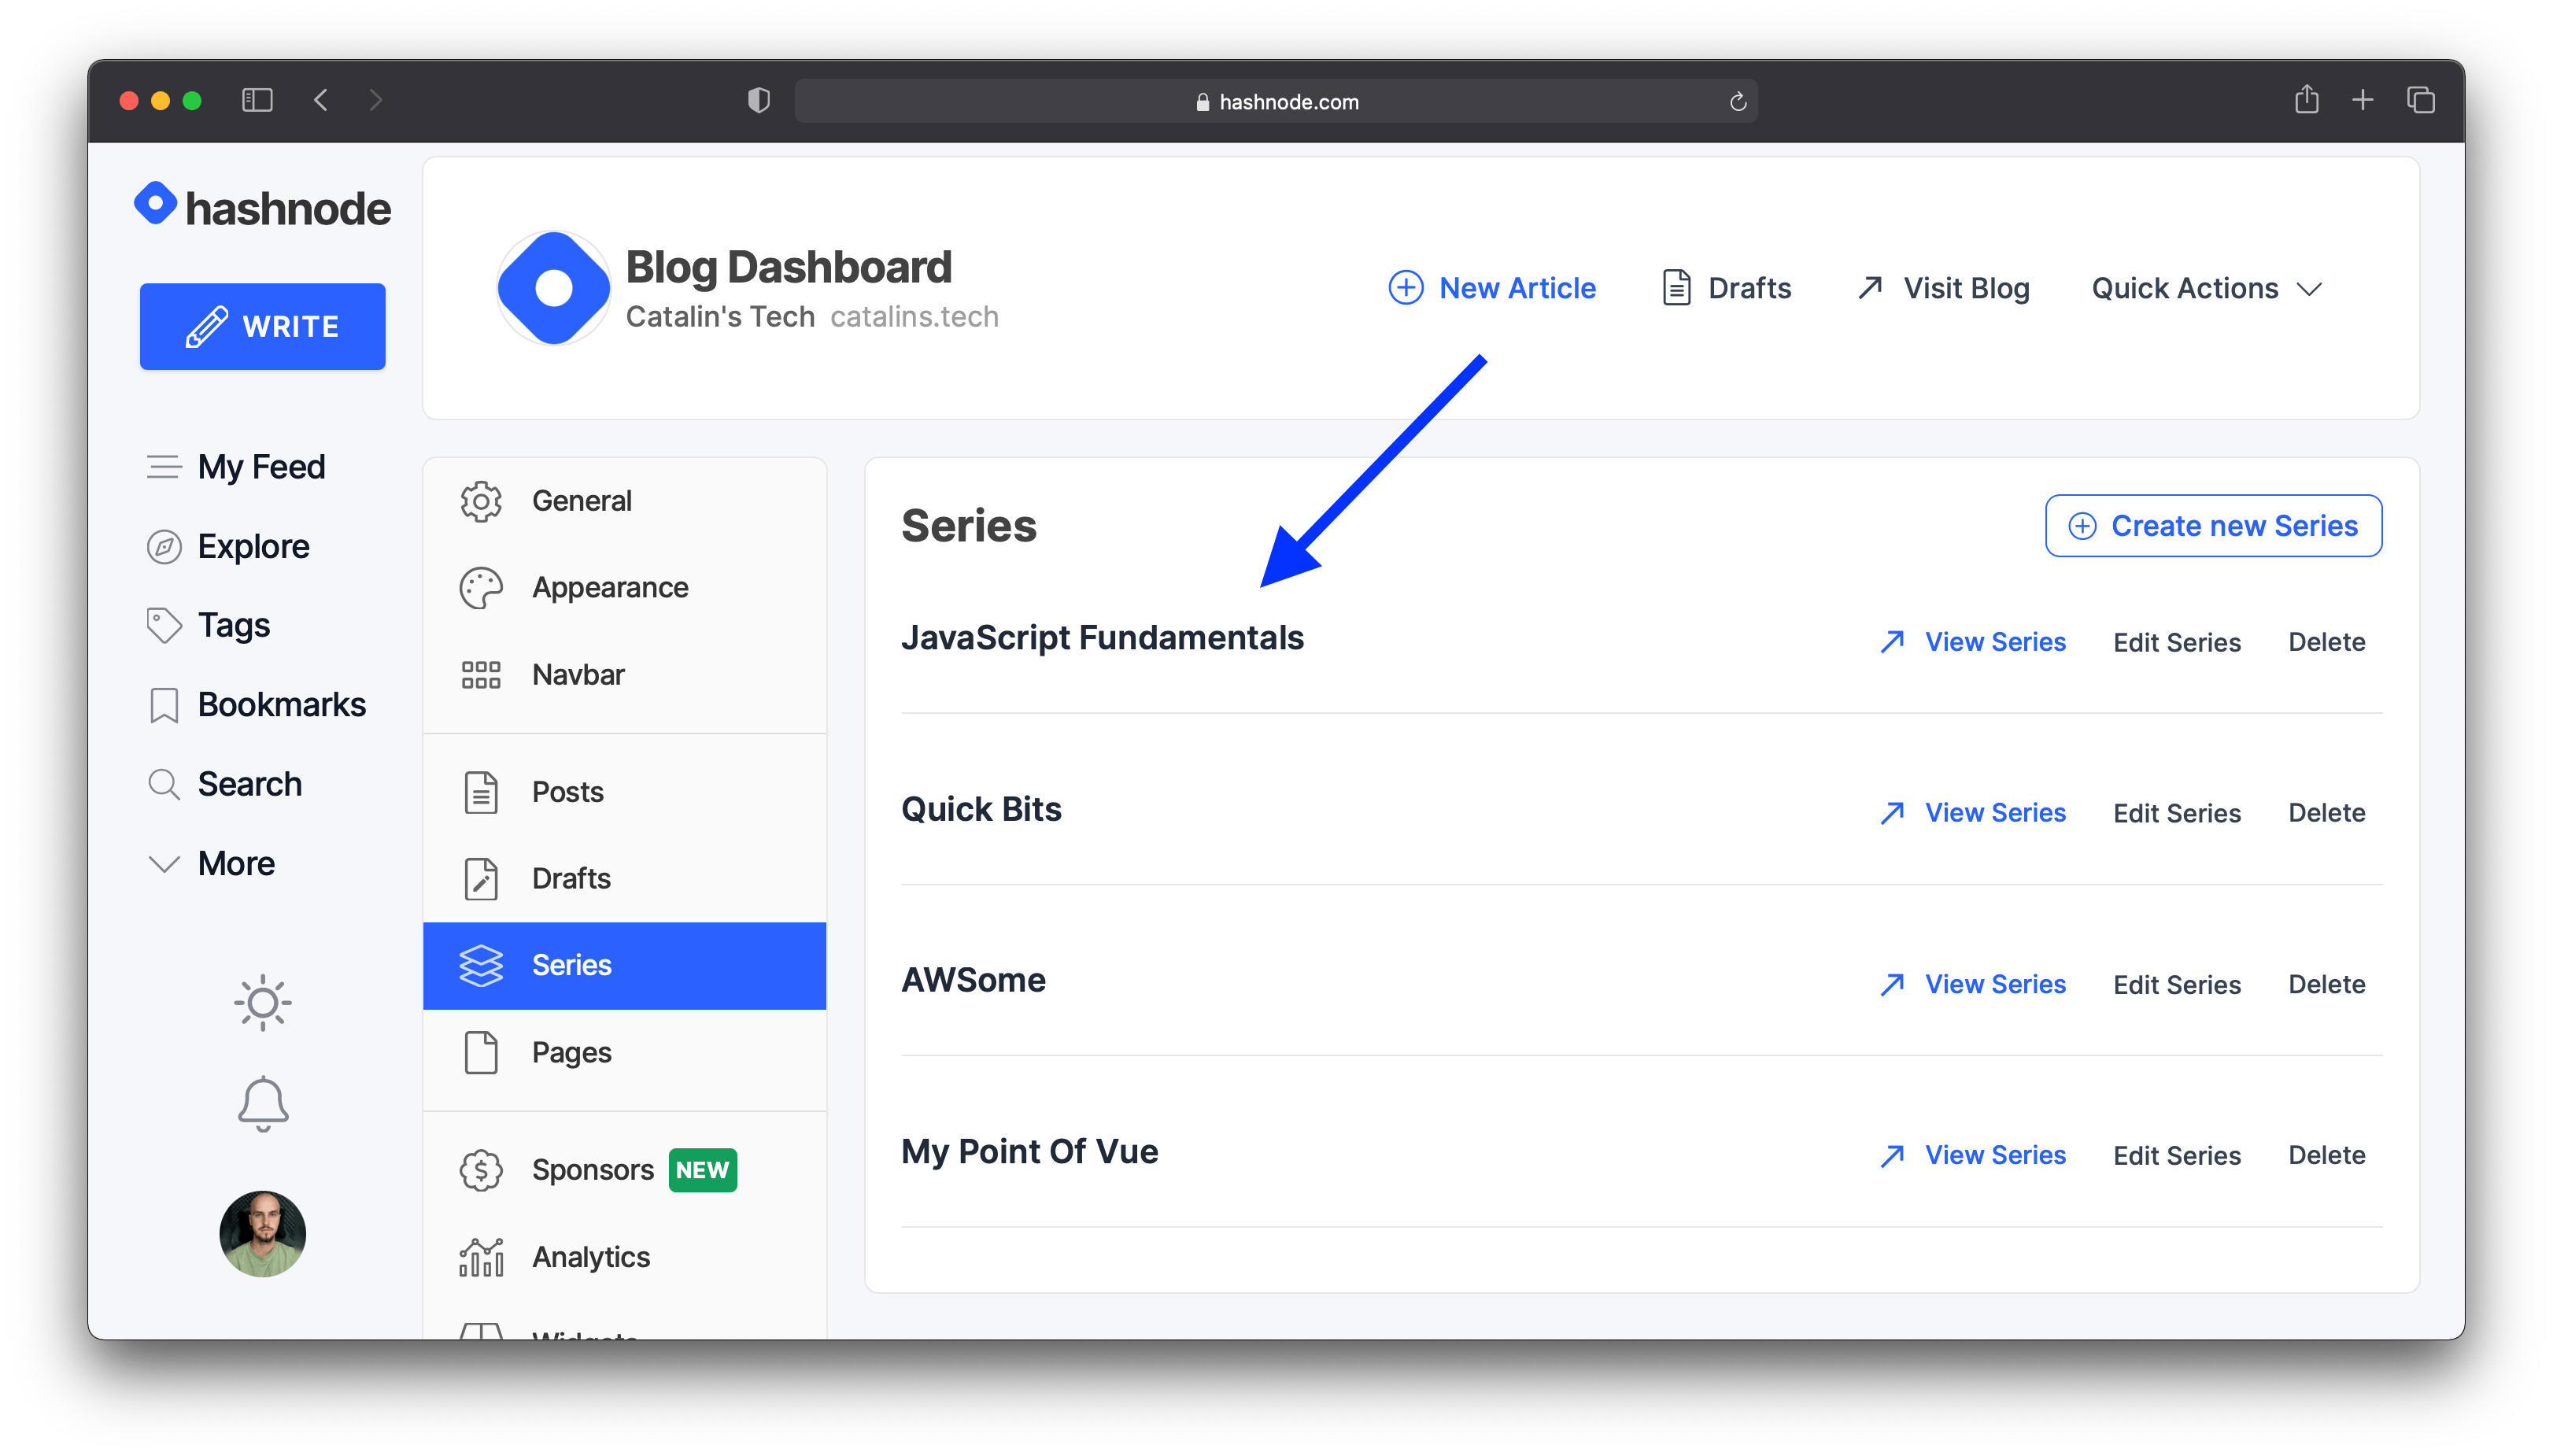 Figure 4
Now the Series is accessible to everyone, and you can start adding articles. In my case, the Series is available at catalins.tech/series/js-fundamentals.
Figure 5 illustrates how the Series looks on the blog:
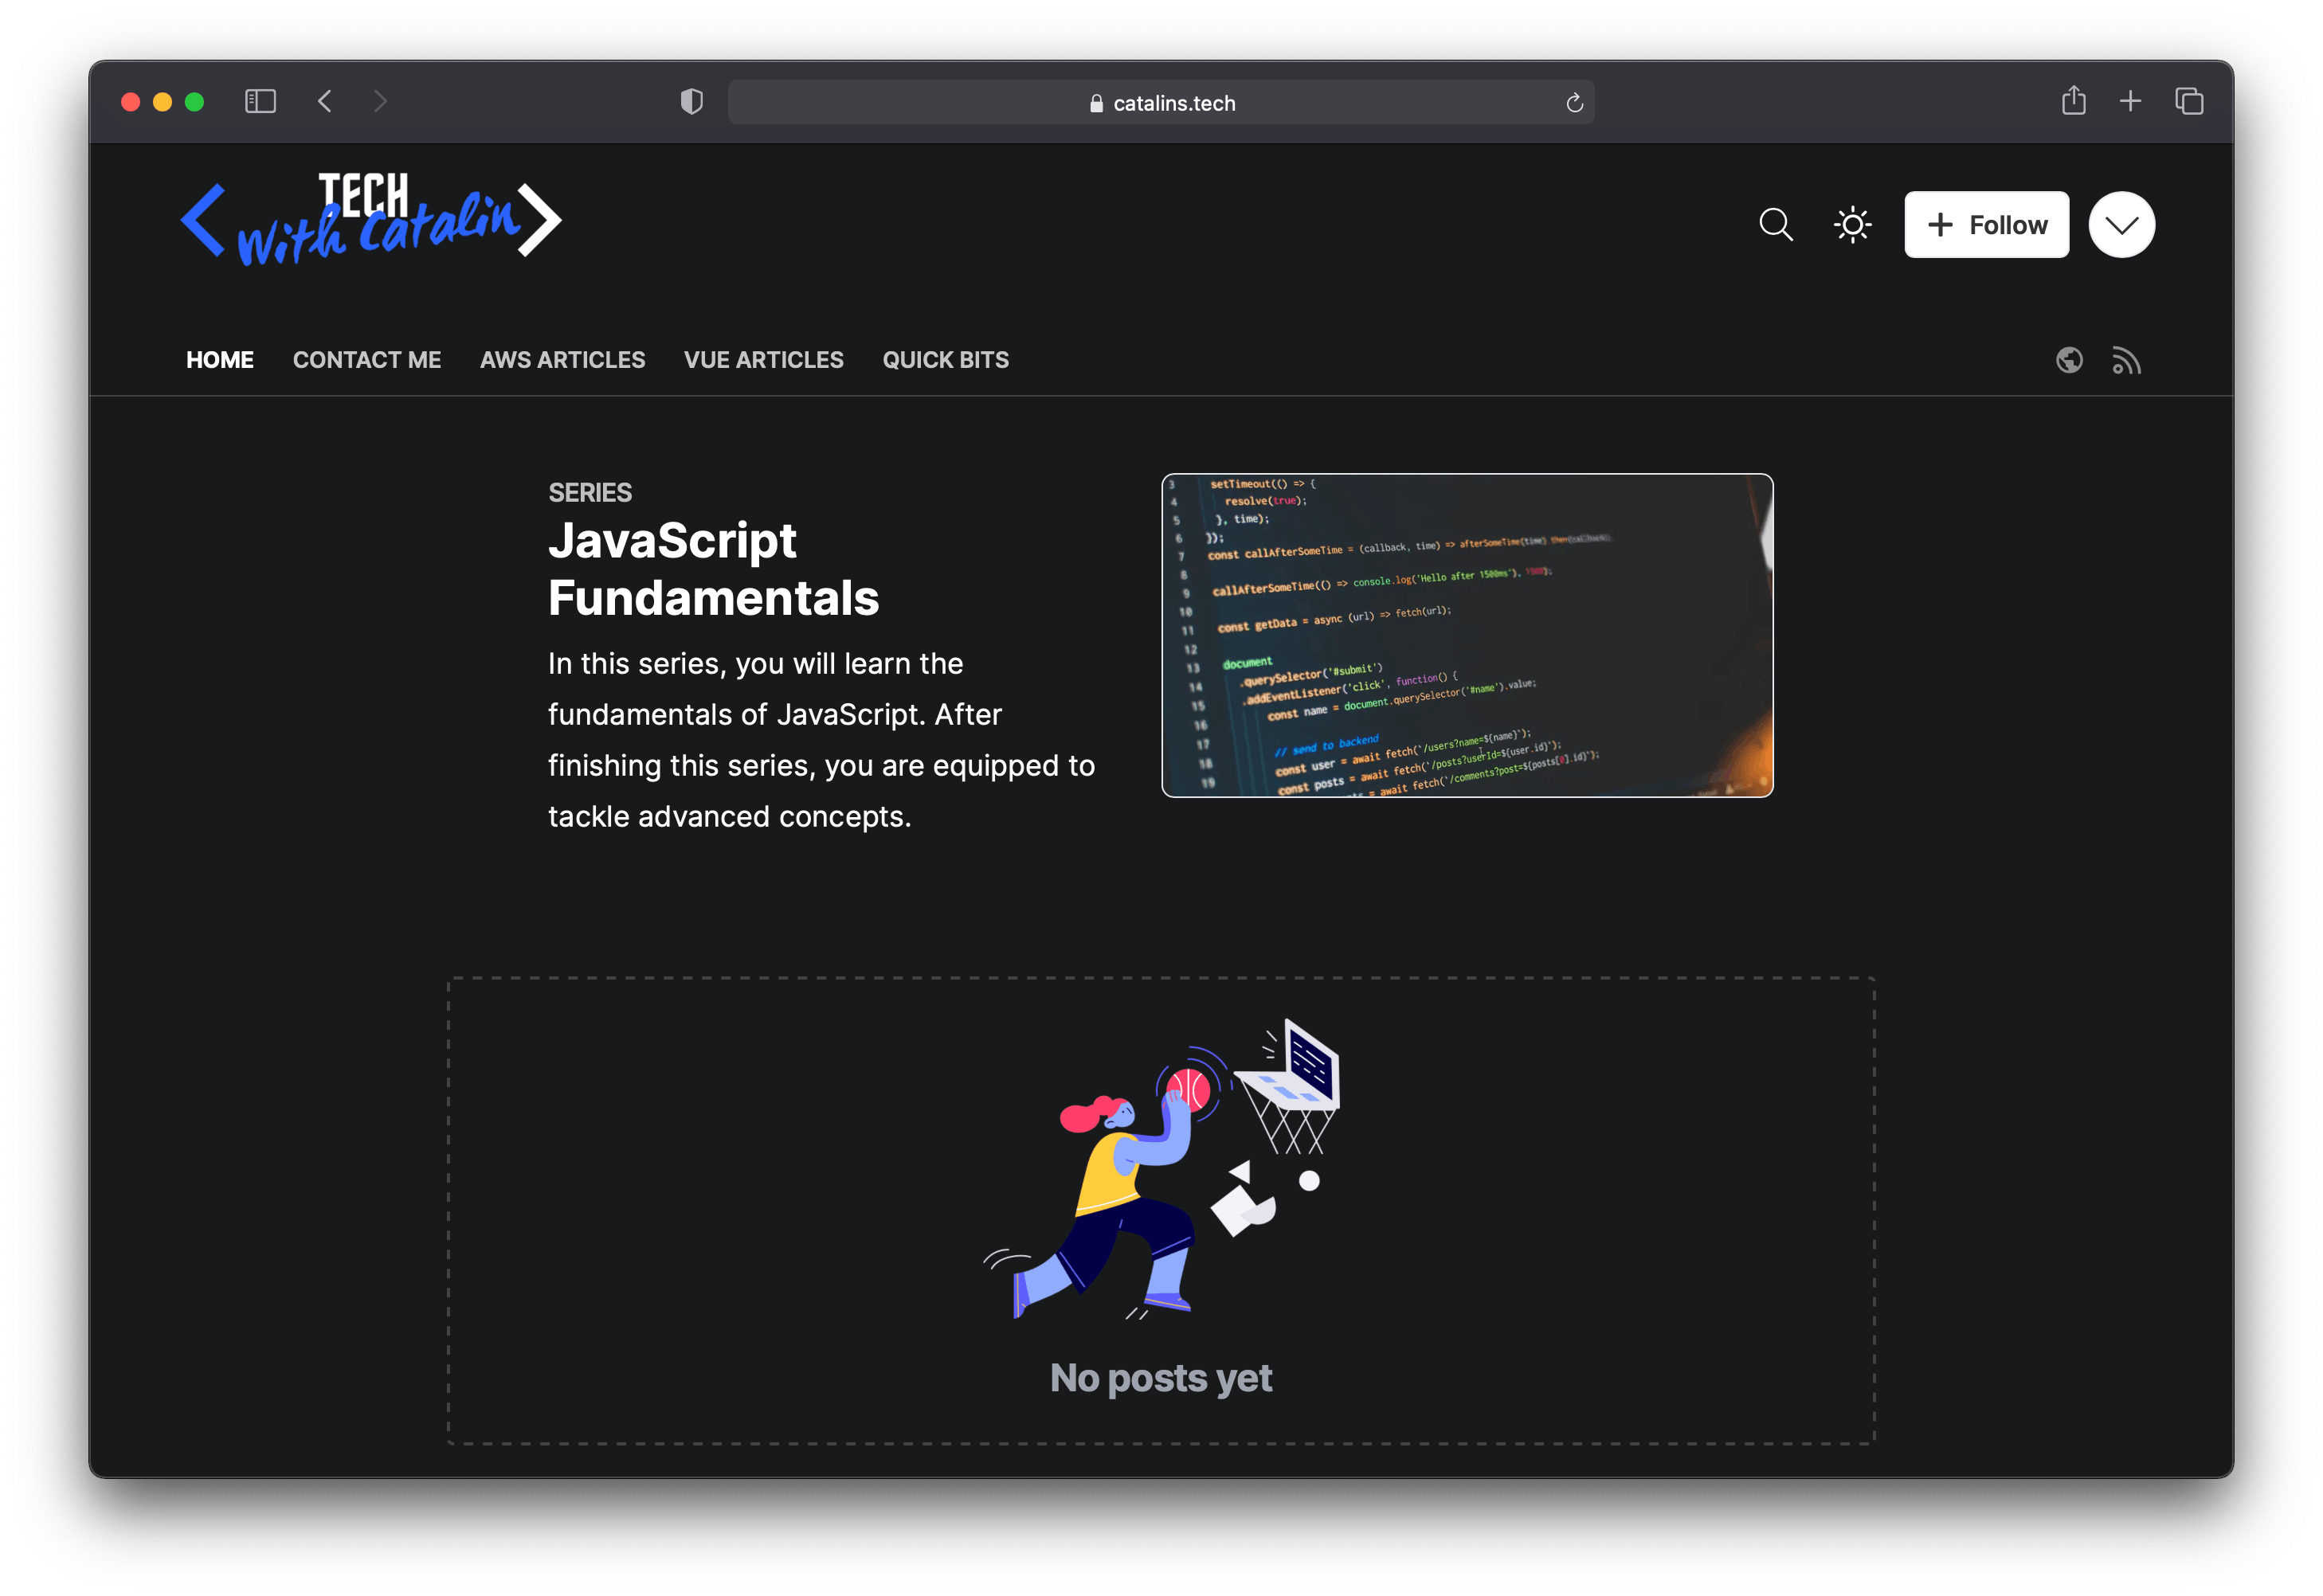 Figure 5
Now it's time to add an article!
How to Add an Article to a Series
The first step to add an article to a Series, of course, is to write an article.
The next step is to click on the Settings button in the article editor (see Figure 6 below).
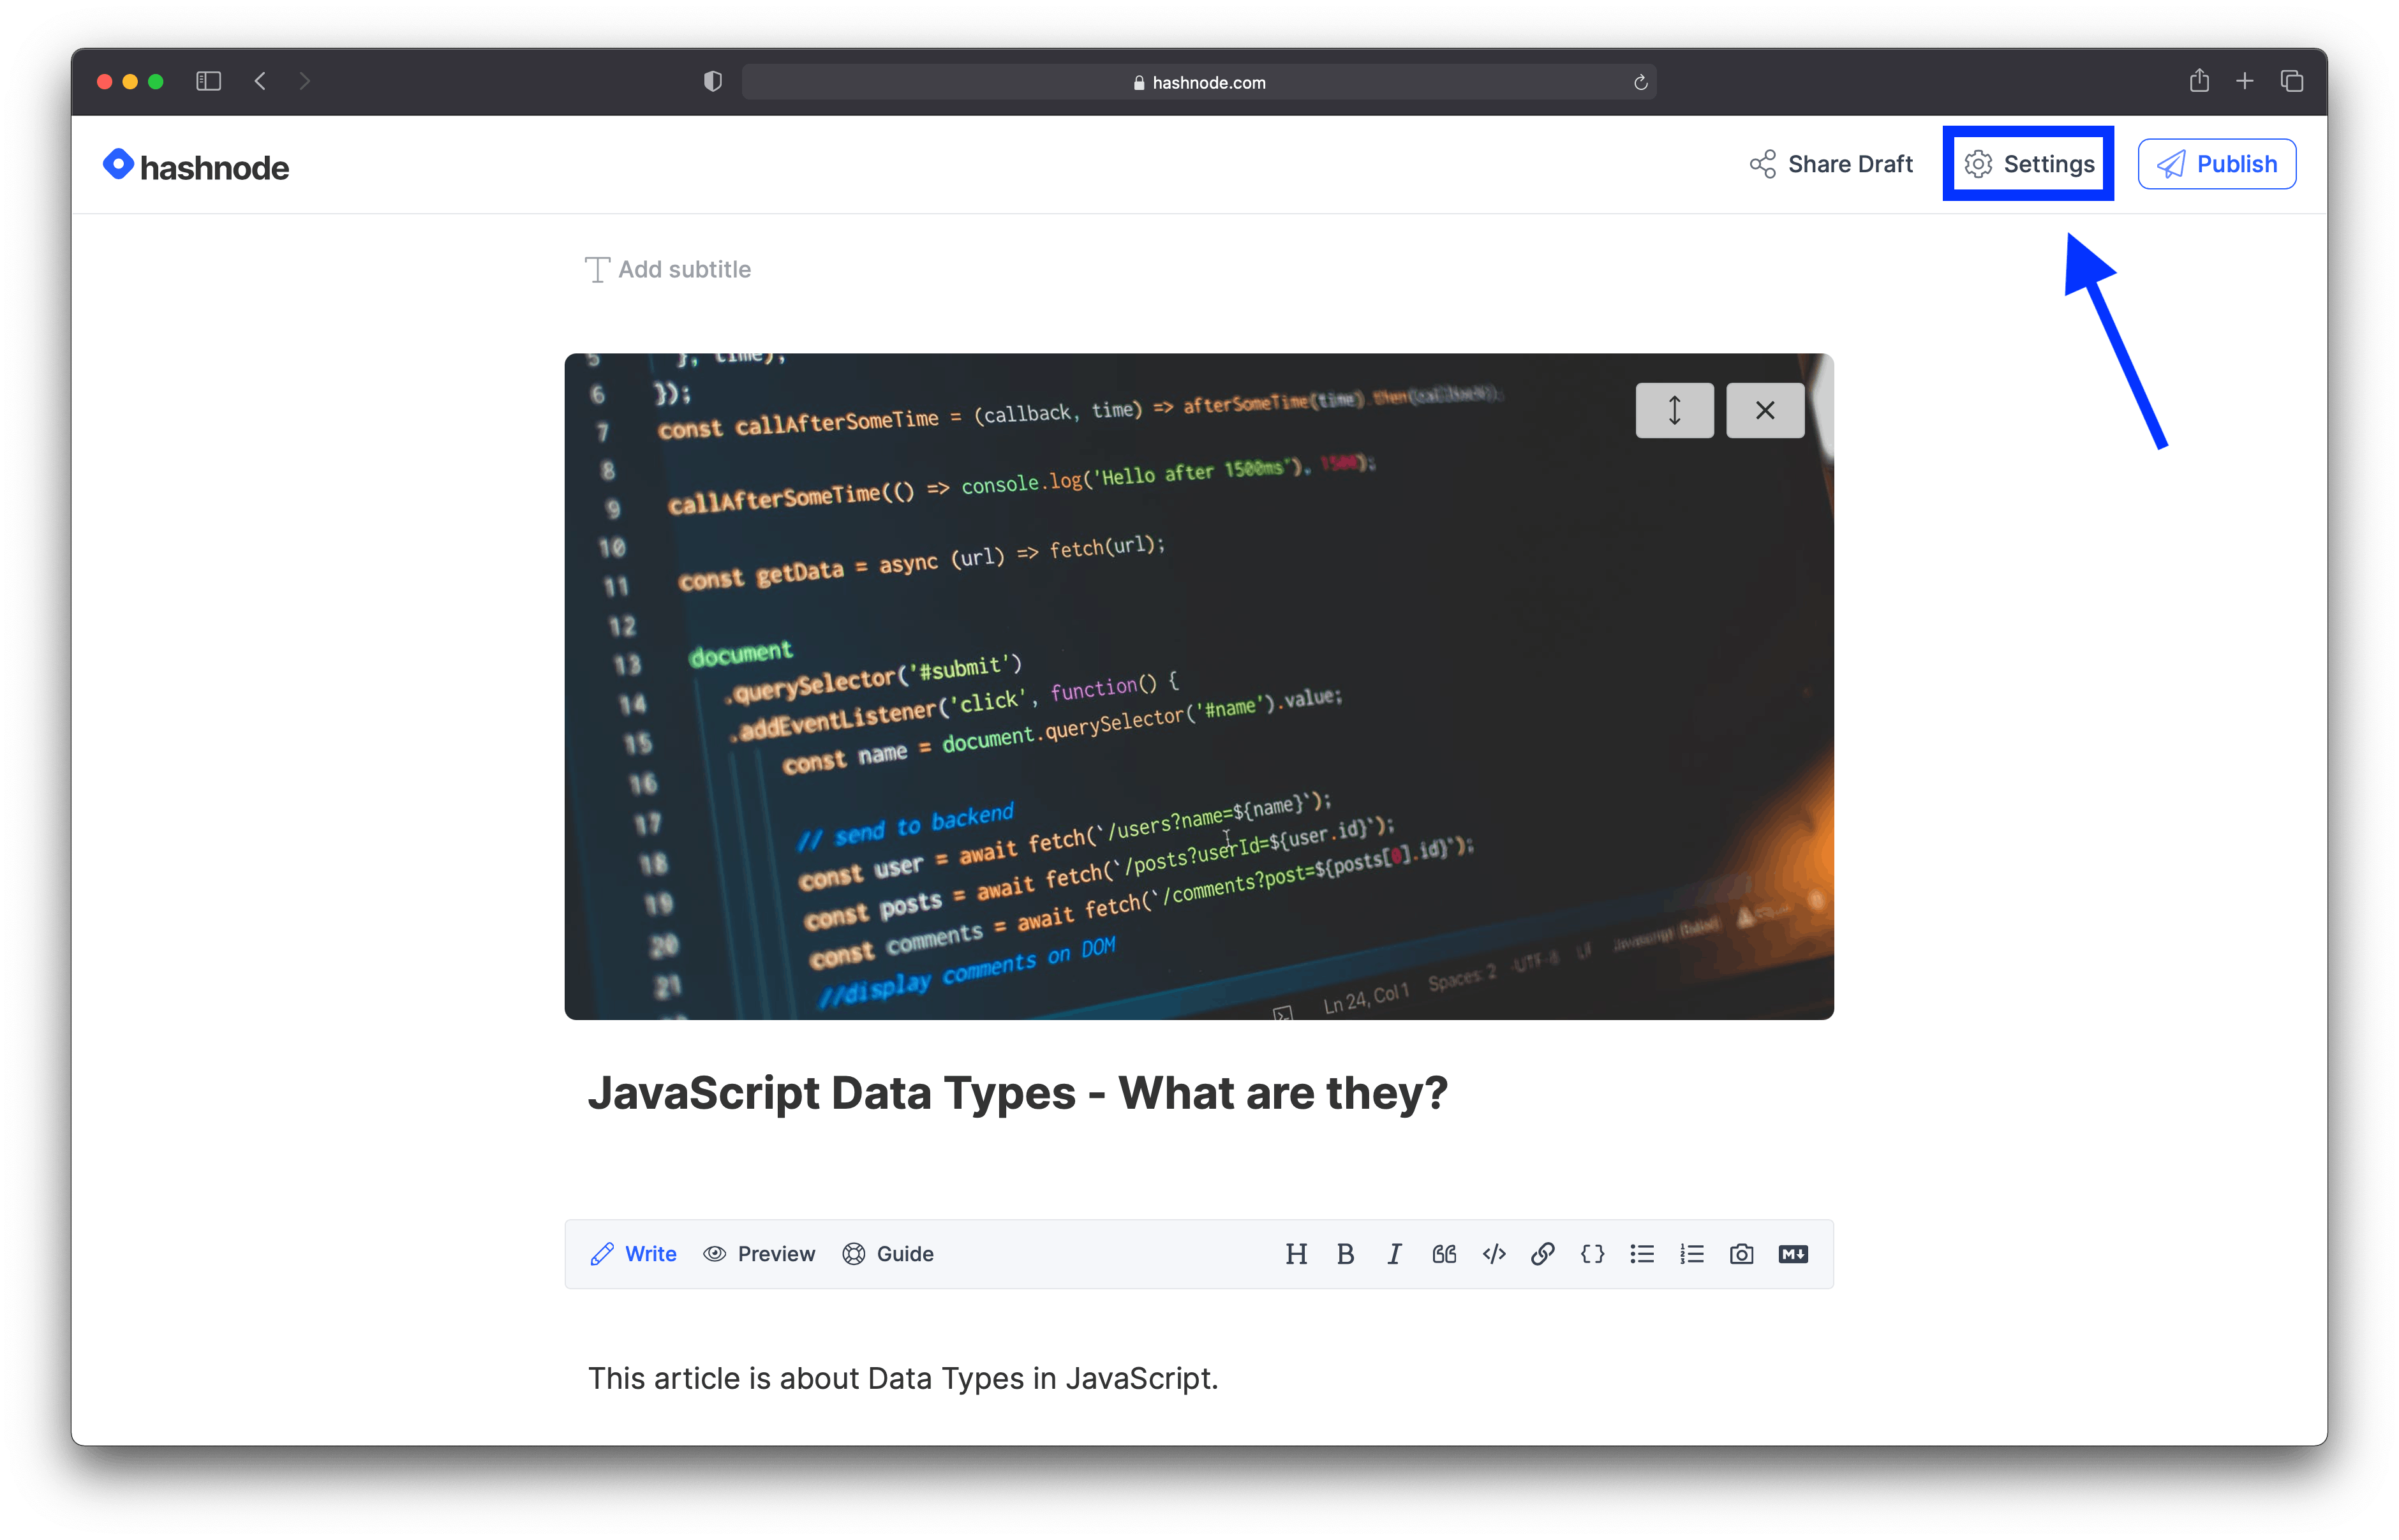 Figure 6
Once you click on the Settings button, a new sidebar opens, as shown in Figure 7. Find the option Add to a Series from the sidebar and click on it.
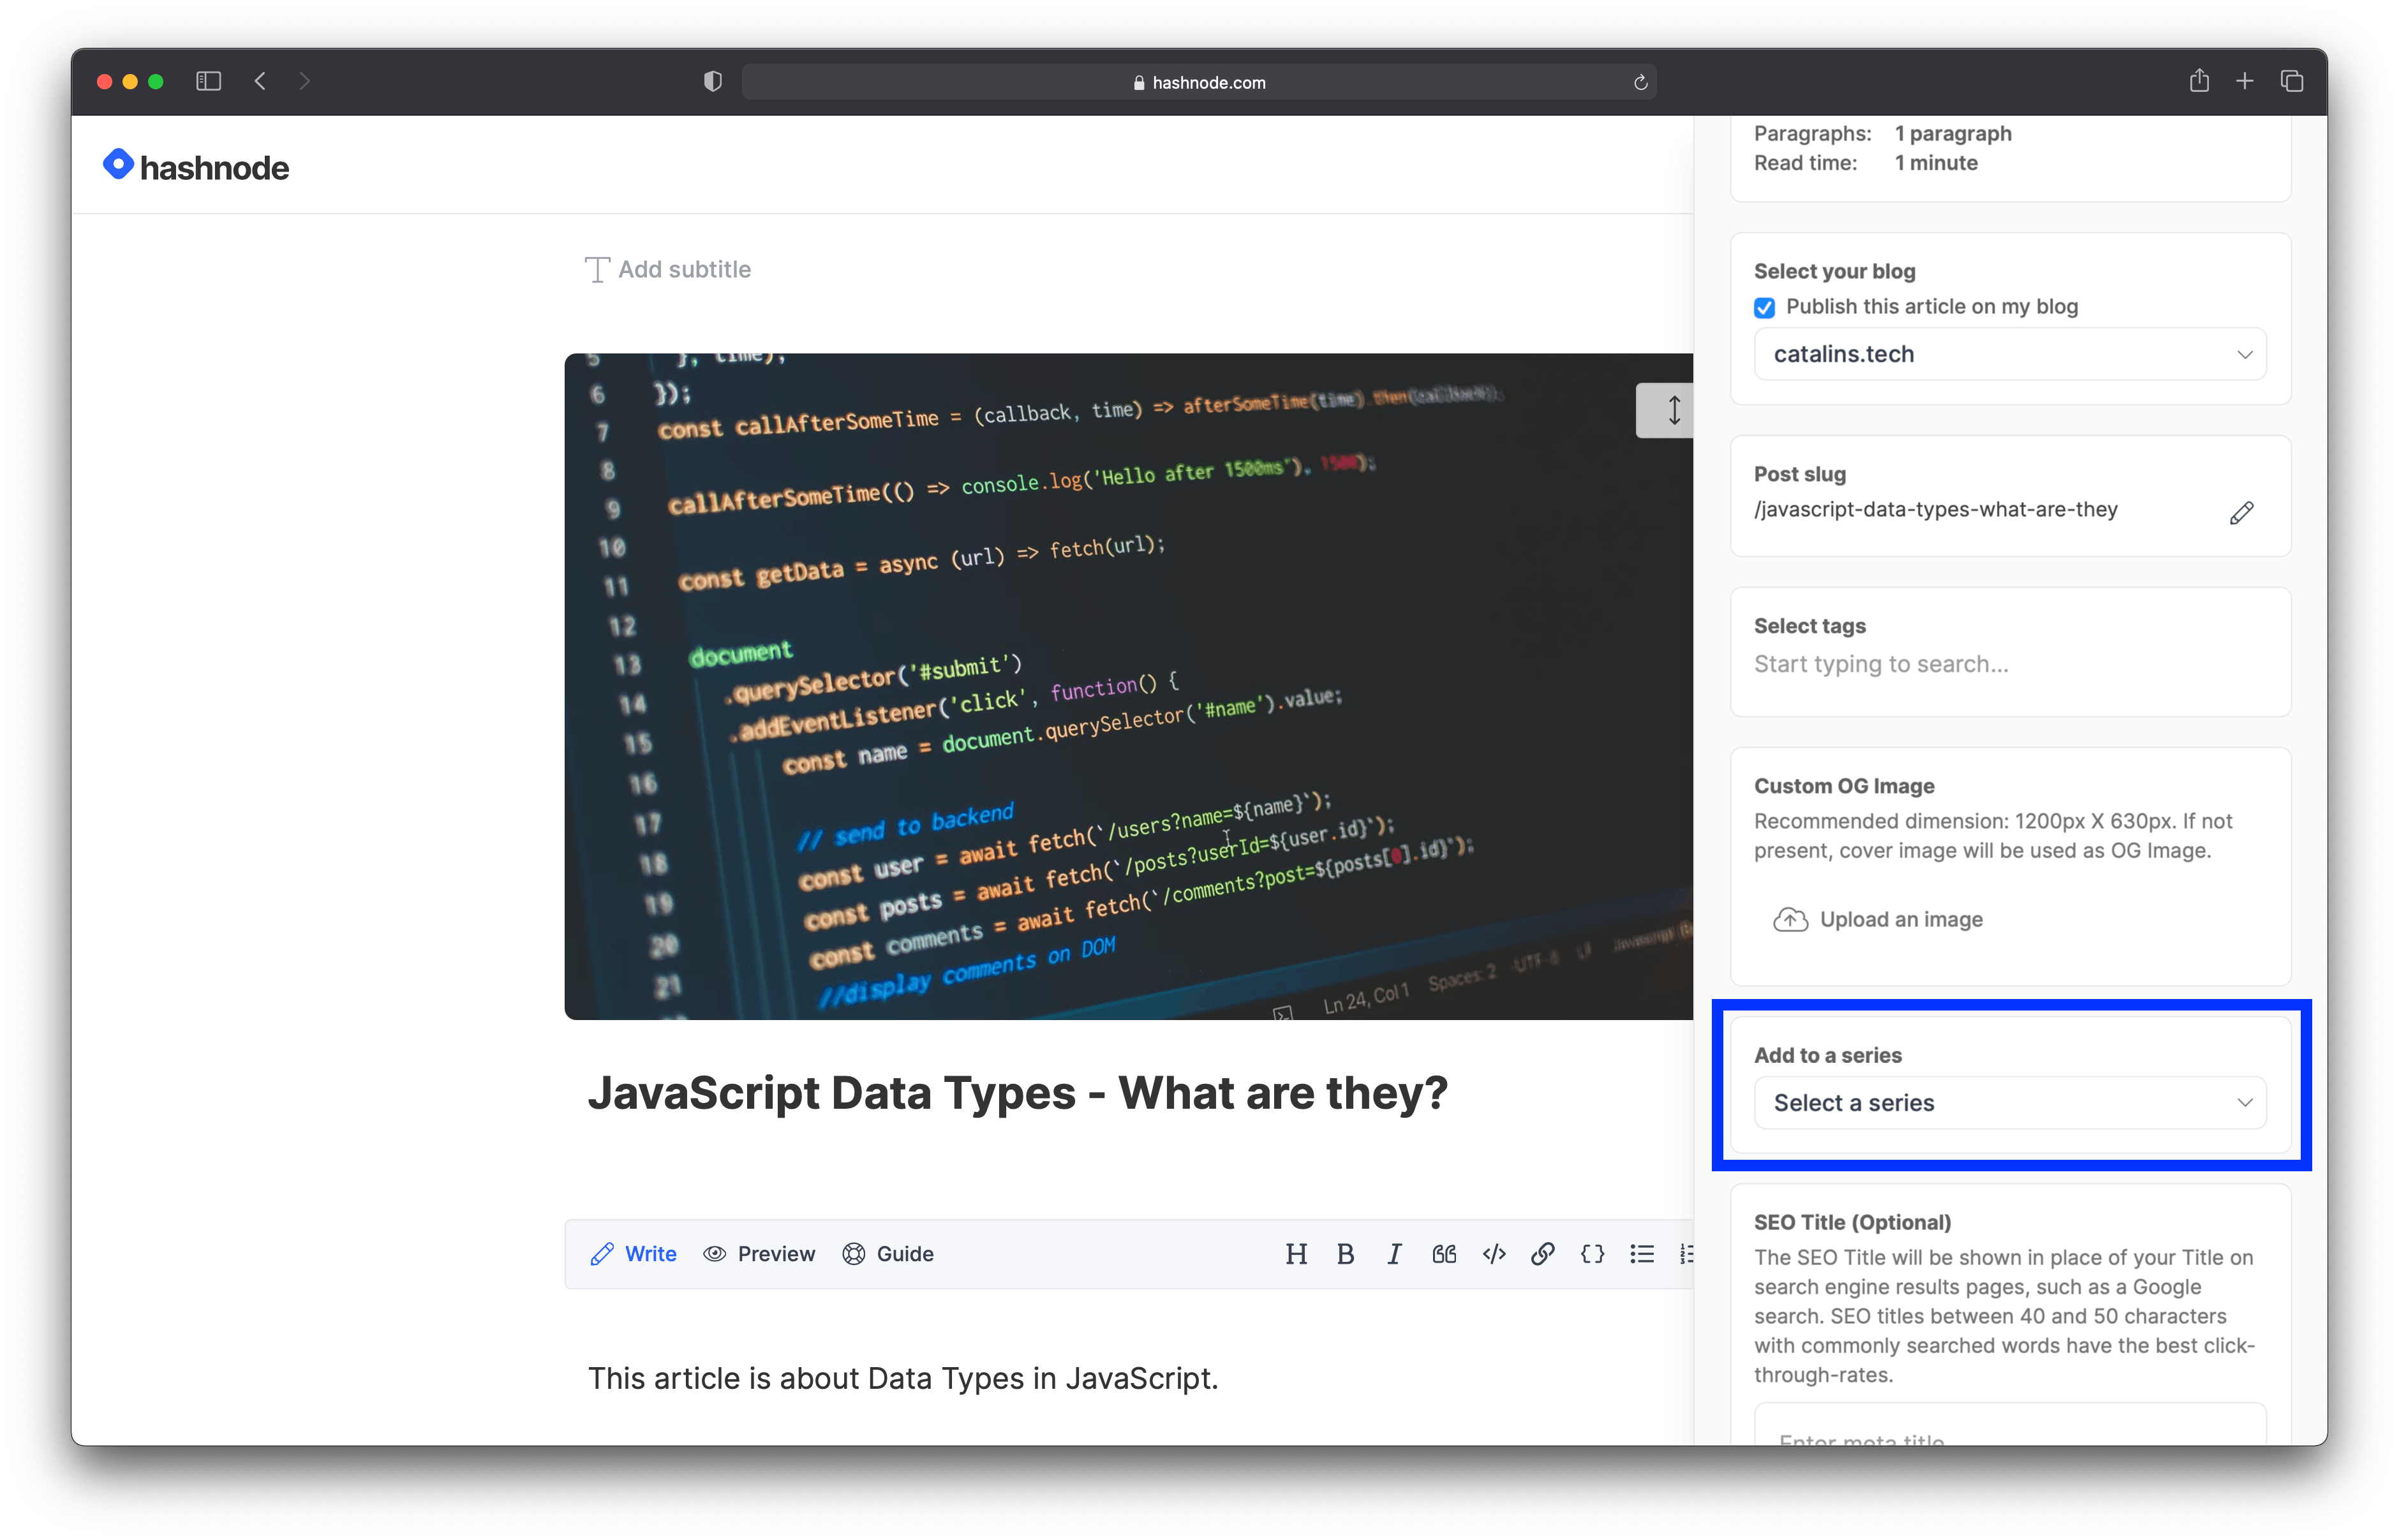 Figure 7
As soon as you click on the option, a new dropdown menu appears where you can select the Series.
Figure 8 shows the available Series from my blog:
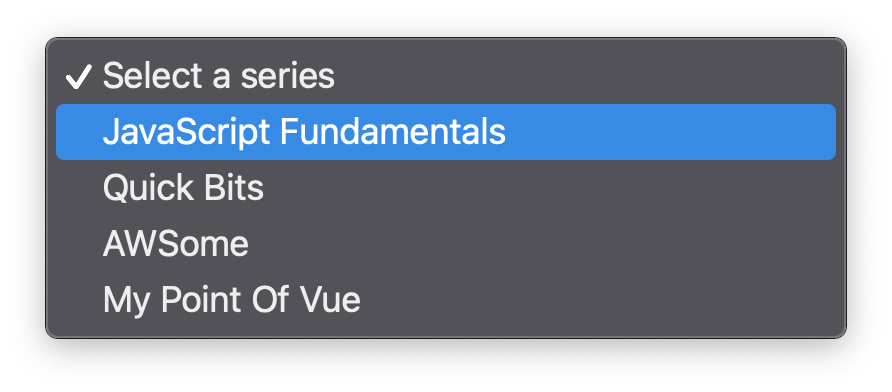 Figure 8
Select the appropriate Series for your article, and you're done! Click the Publish button, and your article will be added to the Series.
Great job creating your first Series!
Show the Series to Your Readers
Now the question is, how can you drive visibility to your Series?
The answer is to add it to the navigation bar on your blog.
In Figure 9, you can see my blog as an example, where I have the three Series in the navigation bar.
 Figure 9
How can you do it, too?
The first step is to go to the blog dashboard, then click on the Navbar option.
Your navigation bar can include three types of items:
- Links (external)
- Pages
- Series
This a great way to shine a spotlight on your new Series!
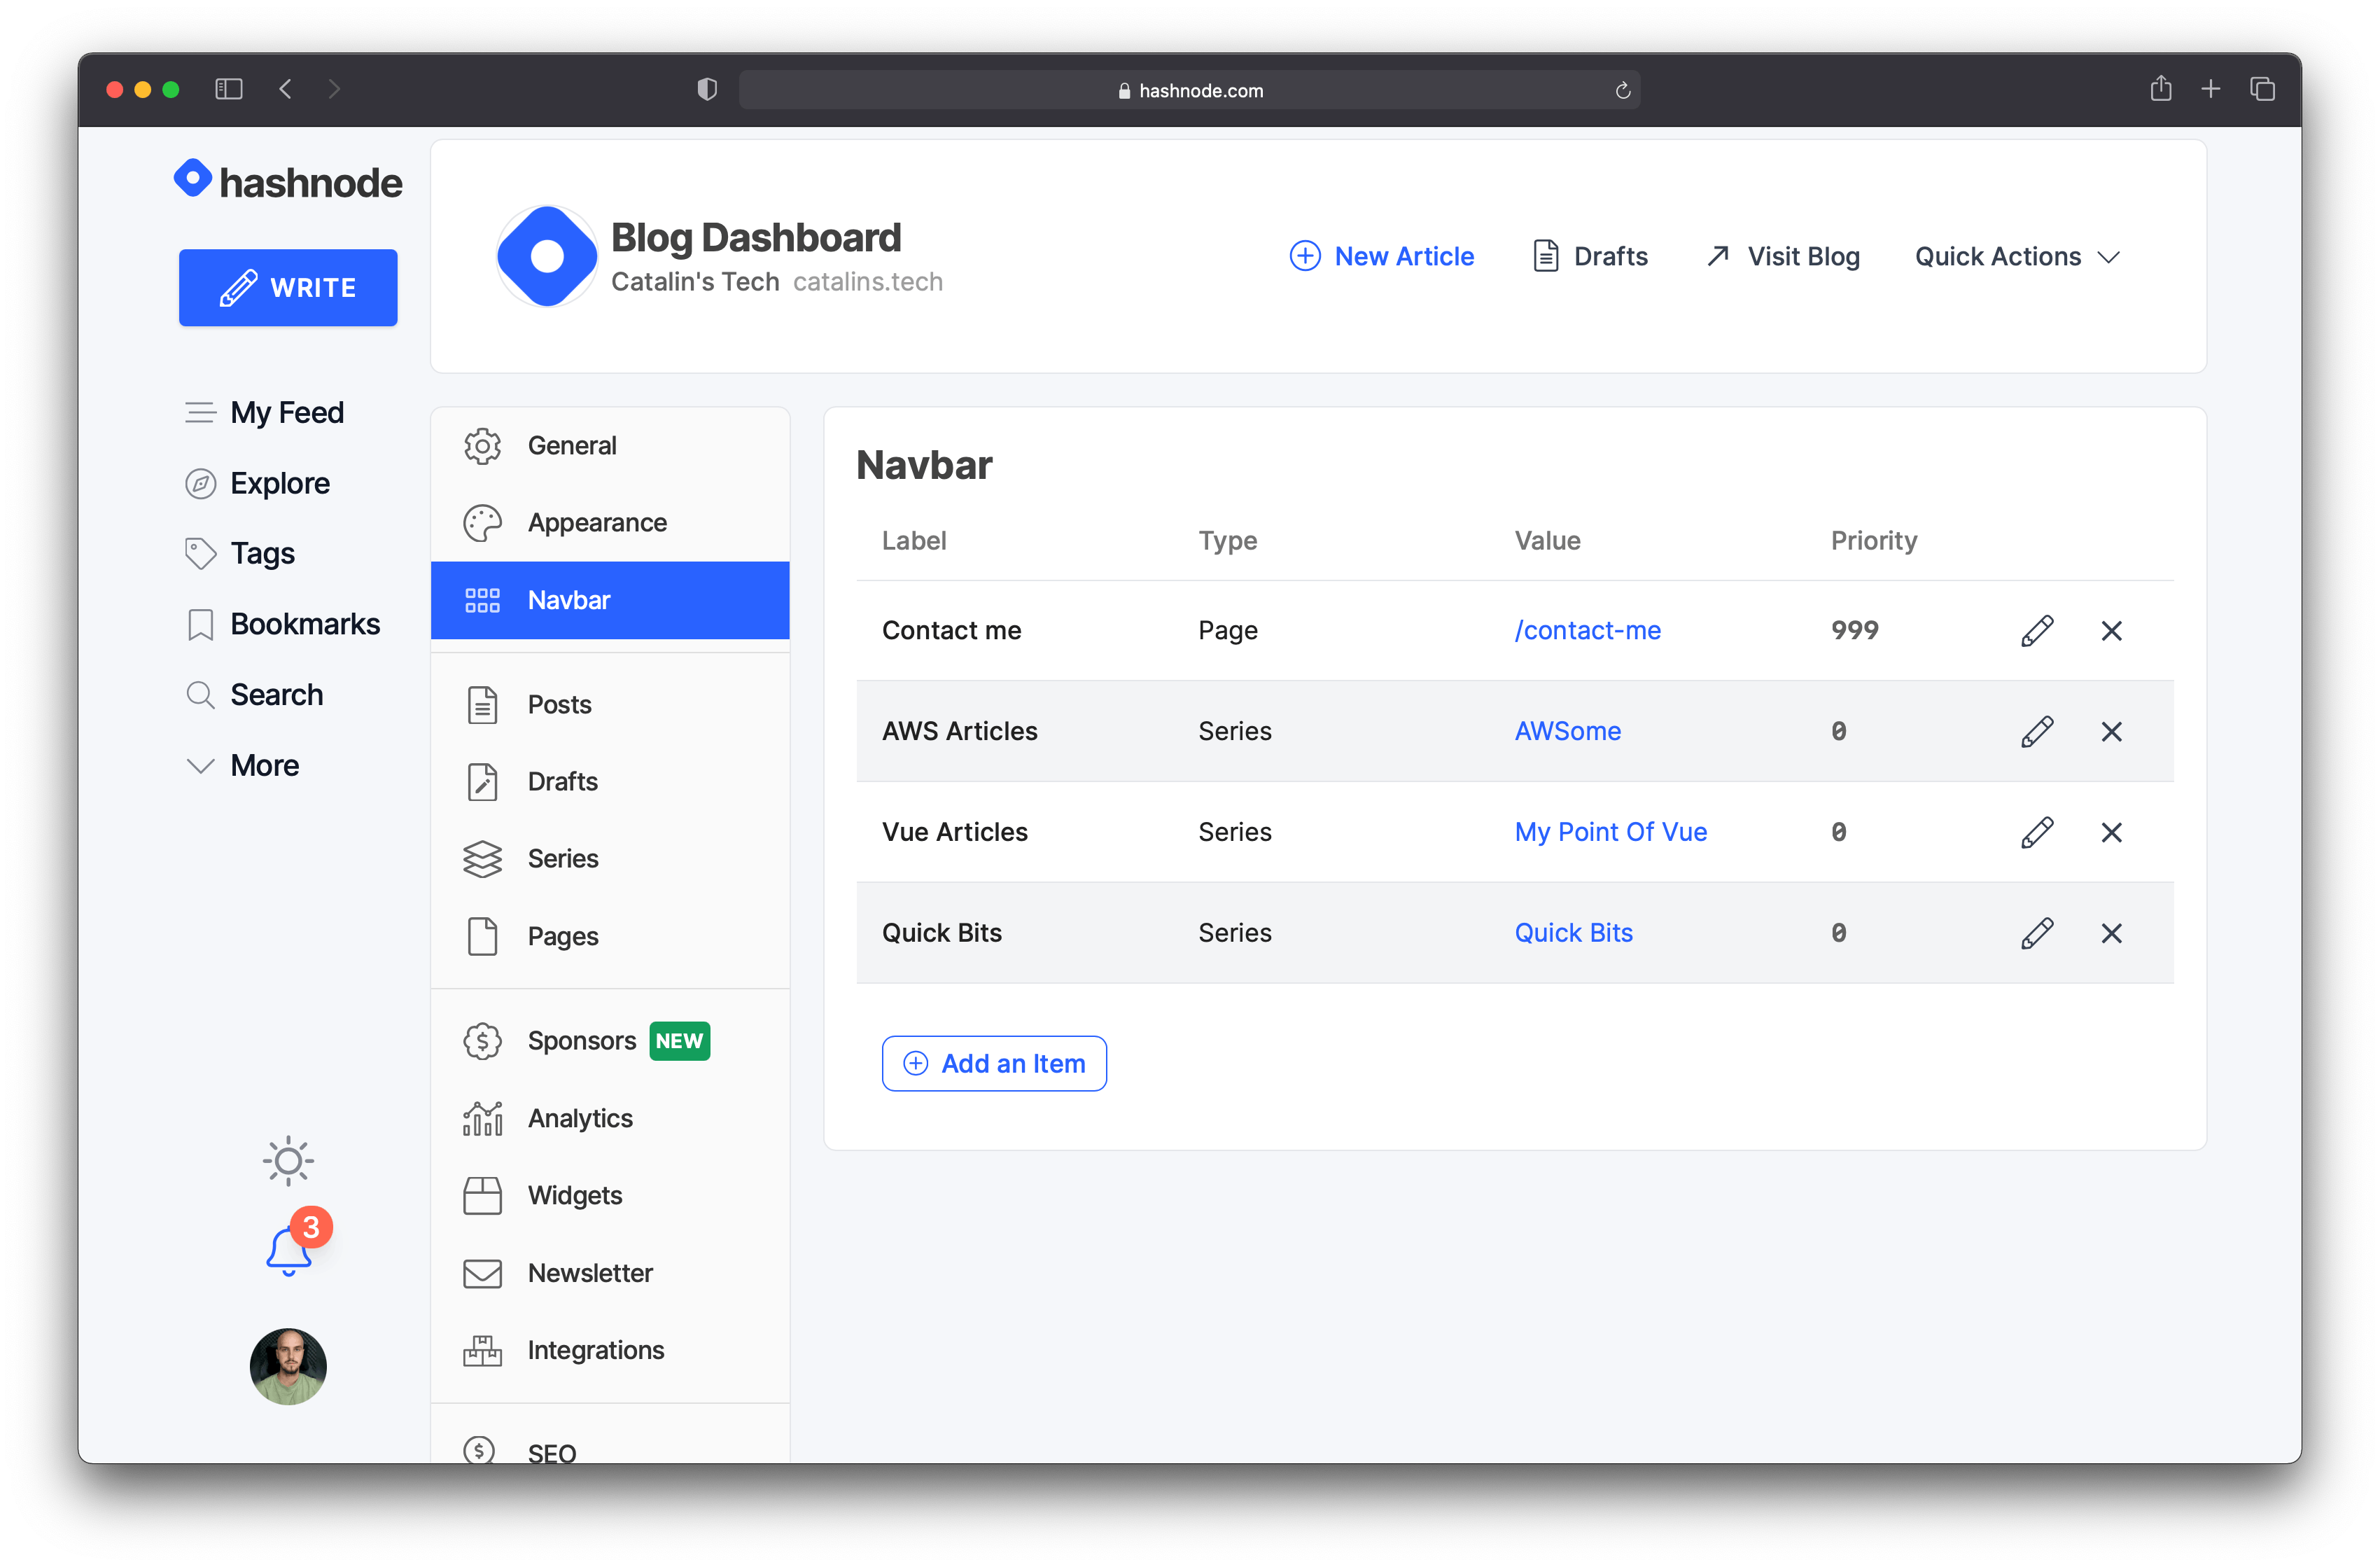 Figure 10
Next, click on the Add an item button. A new set of fields will appear where you can select:
- Label — the name of the item
- Type — Link, Page, or Series
- Value — in this case, the name of the Series
- Priority — the highest number is the highest priority, which means it will be the first item in the navigation bar
Figure 11 shows what you should see when you click the Add an item button.
 Figure 11
Now click on the second dropdown menu and choose the Series option. If you have only one Series available, it will automatically select that one.
Otherwise, you need to select the Series you want to appear in the navigation bar. See Figure 12 below for reference.
 Figure 12
The last step is to set the priority. If you leave the default value 0 for the priority, it will be the last item in the navigation bar. Select the priority you want and then click on the Save Navbar button.
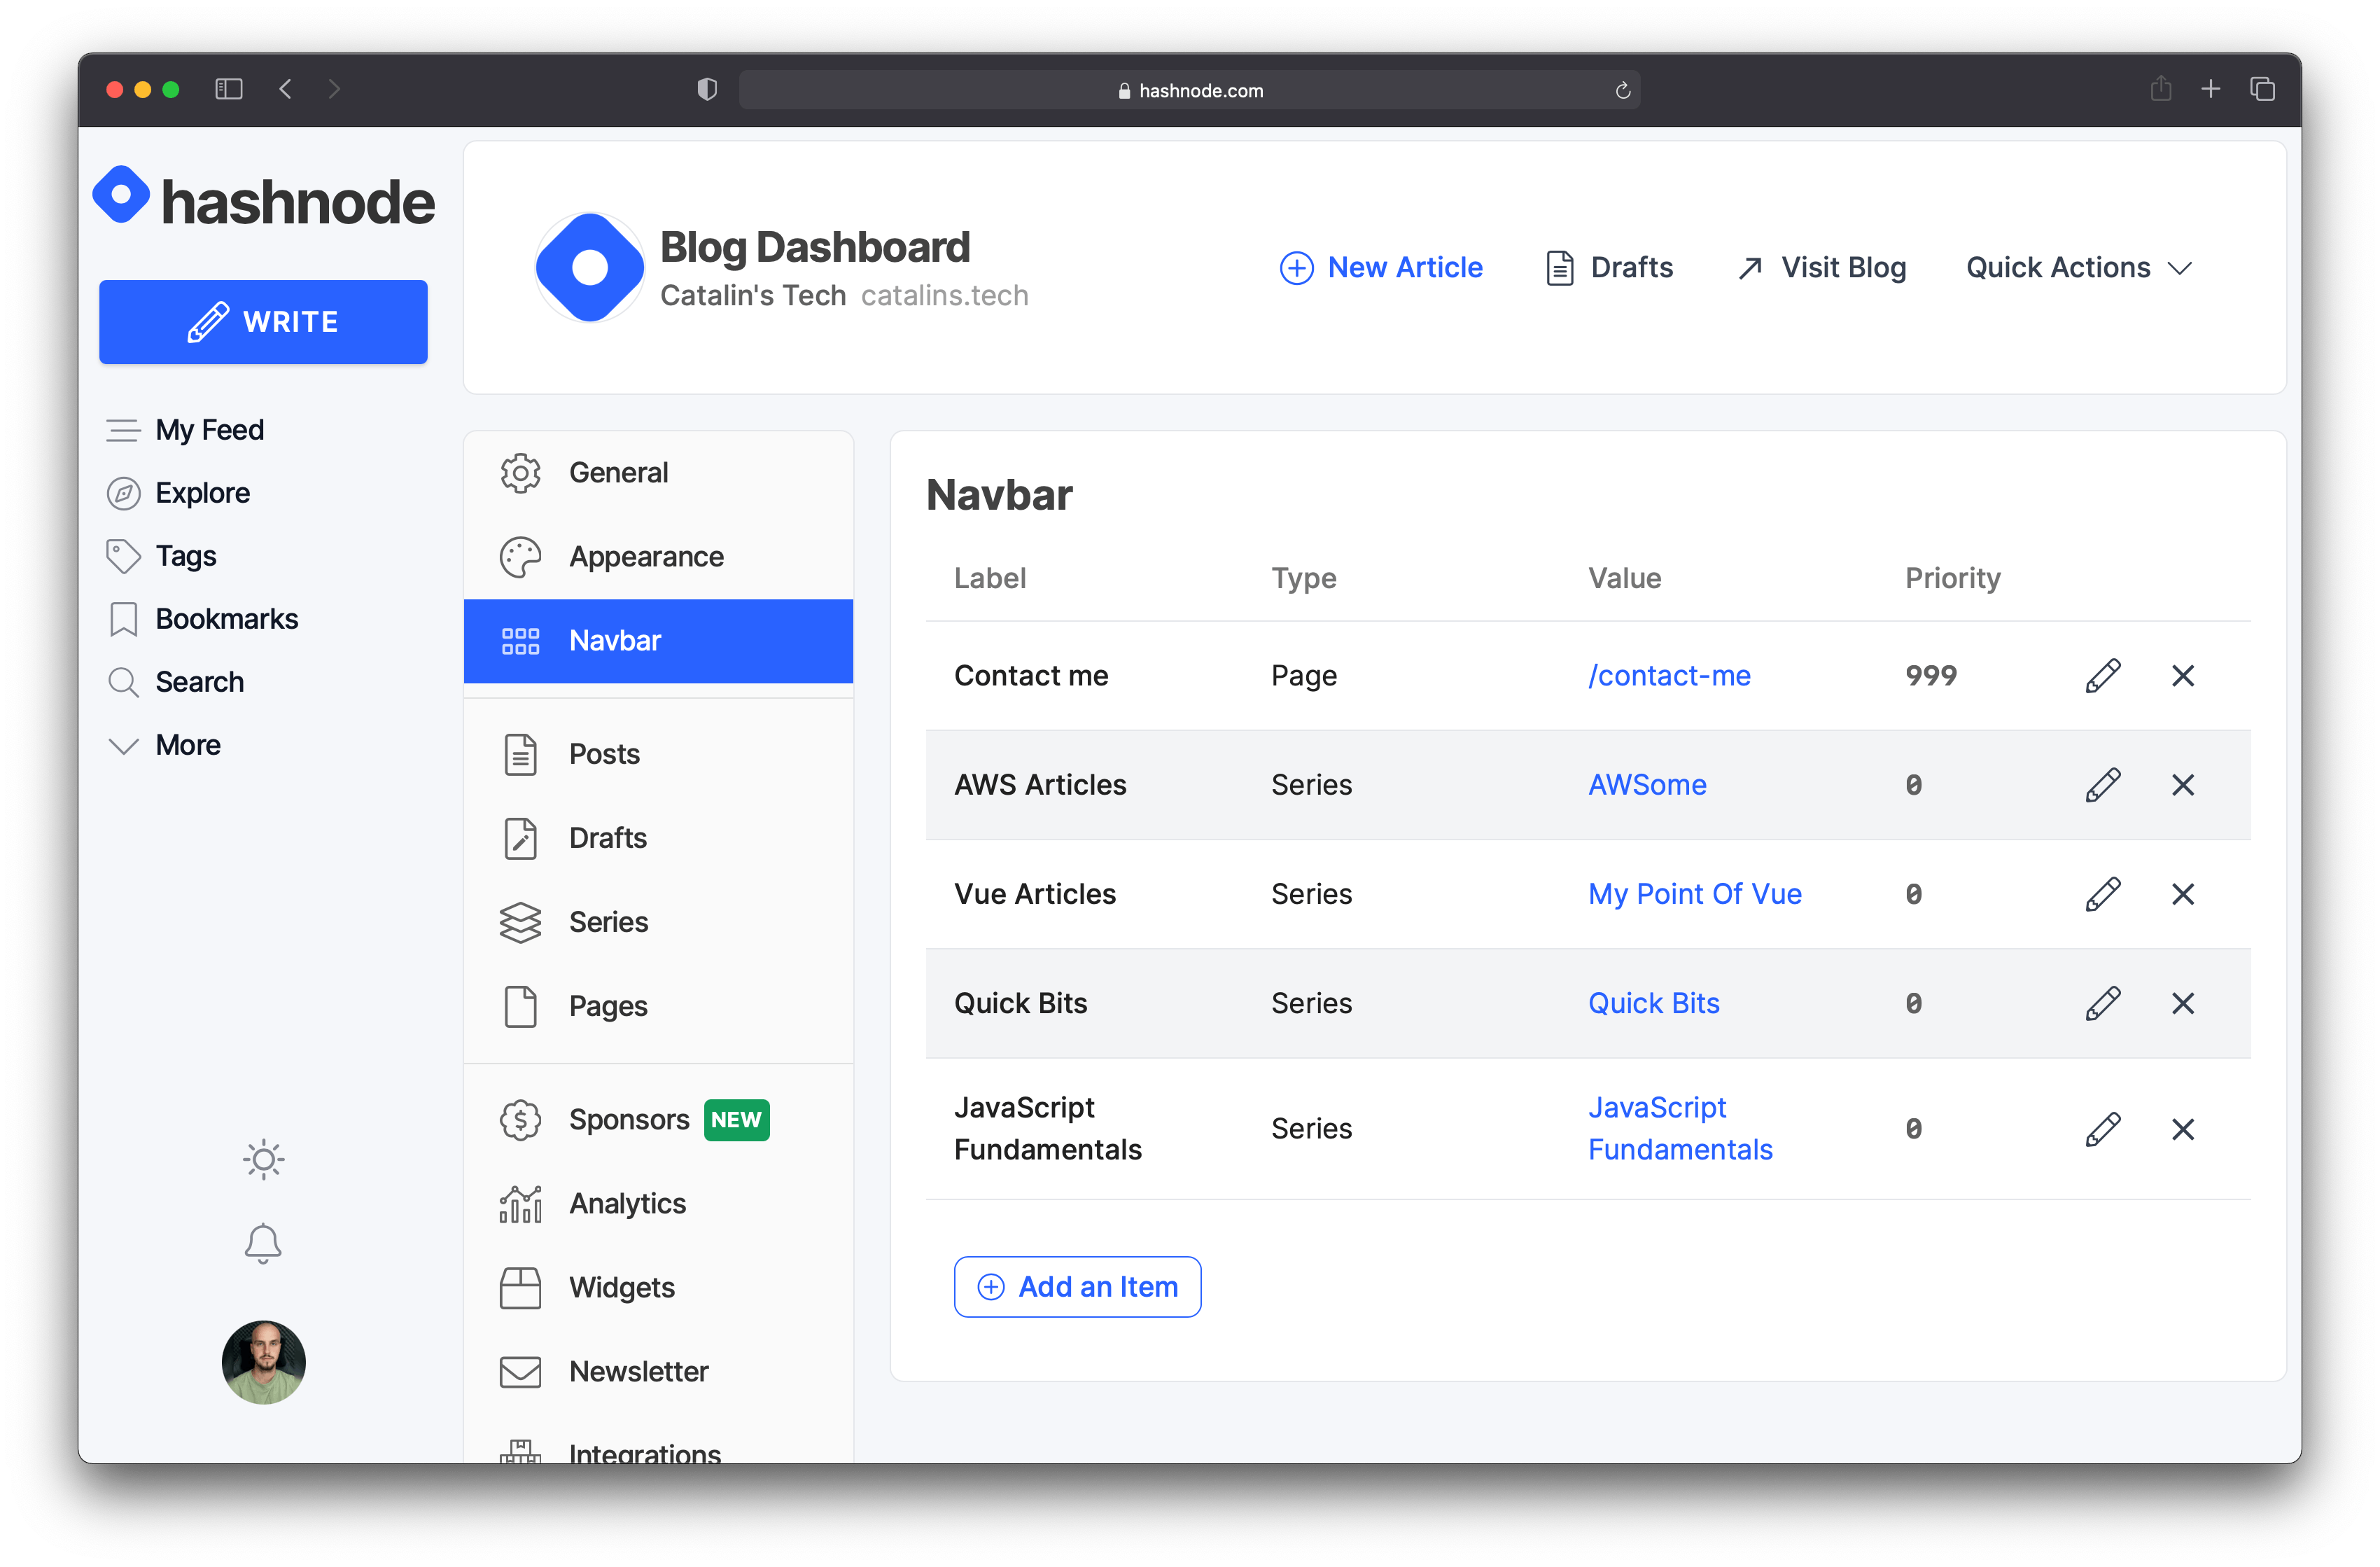 Figure 13
After saving the navigation bar, you're all done! As you can see in Figure 13 above, the Series was added successfully. If you visit your blog, you should see it live!
Conclusion
The Hashnode Series feature allows you to organize your content much more efficiently. All related articles are in one convenient location, making it easier for people to find what they need.
Do you have any Series that you're working on? Show them off in the comments! 👇